What is bias tape?
Bias tape is a trim that is cut on the bias and is used for finishing edges on rounded objects. Bias tape is best used around armholes and necklines for clothing. It’s also good to use for rounding corners on things like pot holders. Because of it’s stretch it allows itself to smoothly finish edges at an angle and cut corners easily. You can purchase pre-packaged bias tape or you can make your own using different fabrics. There is a single fold bias tape and a double fold bias tape. Single fold is flat with only one edge folded over on each side. Double fold bias tape has been folded over twice on each side and folded in the center. One side is slightly bigger than the other making it easier to sew. Double fold bias tape is used more for large projects like quilts and blankets. Single fold can be used on smaller projects like pot holders and clothing.
How do you use a bias tape maker?
Bias tape makers come in two sizes, 1/2 inch and 1 inch. The 1 inch is the most popular and is the one that I’ll be using. Bias tape makers help pull the fabric through while folding the edges over and allowing you to iron and pull as you go. The bias is located at a 45 angle between the selvage and the width of the fabric. Unless the fabric is a 4 way stretch material like jersey knit, you’ll notice the width and the selvage do not stretch. The 45 degree angle will stretch and that is the bias. For any project that you’re making bias tape for, measure the circumference and add an extra inch at the end. To make 1 inch single fold bias tape, cut a 2 inch wide strip of fabric on the bias. Insert the strip of fabric into the 1 inch bias tape maker. Use a seam ripper to help guide the fabric through. Gently pull the fabric out and begin to pull the bias tape maker as you iron. Do this until you’ve reached the end.
Sewing bias tape
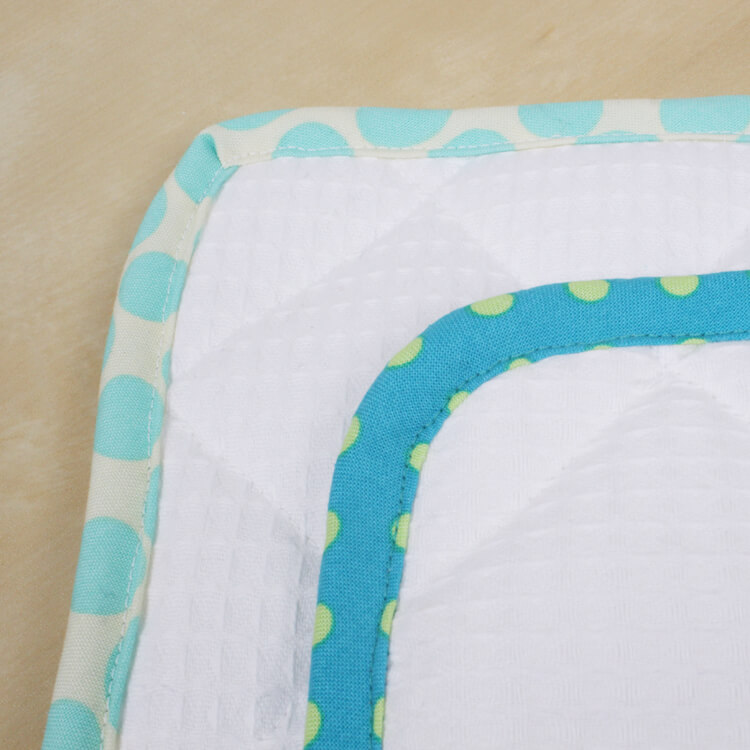
To show how to add bias tape to a project, I’m going to add some to this pot holder that has rounded edges. Click here to see the full pot holder tutorial.
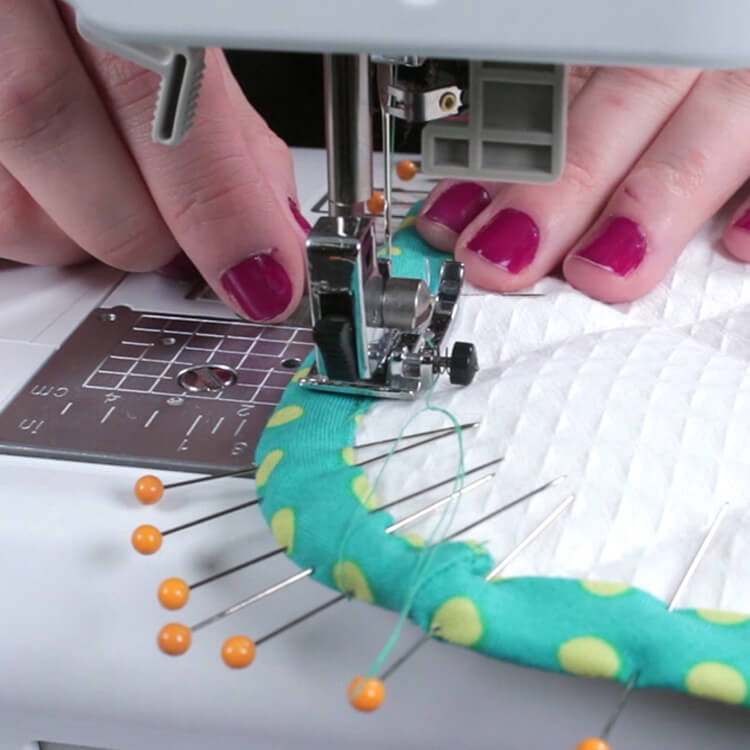
Unfold one side of the bias tape and pin it around the pot holder. Start a 1/2 inch in and stitch on the crease of the fold until you’ve reached the end. Back stitch at the beginning and the end. Stitch the ends together and fold the bias tape over to the other side and pin. Top stitch along the fold until you’ve reached the end. And that’s it. Bias tape stretches easily around corners and creates a neat finish around the edges.