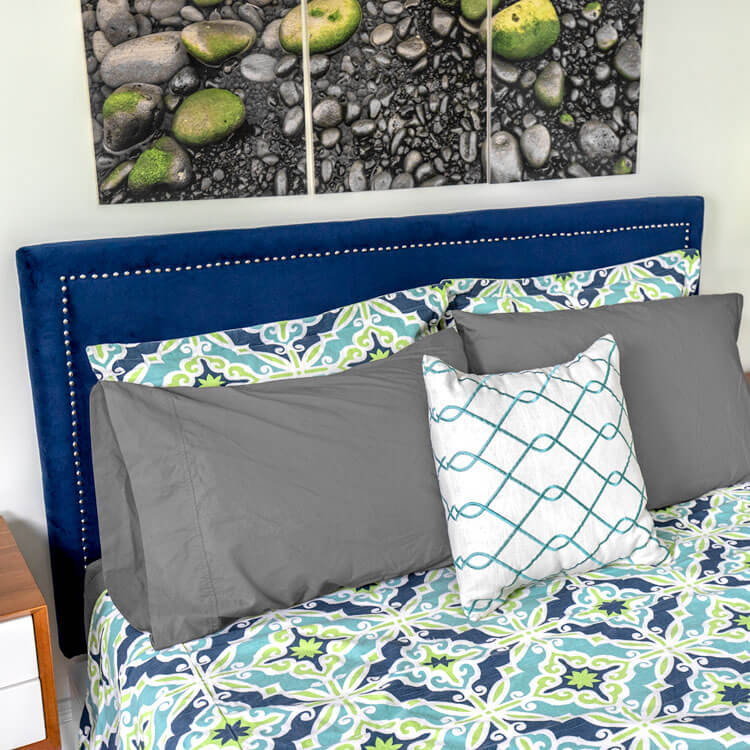
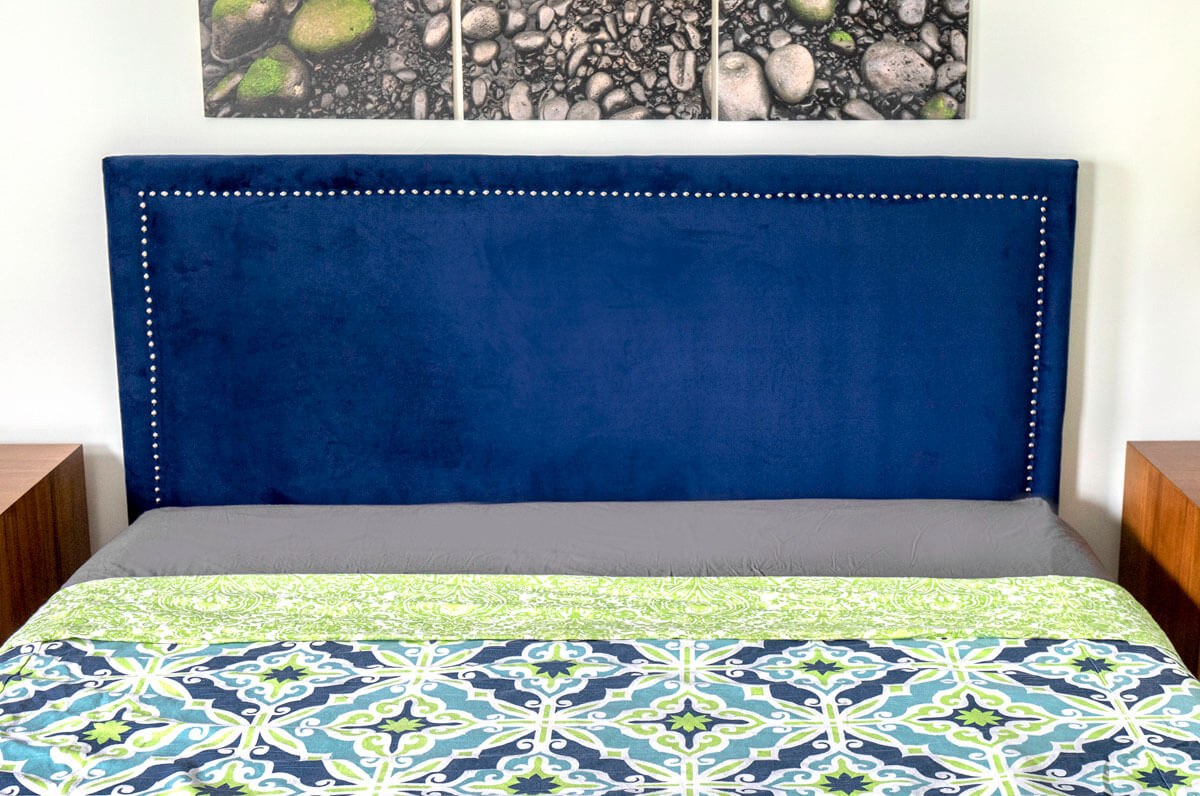
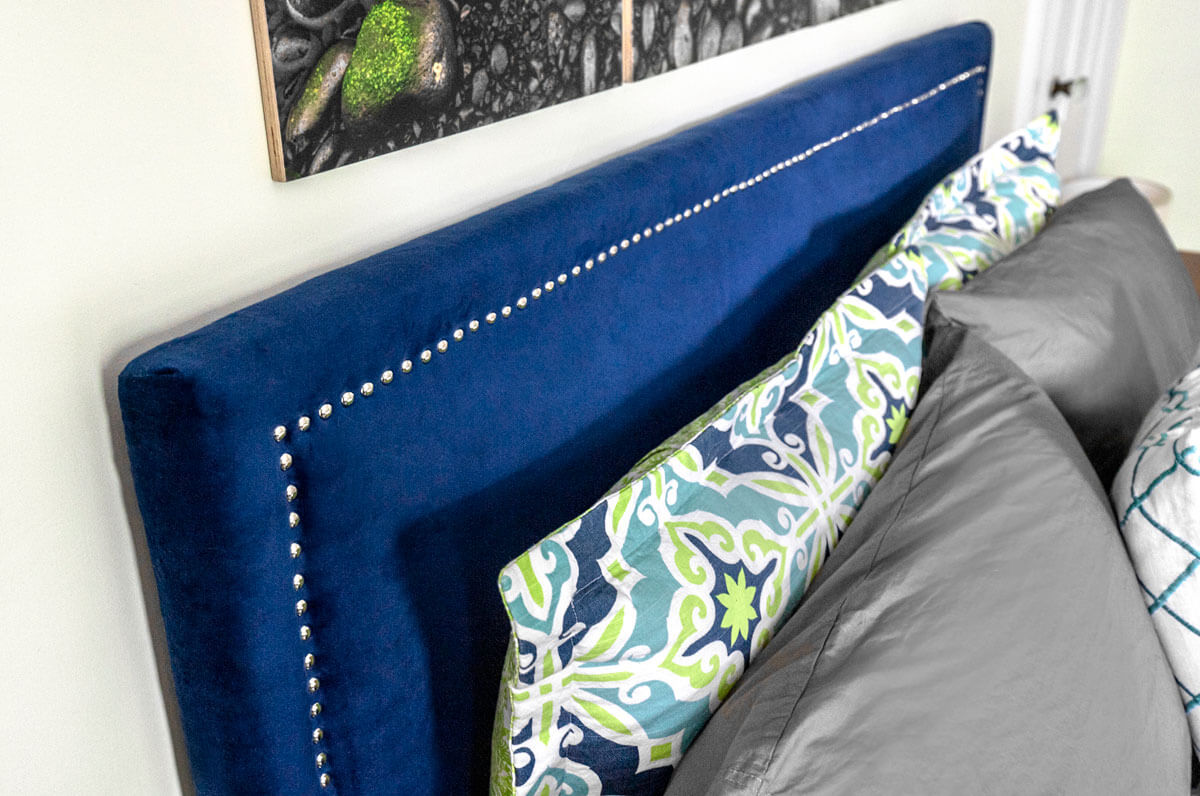
How to Make an Upholstered Headboard with Nail Head Trim
- By Clara
- 1 hour 45 minutes
Upholstered headboards with nail head trim have a timeless quality that can go with many styles from contemporary to traditional. But they can be really expensive in stores, and if you have the DIY bug, you probably have looked at one and thought you could make one yourself.
So, if you want this high end look for you bedroom, I’ll show you how to make an upholstered headboard for a fraction of the price of retailers.
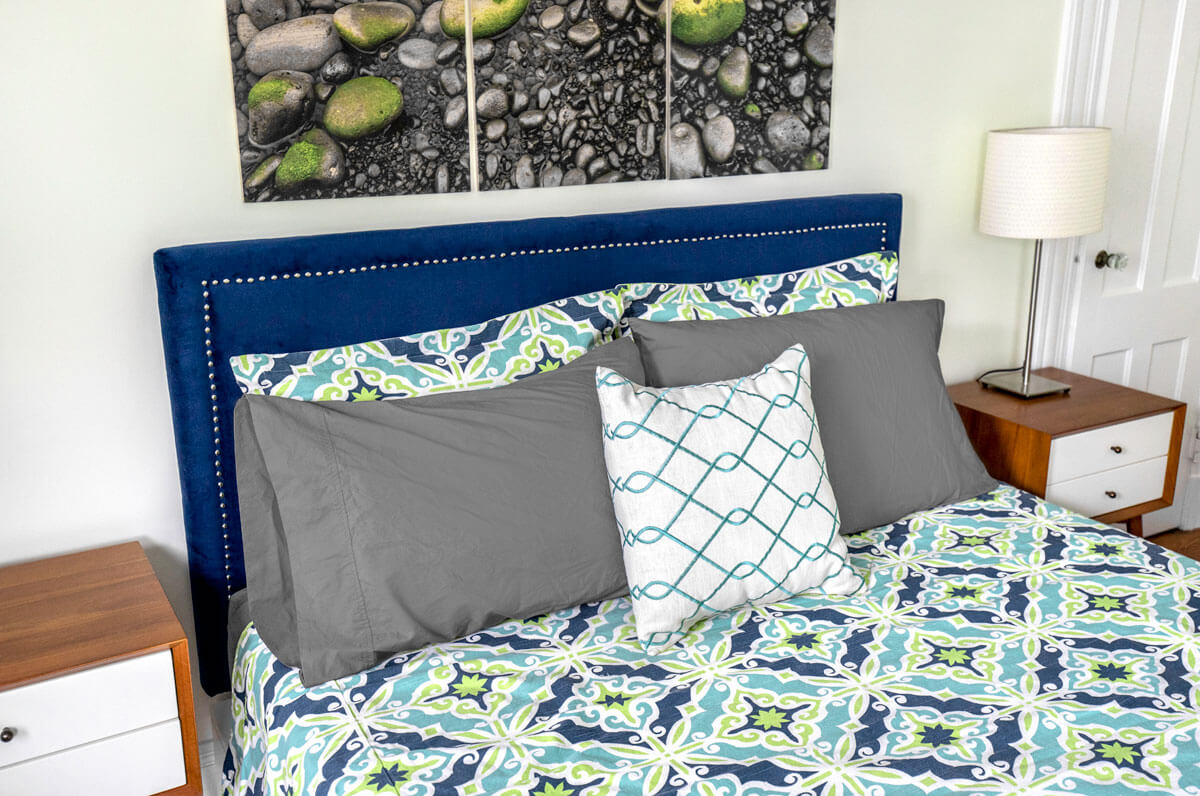
I am making mine for a queen sized bed but you can make your headboard in many shapes and sizes and customize it in your own way.
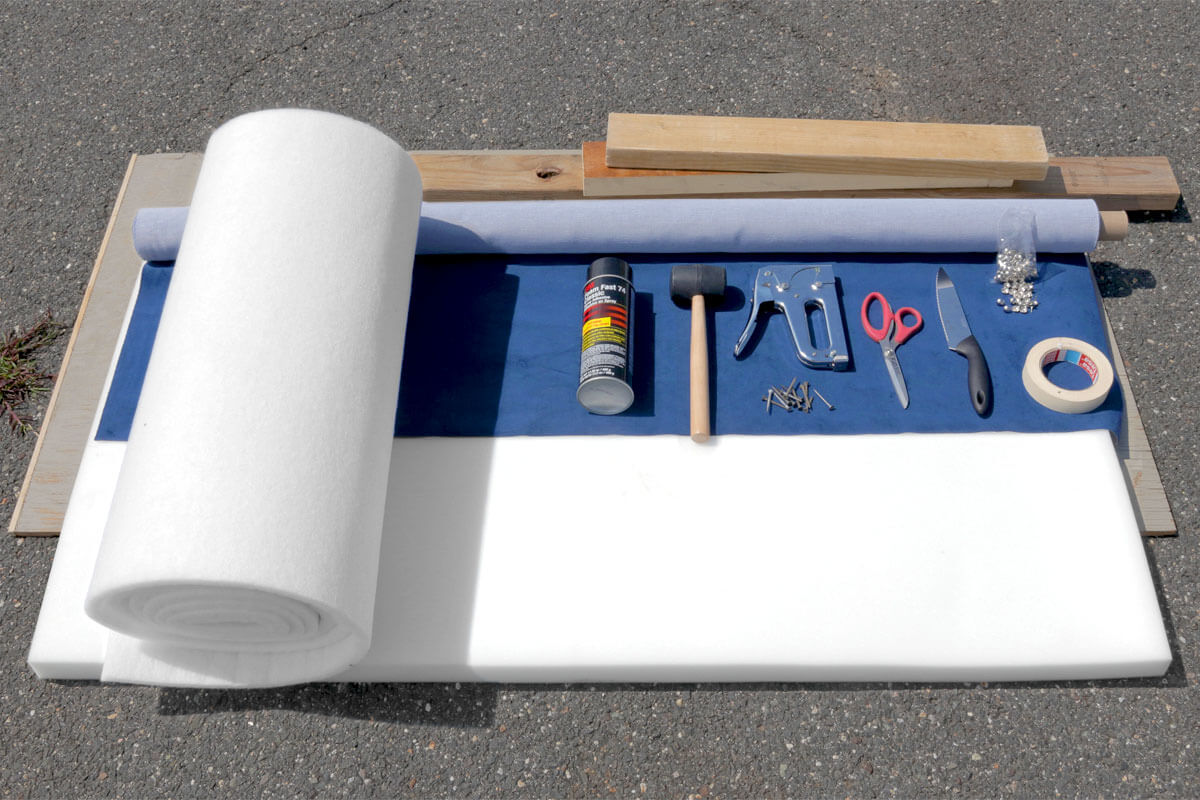
Materials
- Plywood
- 2x4's
- Upholstery Foam
- Decor Fabric
- Padding
- Spray Adhesive
- Rubber Mallet
- Screws and a Drill
- Staple Gun
- Scissors
- Serrated Knife
- Decorative Nail Heads
- Masking Tape
Related Products


Video
Instructions
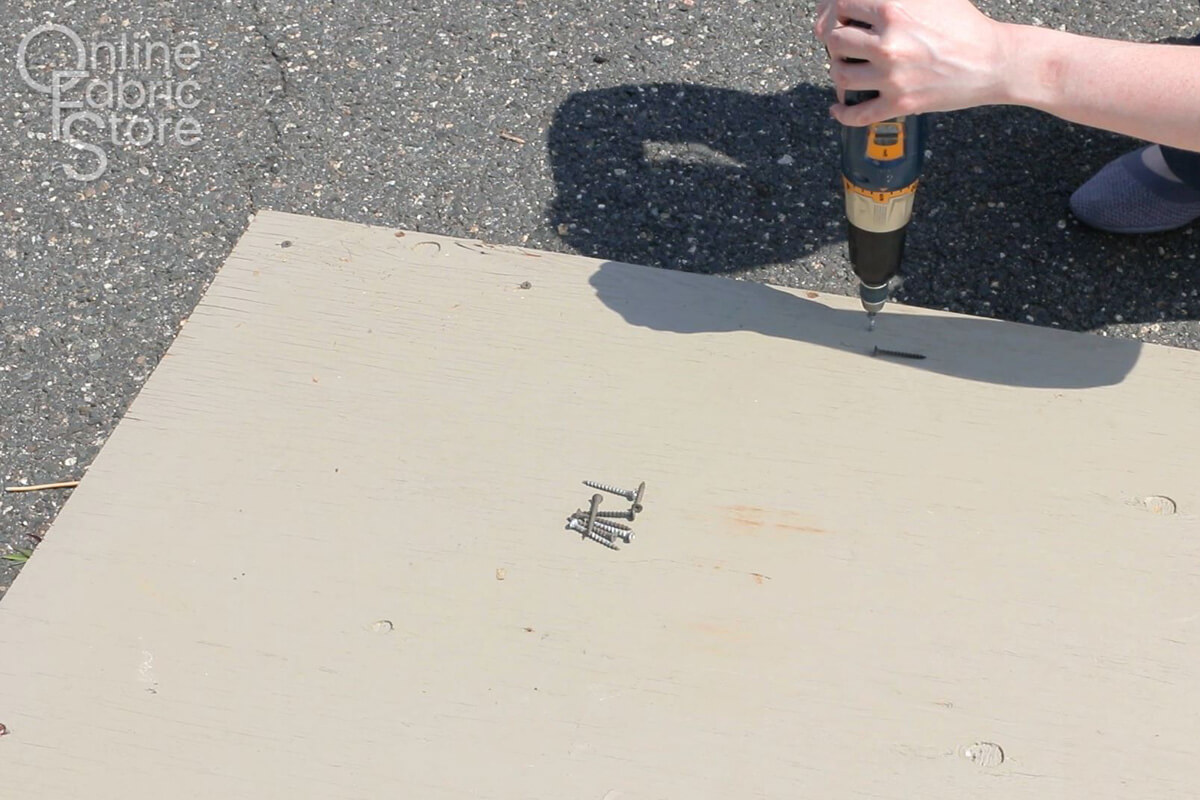
Step 1: Make the frame
If you want the nail head trim to run all the way around, you can add a piece of wood for the bottom too.
Cut a piece of plywood to the width and height you want the headboard. Mine is going to be 61” wide and 30” tall for a queen size bed.
Cut a 2×4 to the width of the headboard and 2 pieces that are the height minus 3 ½”.
Place the long piece of wood flush along the top of the headboard and screw from the back. Do the same for the smaller pieces on the sides.
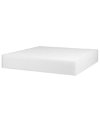
Step 2: Attach the foam
Cut the foam to fit inside the wood frame with a serrated knife. Mine’s already the correct width so I’m just cutting off the extra at the bottom.
I’m using 2 inch thick upholstery foam. It should be slightly higher than the wood frame.
Use a spray adhesive that works well with foam to attach it.

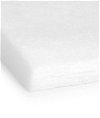
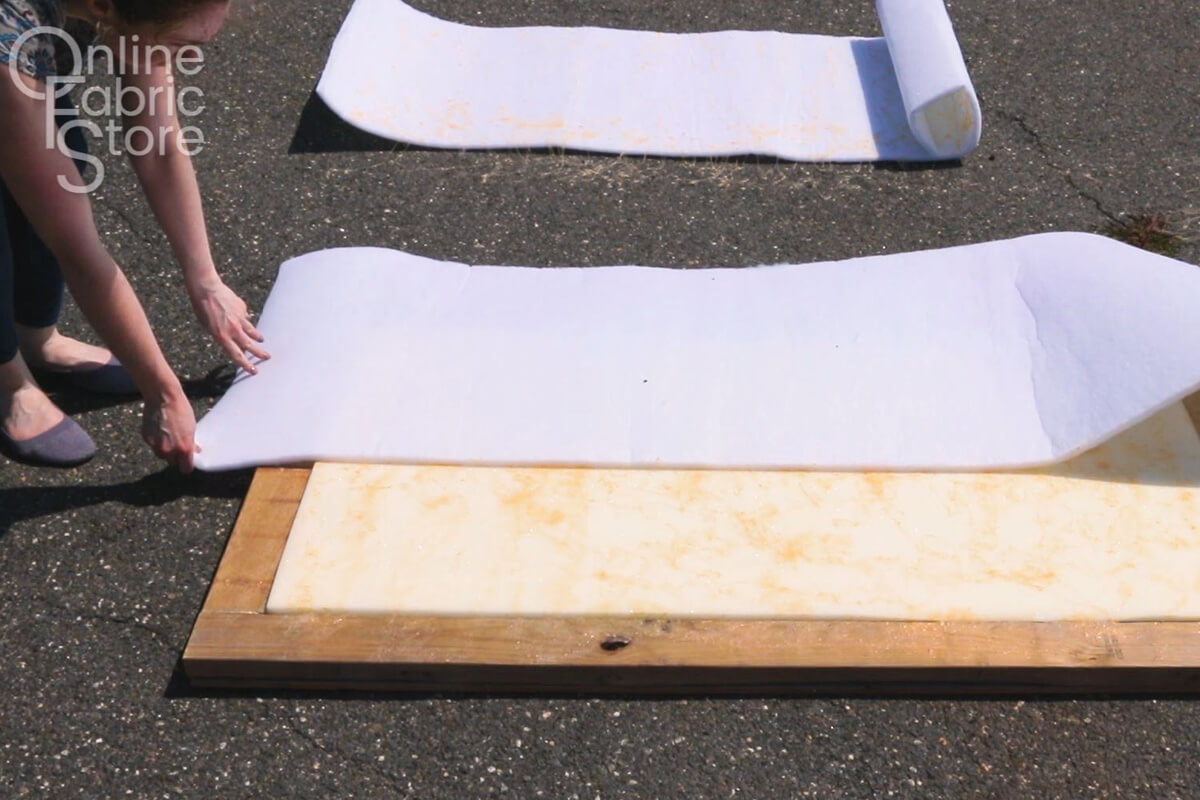
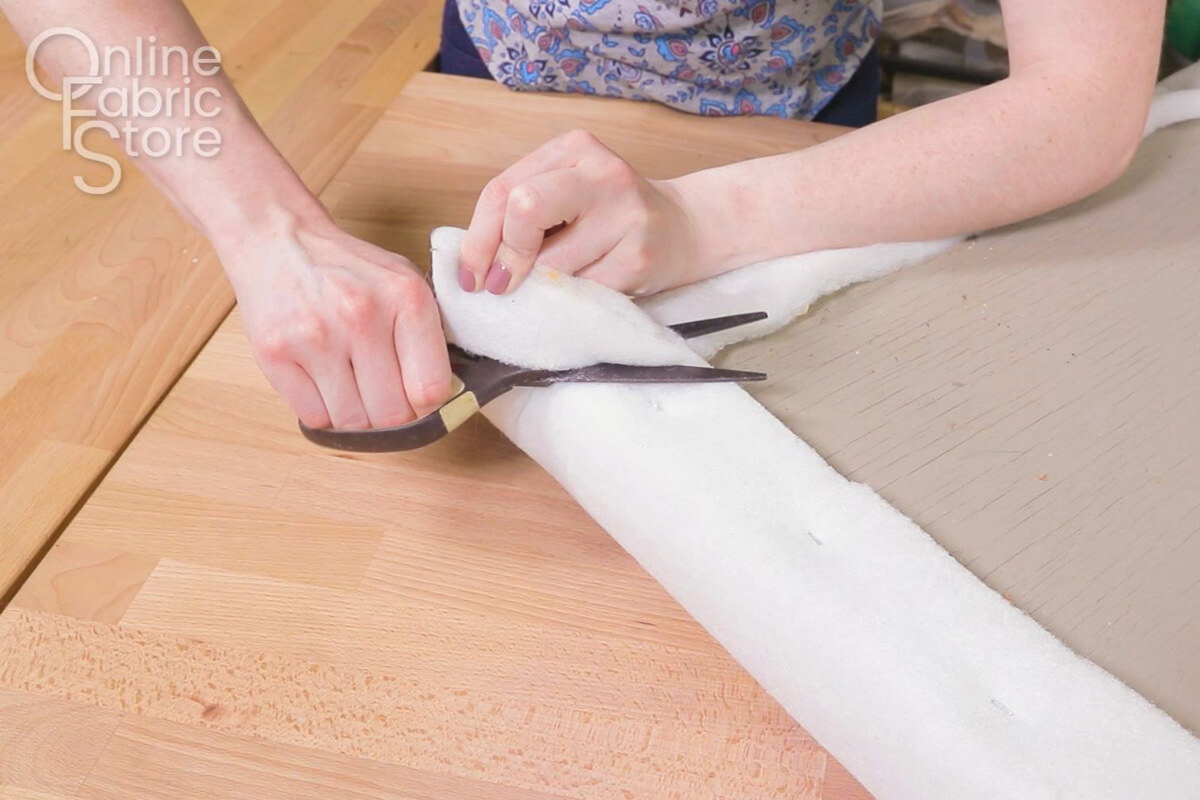
Step 3: Attach the padding
Cut a piece of batting or padding that’s big enough to wrap around the sides to the back. Mine isn’t wide enough so I’m using 2 pieces and attaching it with spray adhesive. If your piece is large enough you don’t have to use the adhesive.
I’m using ½” upholstery deck padding which is stiffer than batting for a crisp look at the edges. You can use batting or cushion wrap if you want more rounded edges and a softer feel.
Staple the center of each side and work out towards the corners.
Cut off the extra padding including the corners.
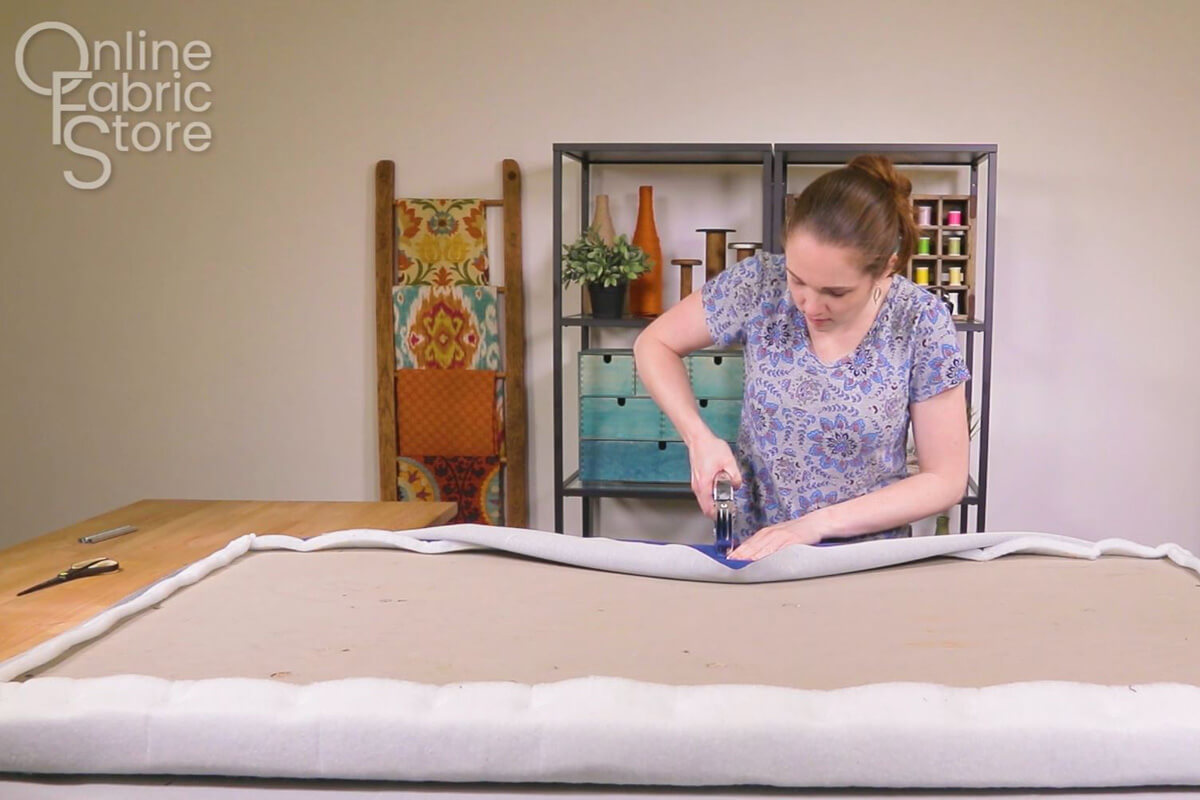
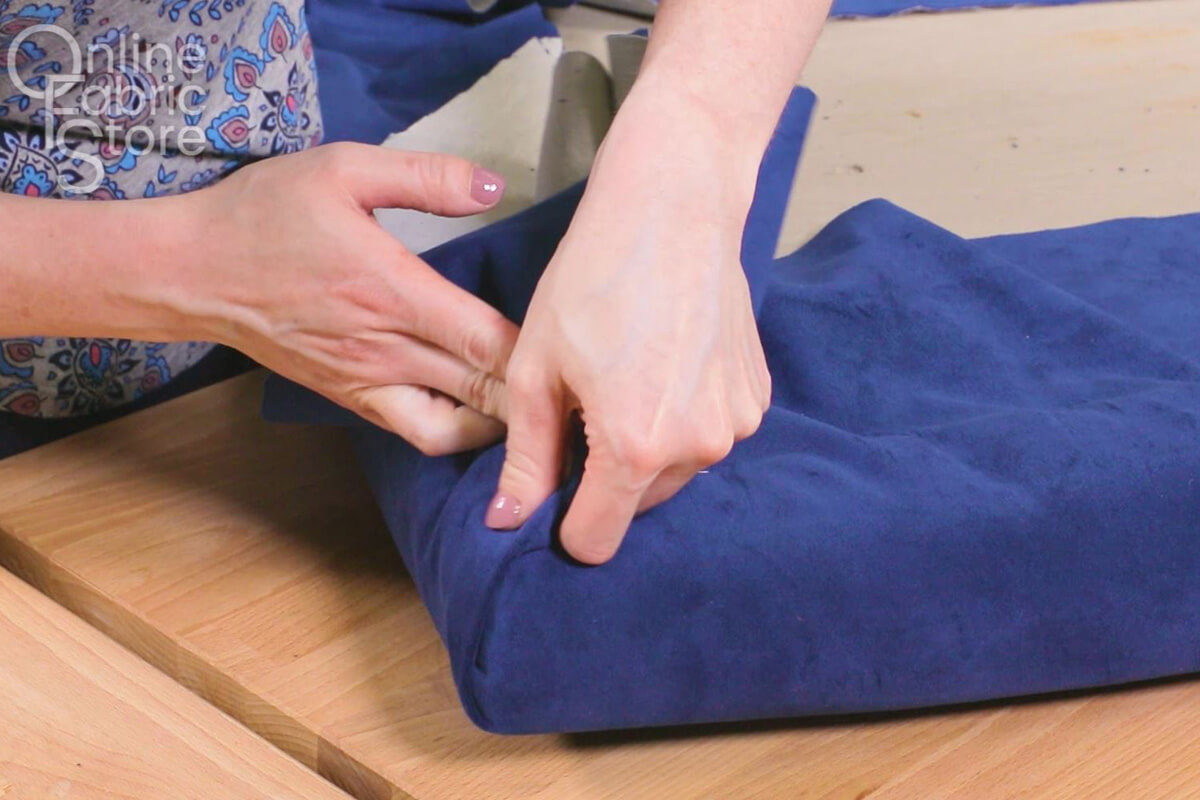
Step 4: Attach the fabric
Cut a piece of the fabric that’s large enough to wrap around to the back. Since I’m using a solid fabric, I can run it horizontally instead of vertically, but if you have a fabric with a pattern, you may have to sew pieces together.
I’m using an upholstery velvet but you can use just about any home décor fabric.
Start stapling in the center on each side and work your way out, pulling the fabric taught.
At the corners, staple all the way to the corner on one side and leave extra space on the other. Fold the fabric from the stapled side under the fabric from the other side. Adjust the fold until you have one crease right at the corner.
Staple in place then cut off excess fabric.
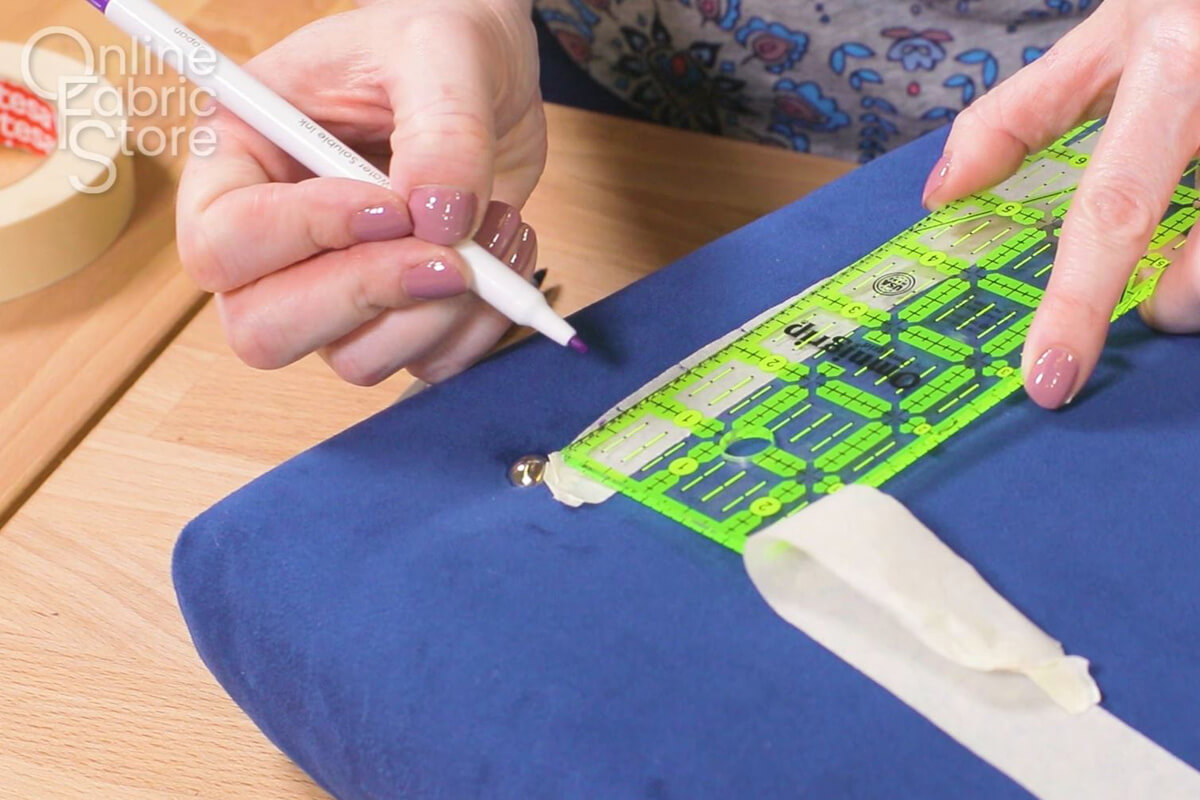
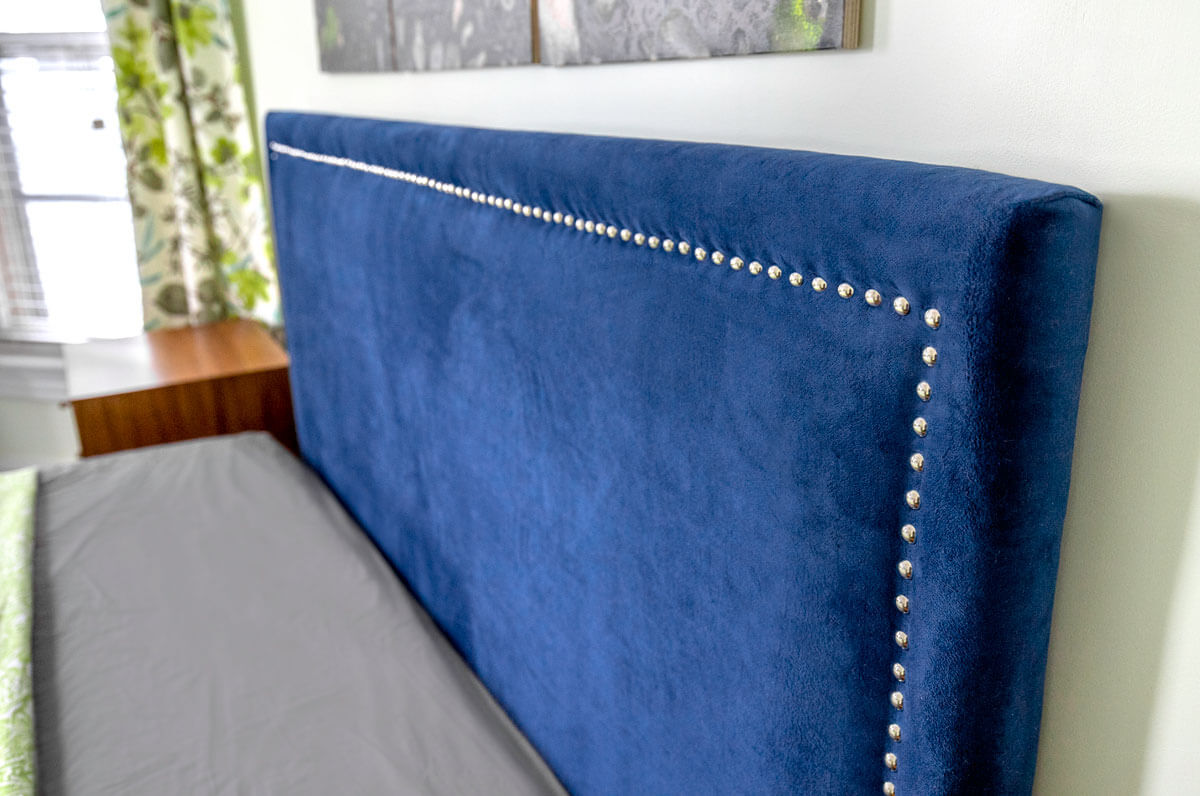
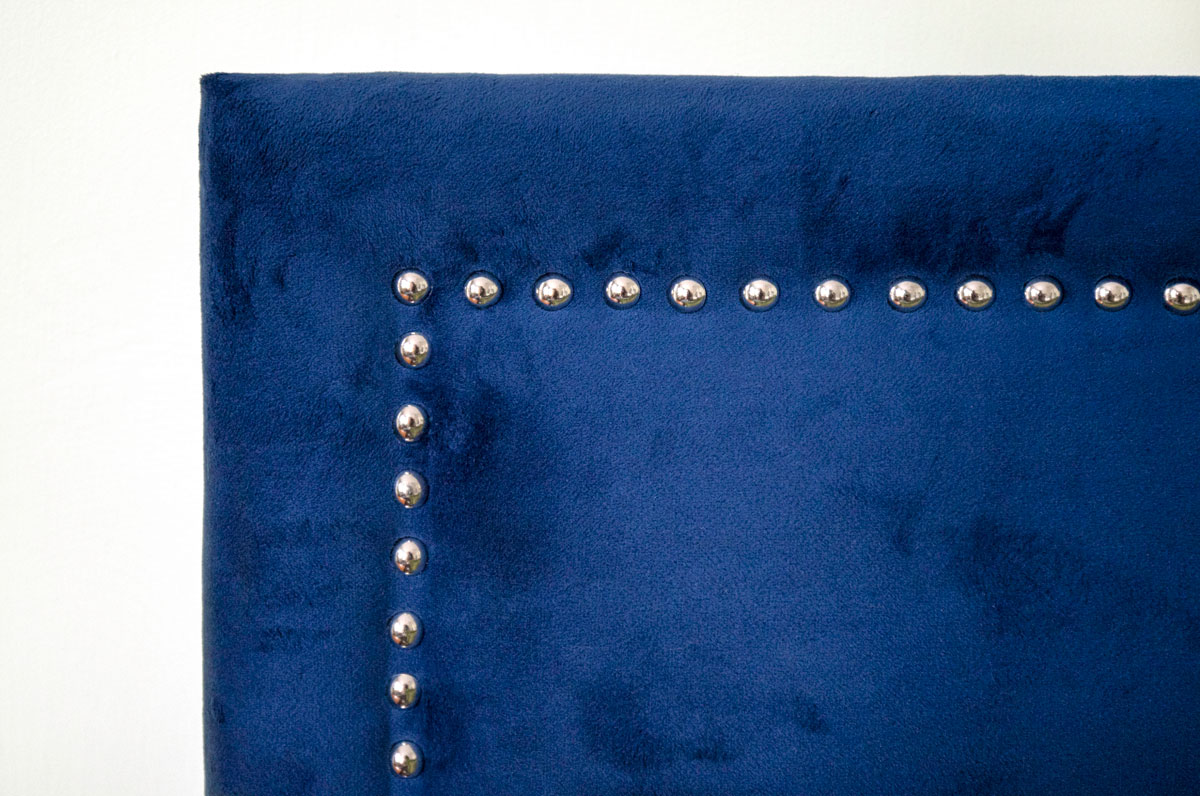
Step 5: Add the nail head trim
These nail heads are going to be 2” in from the edges. To keep the line straight and the spacing even, I’m using masking tape.
Mark your desired distance between the centers of the nails on the masking tape. I’m going to have ¼” between the nails which are ½” wide, so I’m marking every ¾”.
You can also use the kind of trim where the heads are attached together in a strip. This is faster and easier to install but doesn’t have the high end look of individual nails.
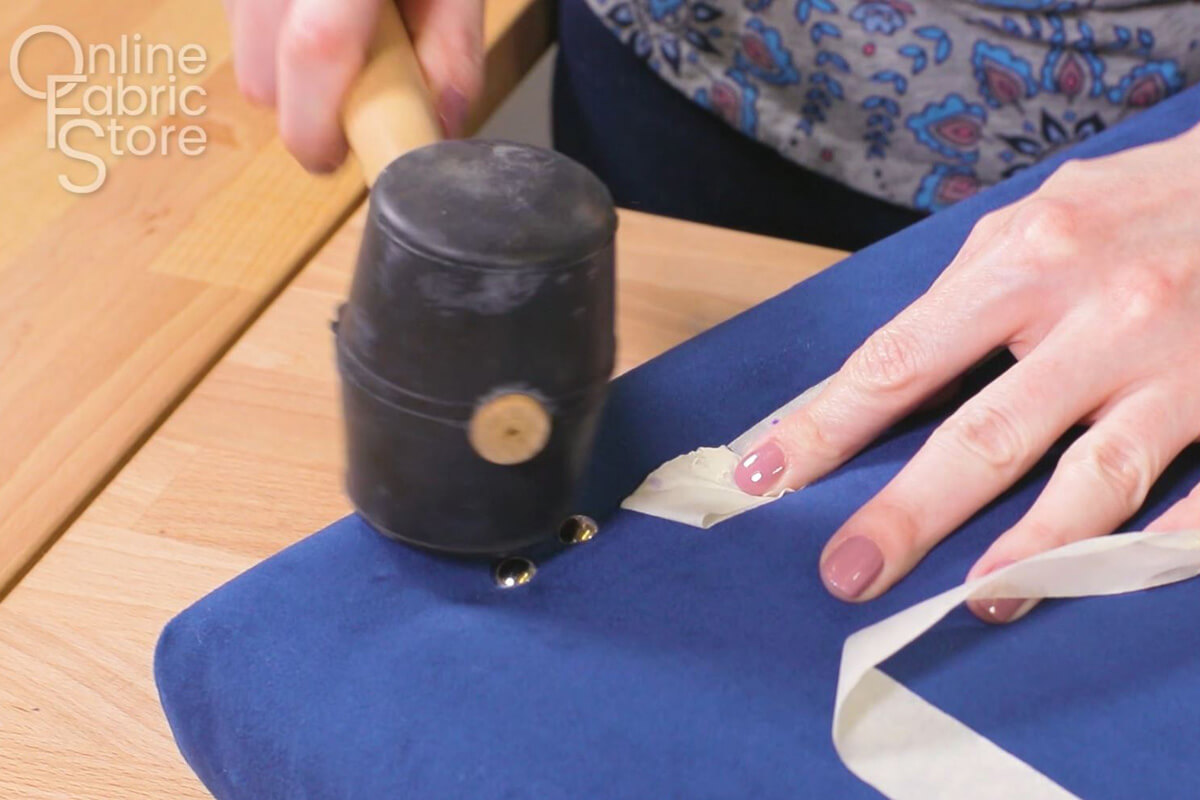
Place the first nail at the corner and hammer into the wood with a rubber mallet so the nail isn’t damaged.
Line up the nail at the edge of the tape next to a mark. Start to hammer but peel the tape back before hammering it all the way.
Repeat down the sides and across the top. Even with the tape it’s hard to keep the nail heads straight and even. You may have to pry some up and try again. You can also hit the side of the nail head to adjust it slightly.
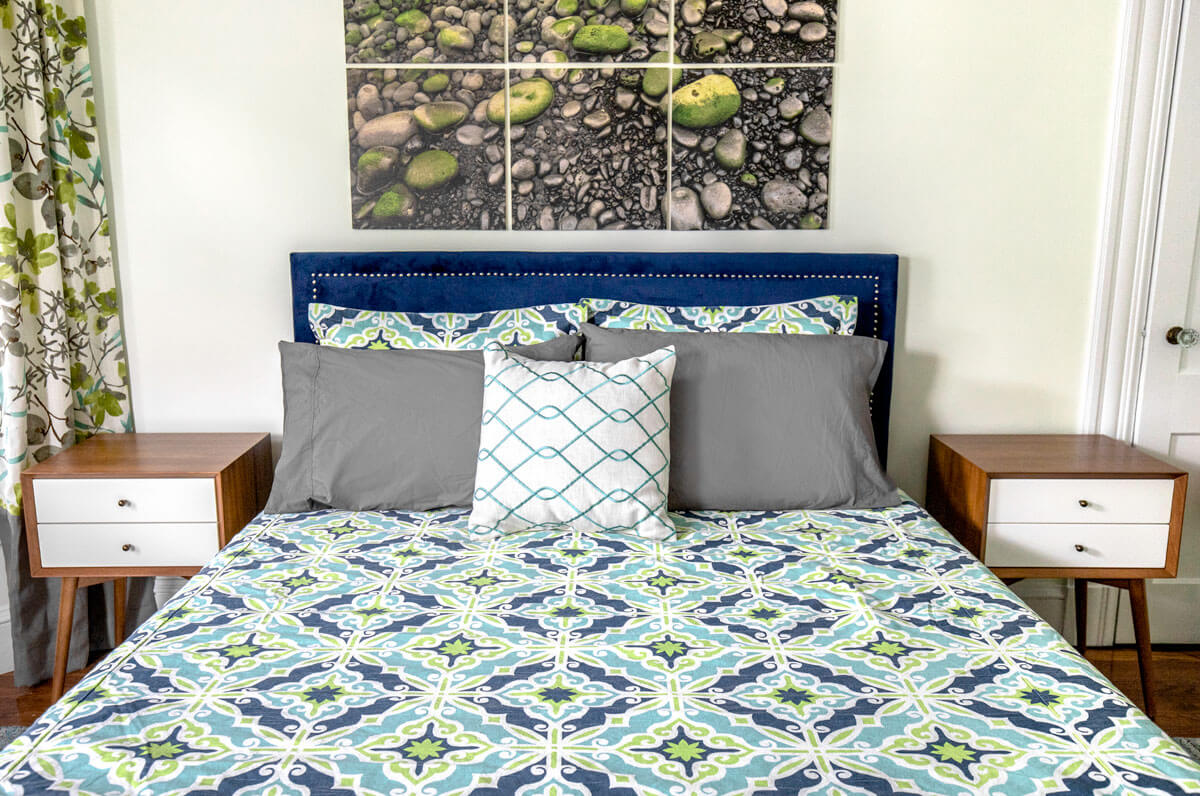
Once the nail head trim is done, it’s ready to hang.
You can hang the headboard in a number of ways but I’m using a French cleat. Attach one side to the headboard. It’s a good idea to put it over the padding and fabric so that it can hook on to the other side which screws onto the wall. The headboard side slides down into the wall side to secure it.
Find fabric for your headboard!