How to Make Burlap Flower Wreaths for Every Season
- By Clara
- Beginner
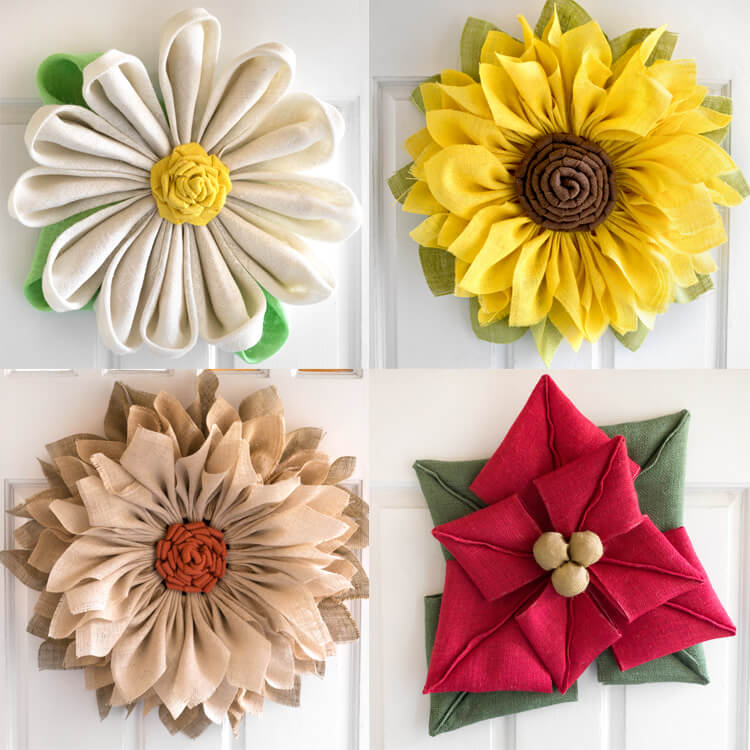
Burlap sunflower wreaths are very popular so why not make a burlap flower for every season? Along with the summery sunflower, I’m going to show you how to make a spring daisy, a winter poinsettia, and a flower fit for fall.
These no-sew burlap flowers are perfect for hanging on the front door. They should be used in an area protected from weather. If your door’s not under a porch or awning, they make great wall art too!
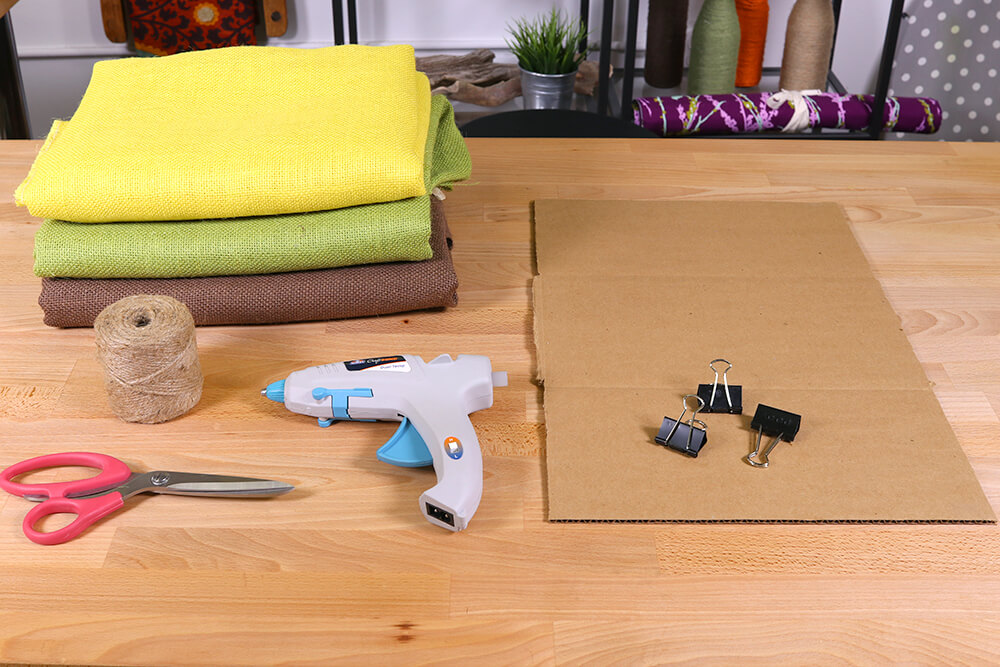
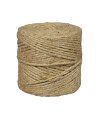
I used 8.5 oz color burlap that’s 46/48″ wide. You’ll need 1 yard of each color except for the sunflower and daisy petal colors which require 2 yards.
Update: After hanging for a while, my wreath petals and leaves started to droop so I’d suggest spraying the flowers with starch to make them stiff so they will hold their shape. Also, the color of the burlap will start to fade in direct sunlight.
Want to get the printable PDF instructions? Sign up to our mailing list to download the PDF.
Materials
Related Products
Video
Instructions
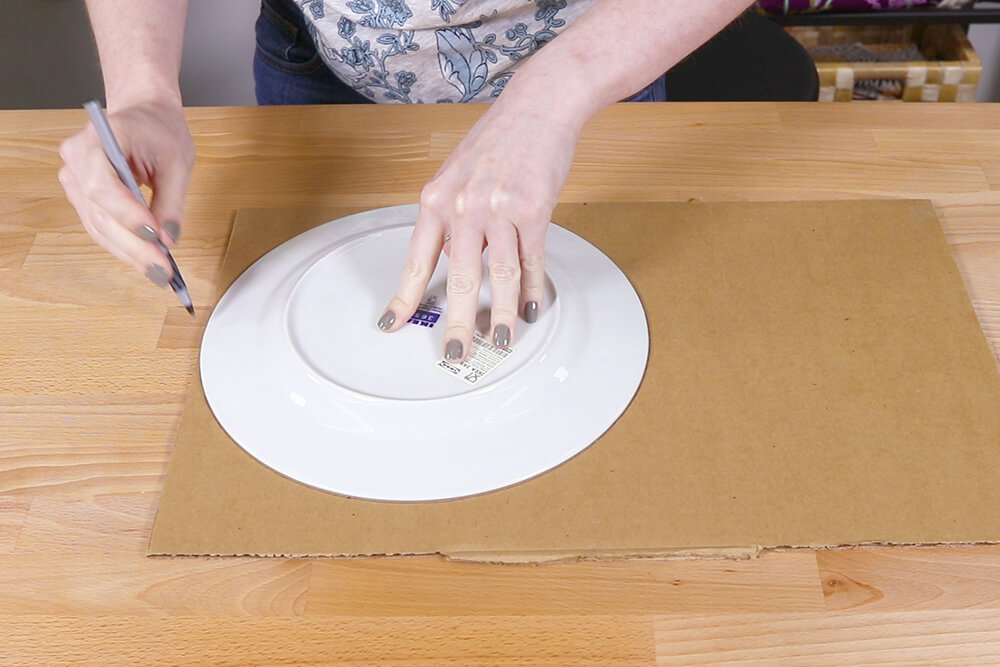
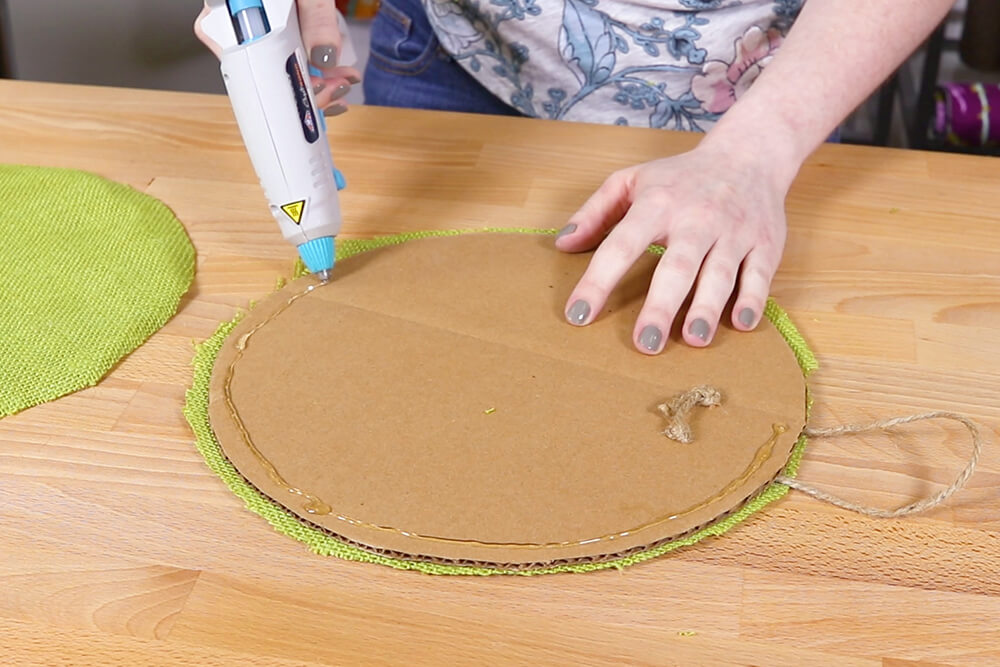
Step 1: Make the back
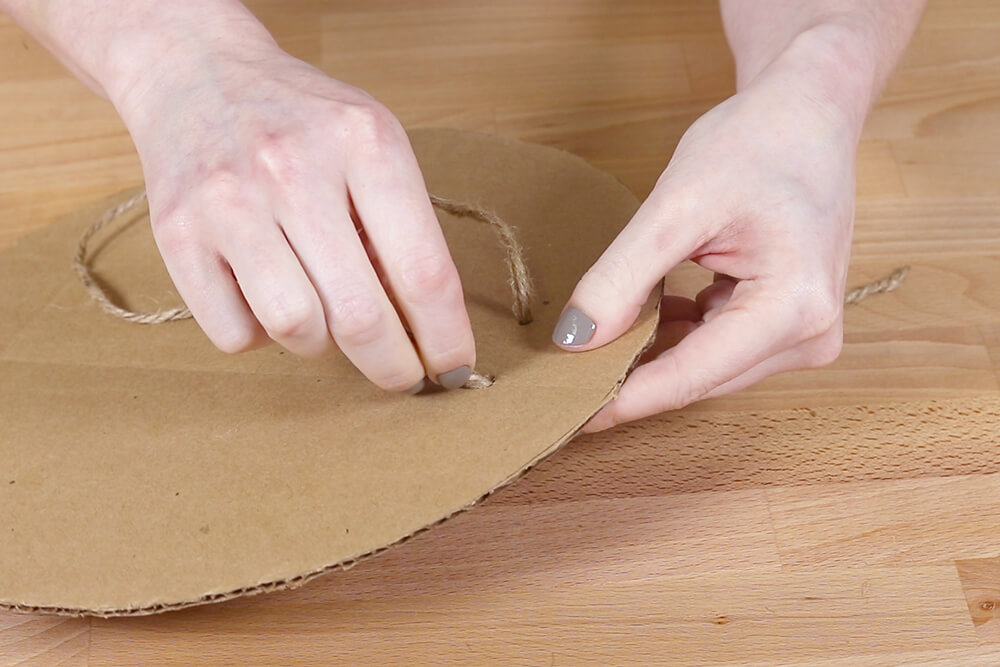
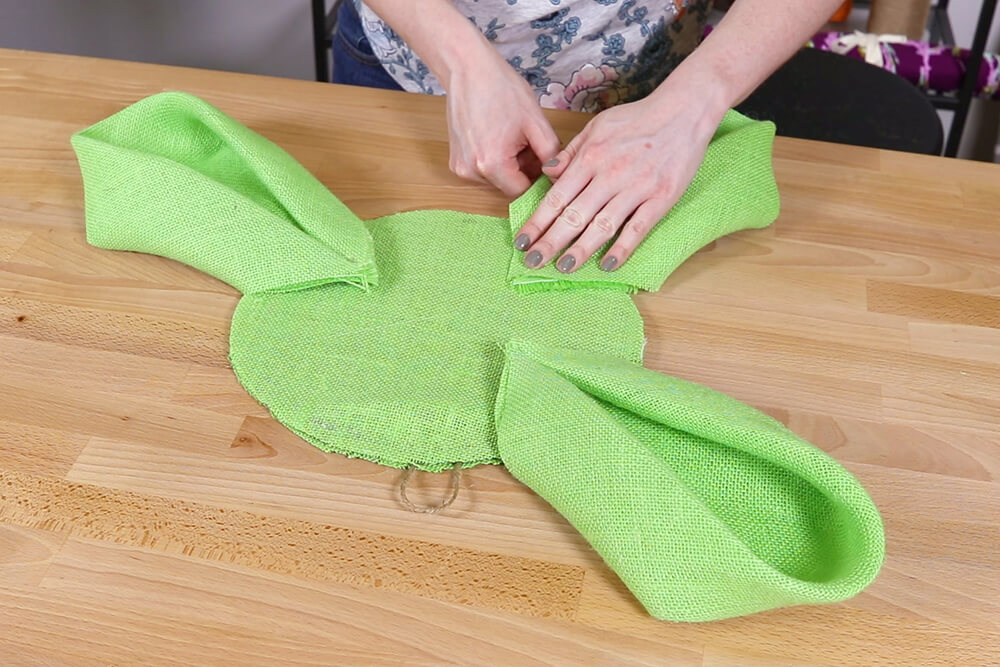
The back is made the same way for all the burlap flowers. Cut out a circle of cardboard that’s about 10 inches in diameter. You can also use foam core or a rigid plastic.
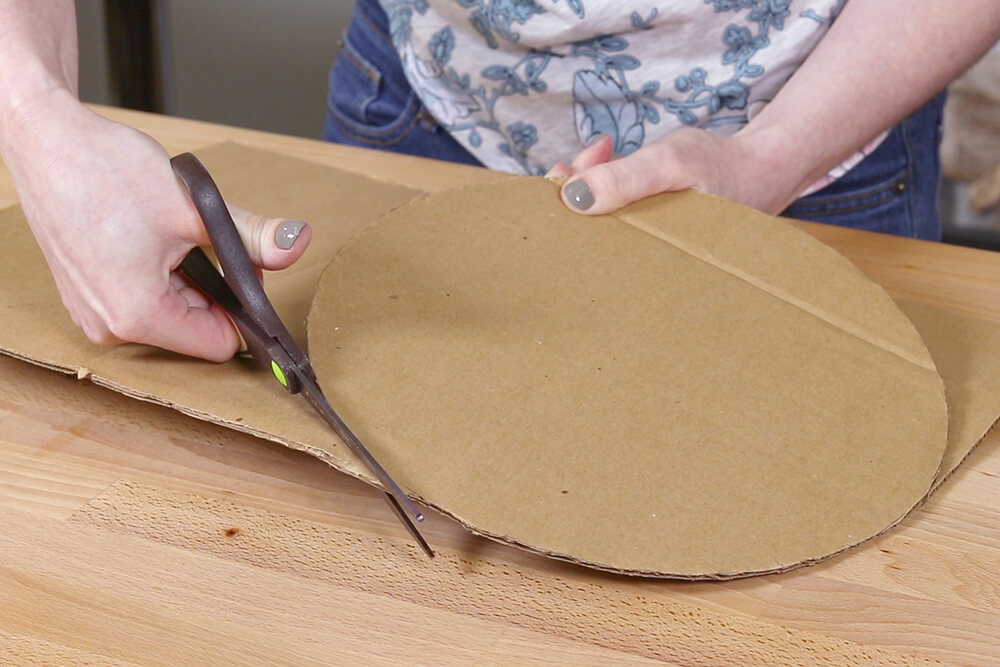
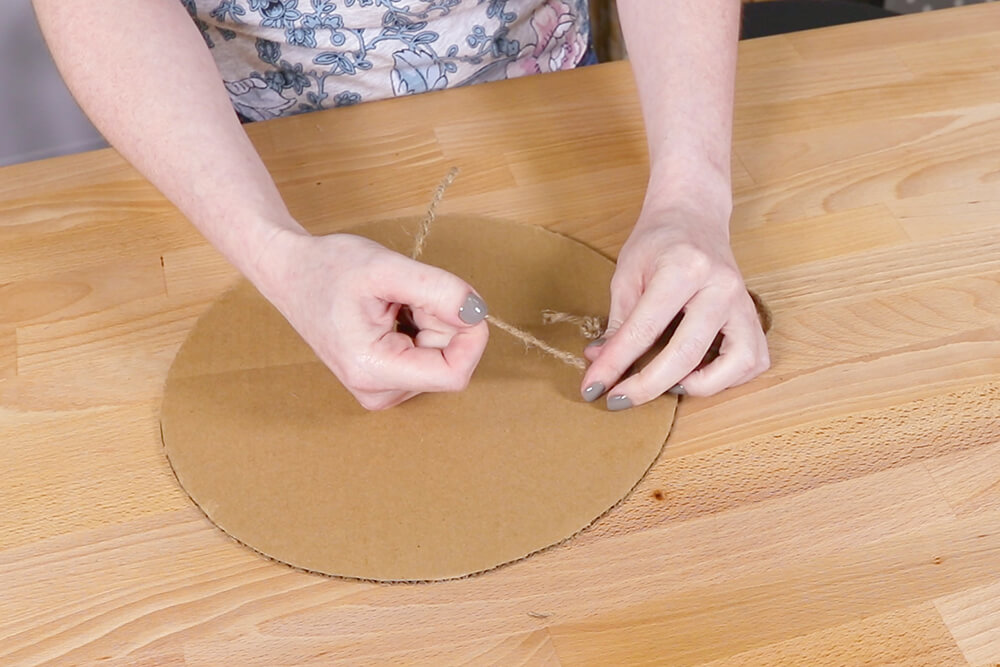
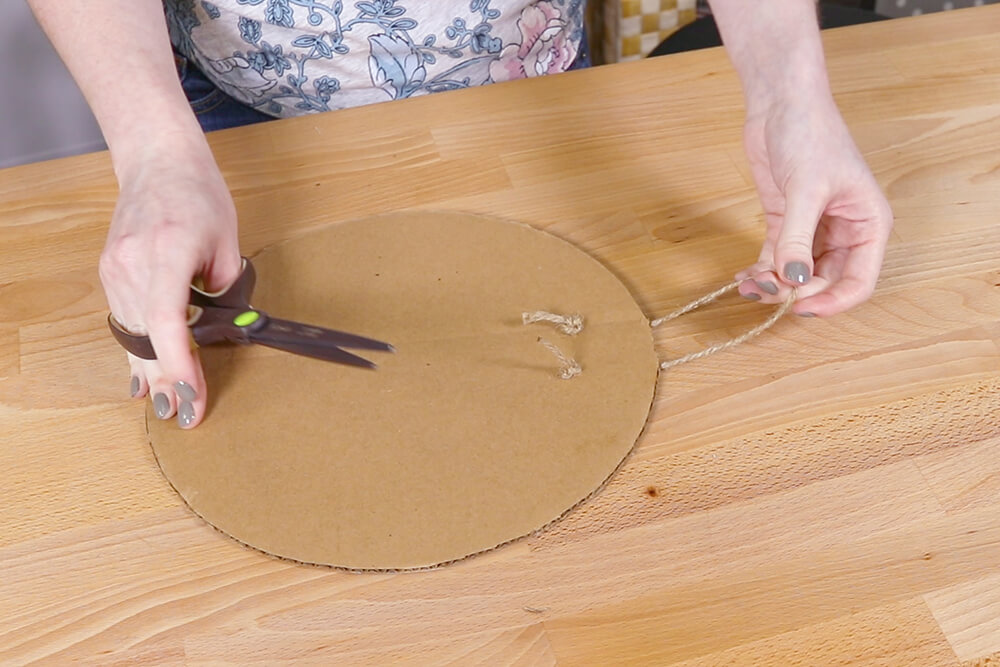
To make a loop for hanging, poke 2 holes near the top and feed a piece of twine through. Knot the twine on the other side.
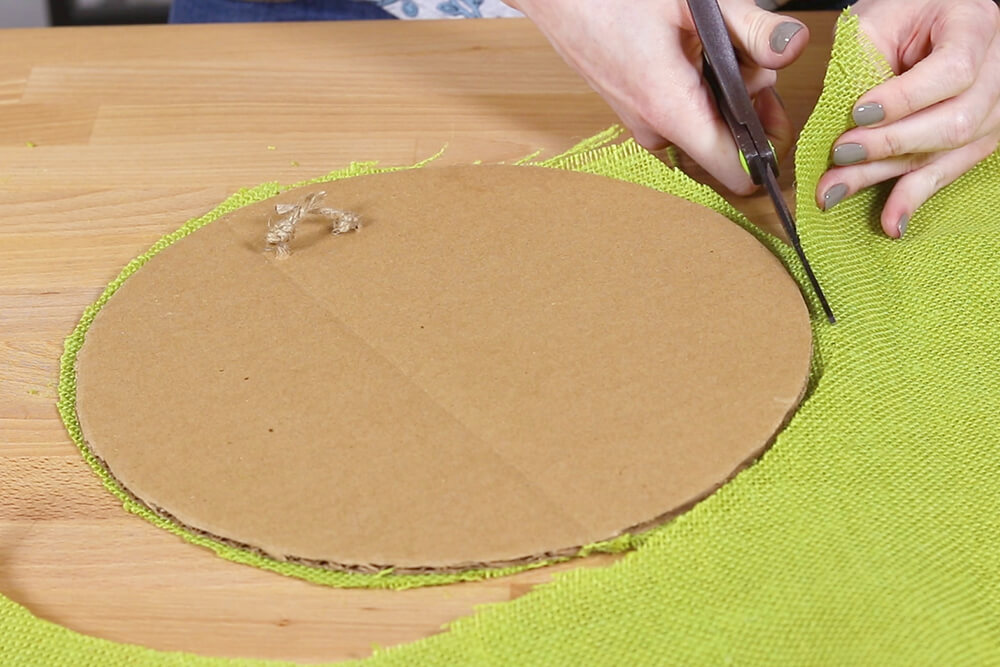
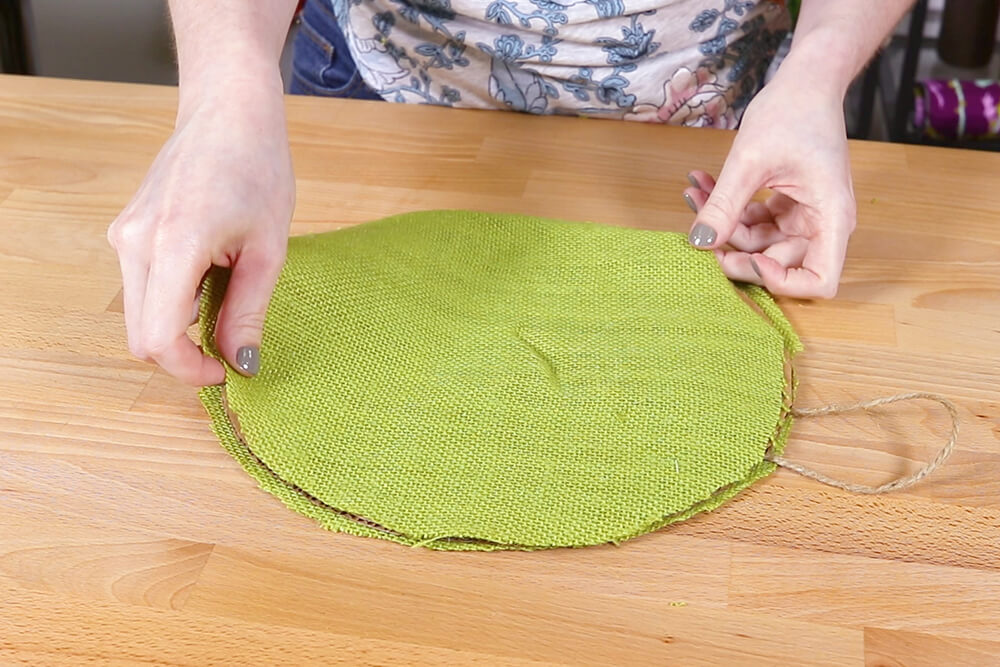
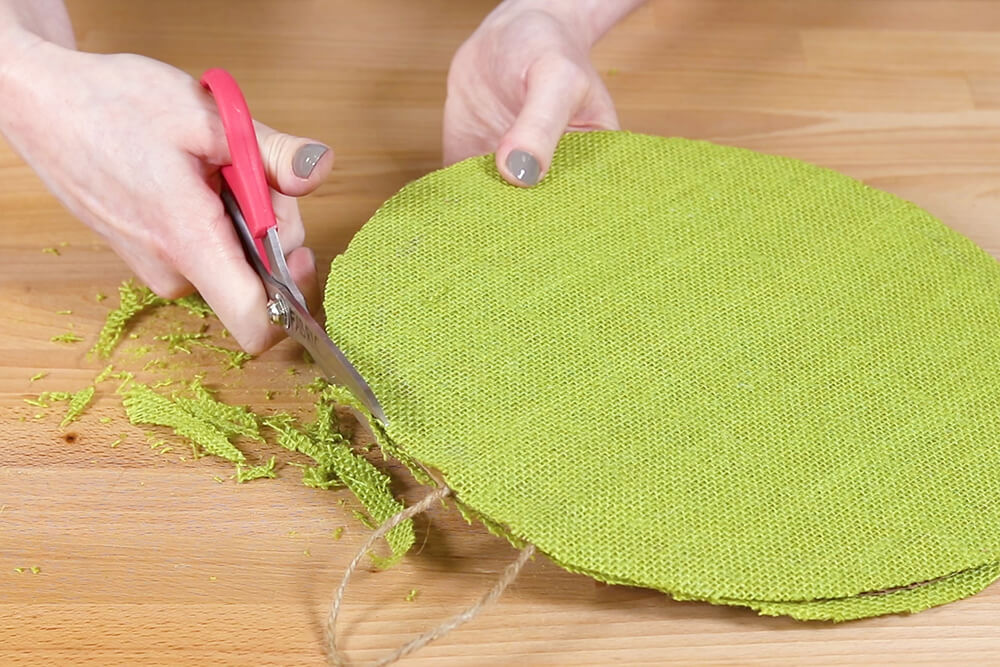
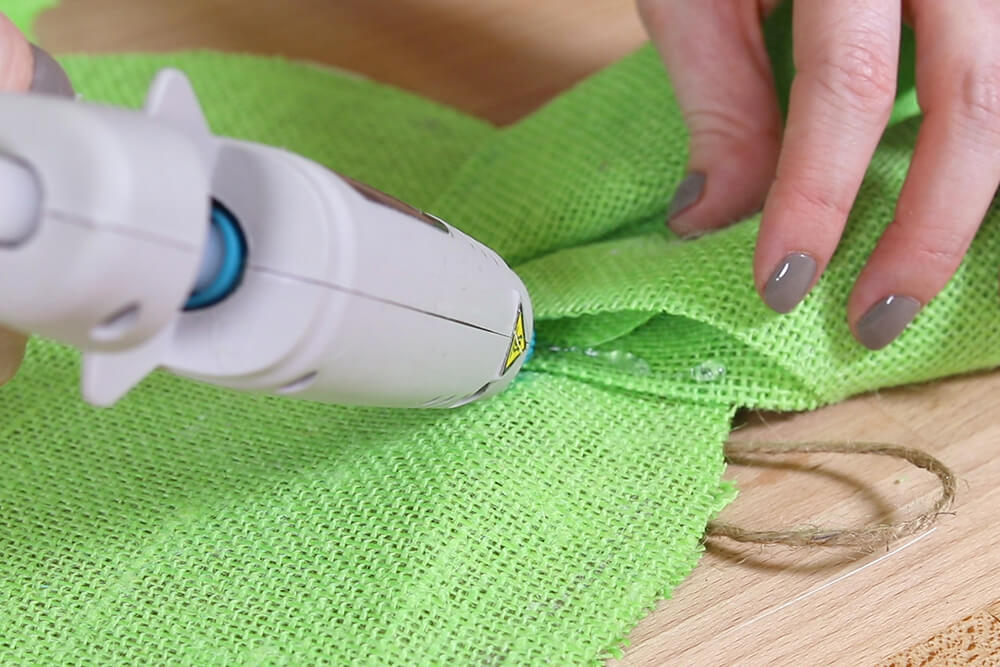
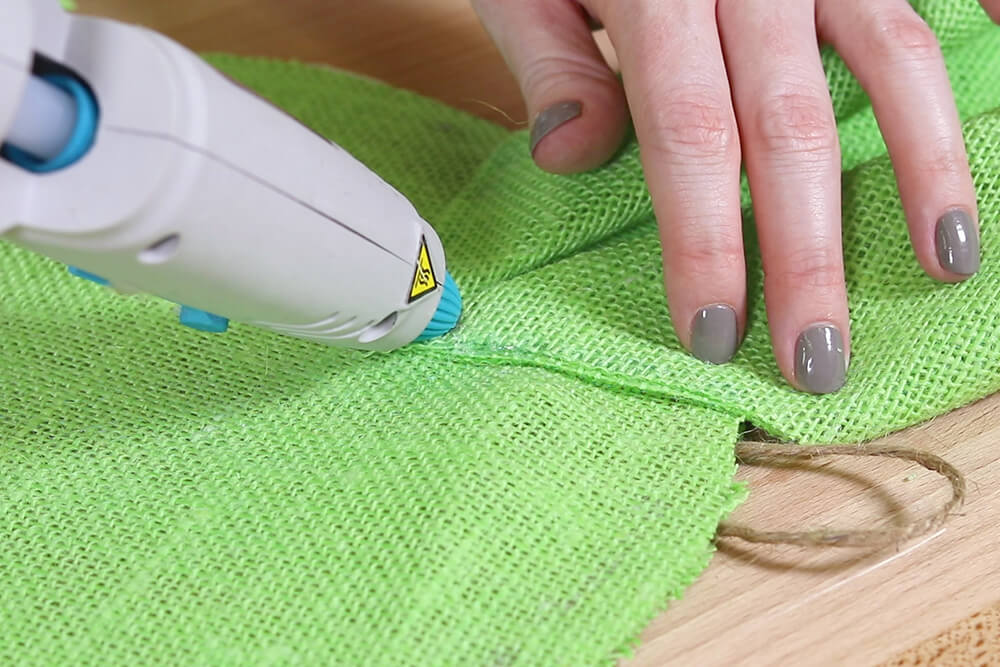
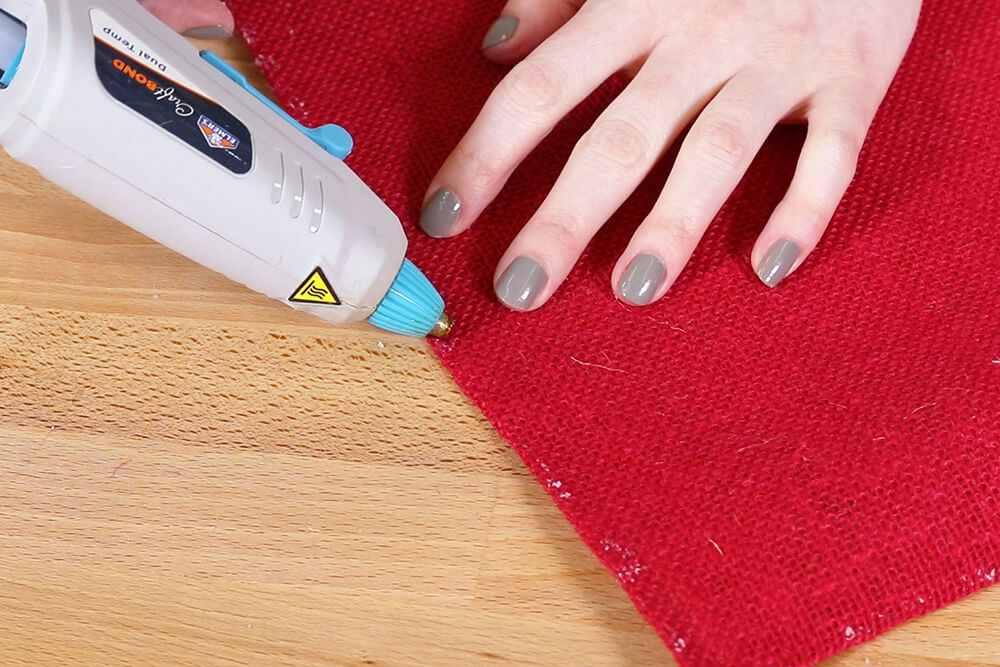
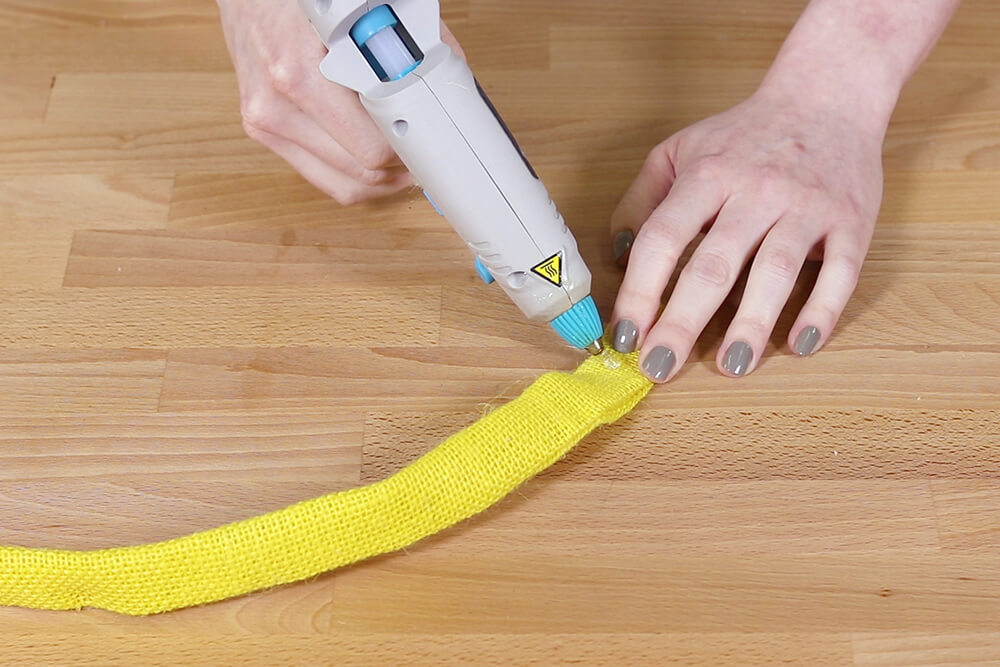
Cut out 2 circles of burlap and hot glue them to each side. Trim the burlap close to the cardboard.
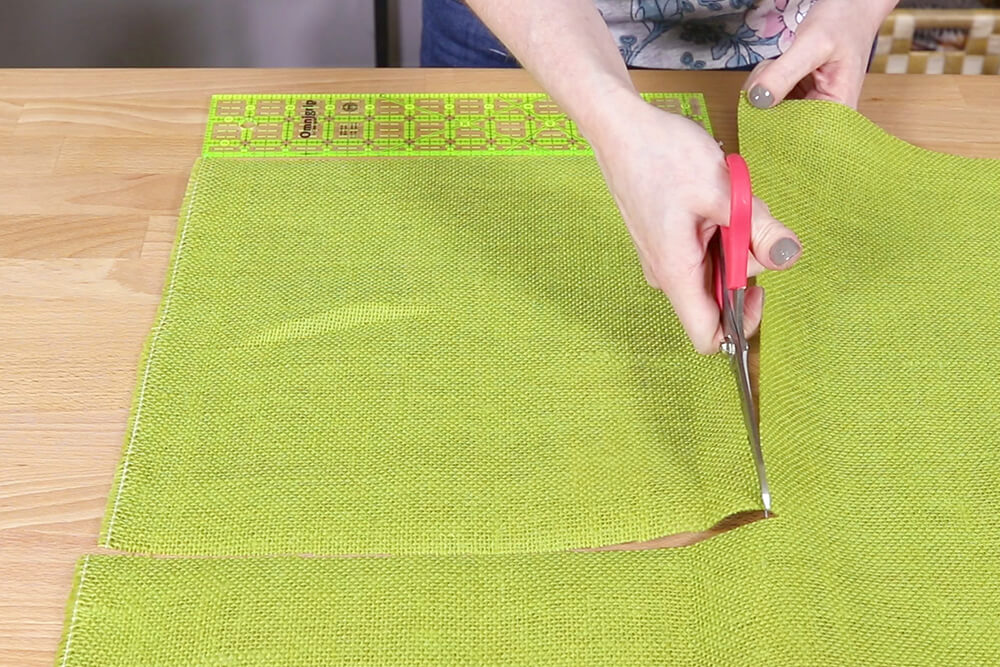
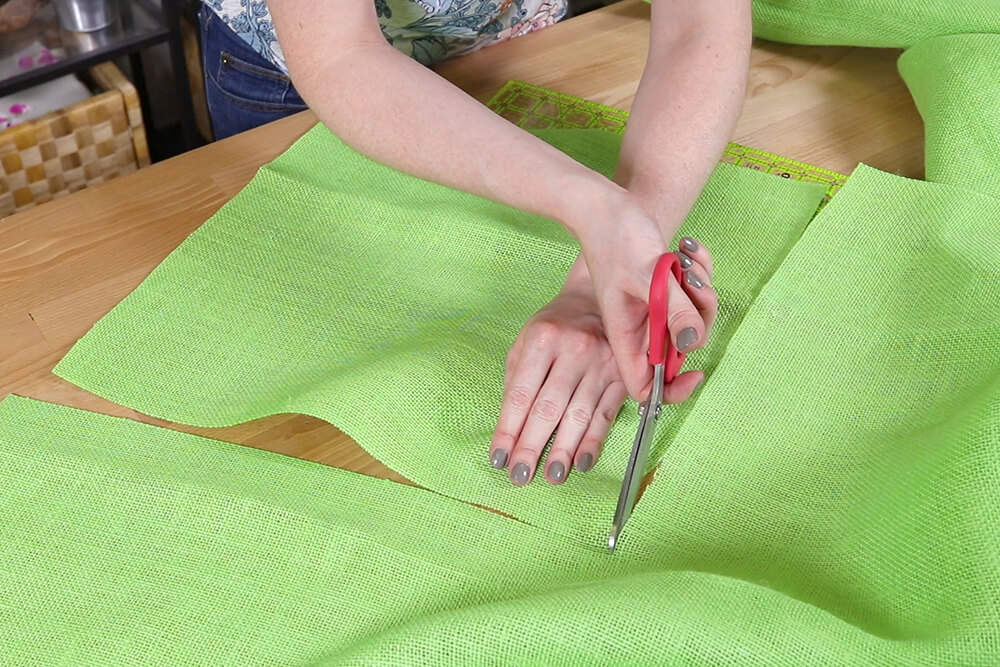
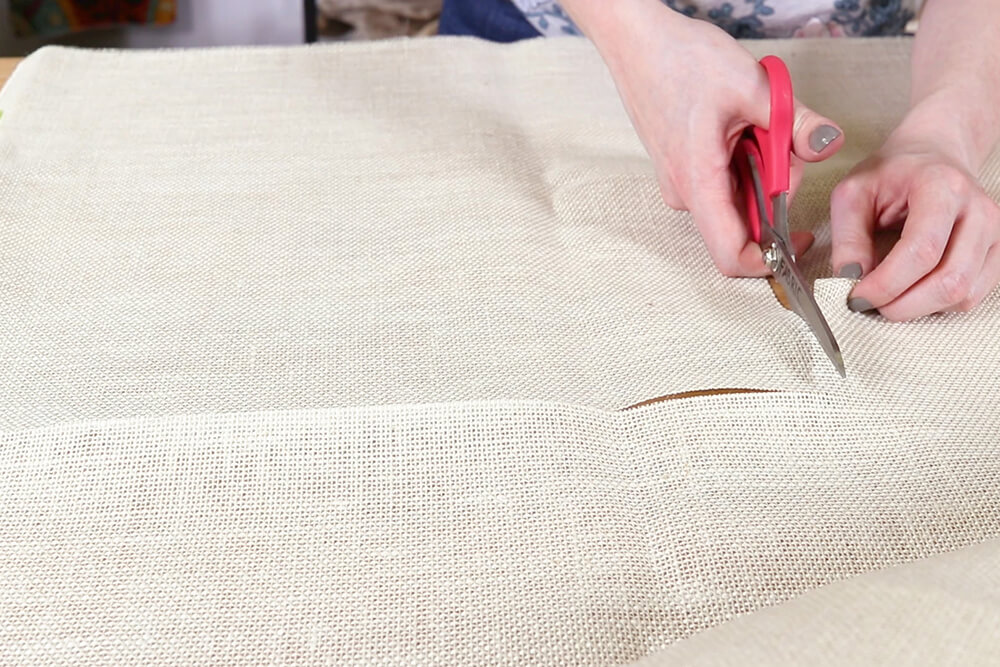
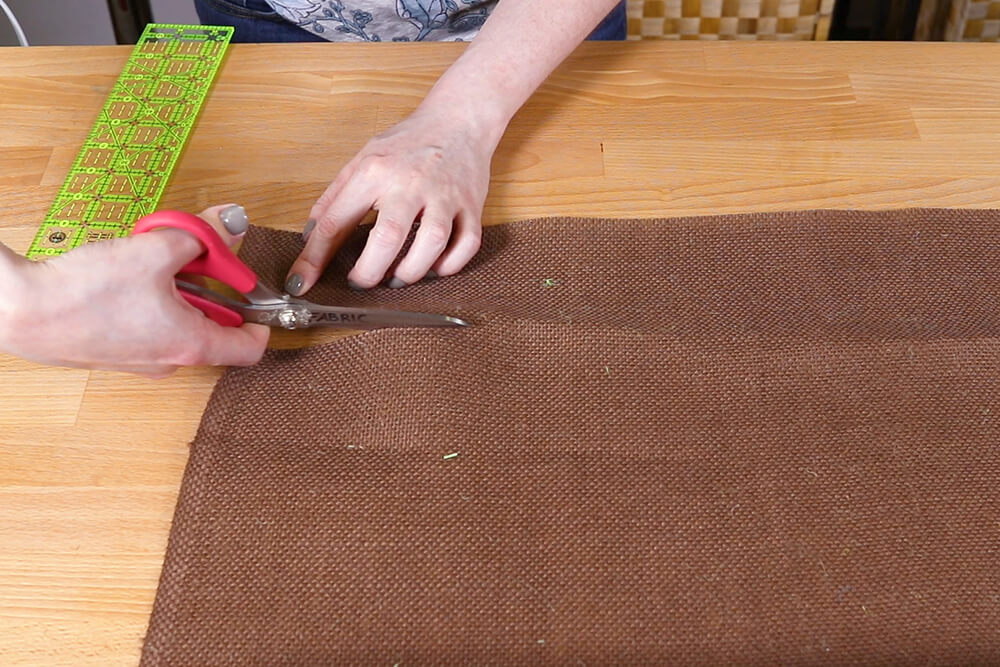
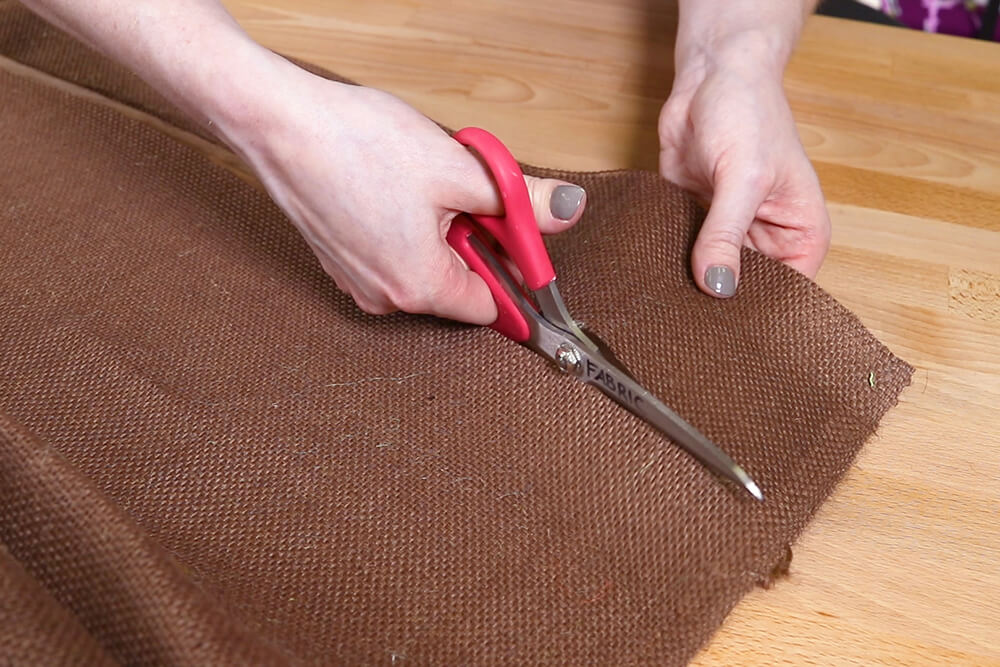
Step 2: Cut the leaves and petals
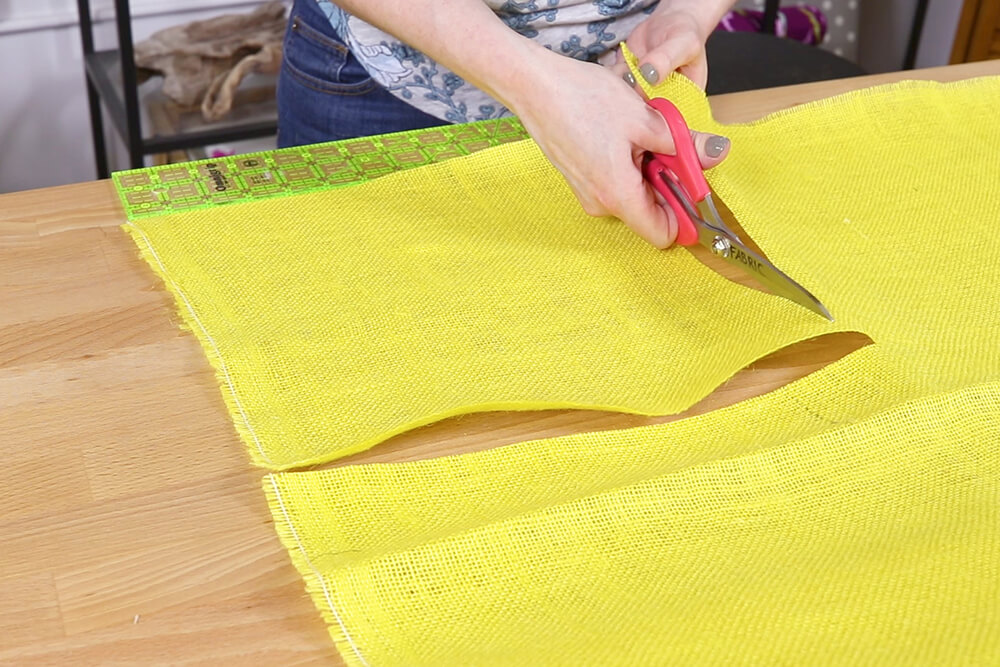
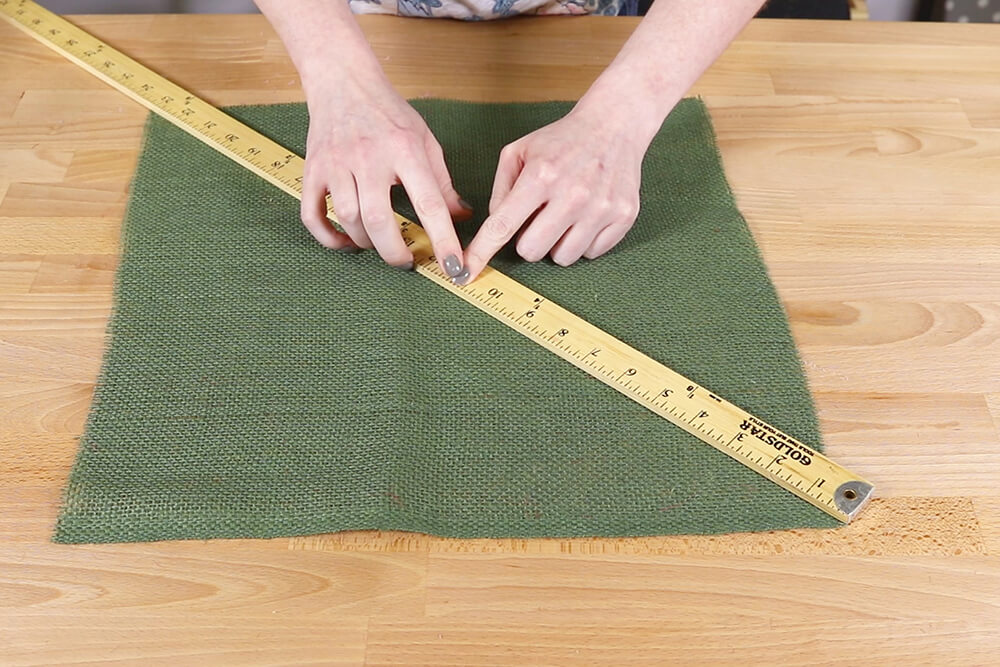
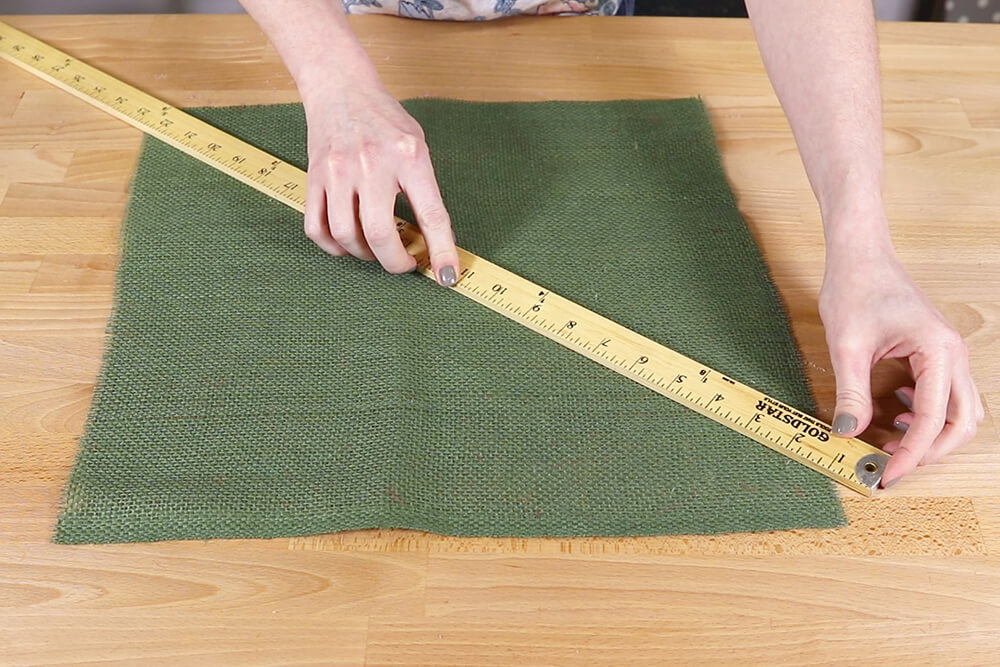
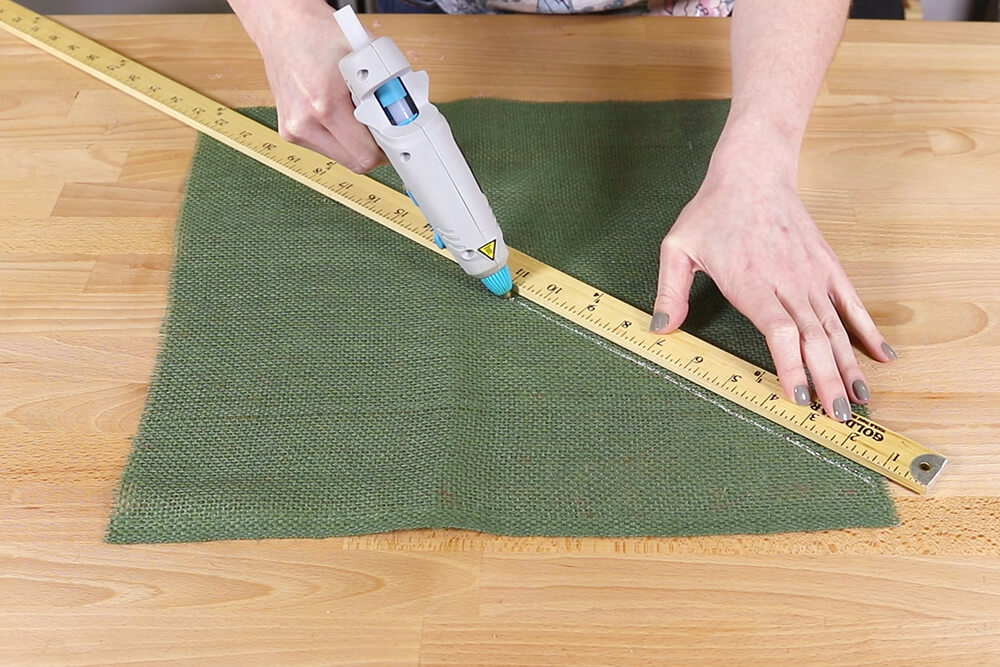
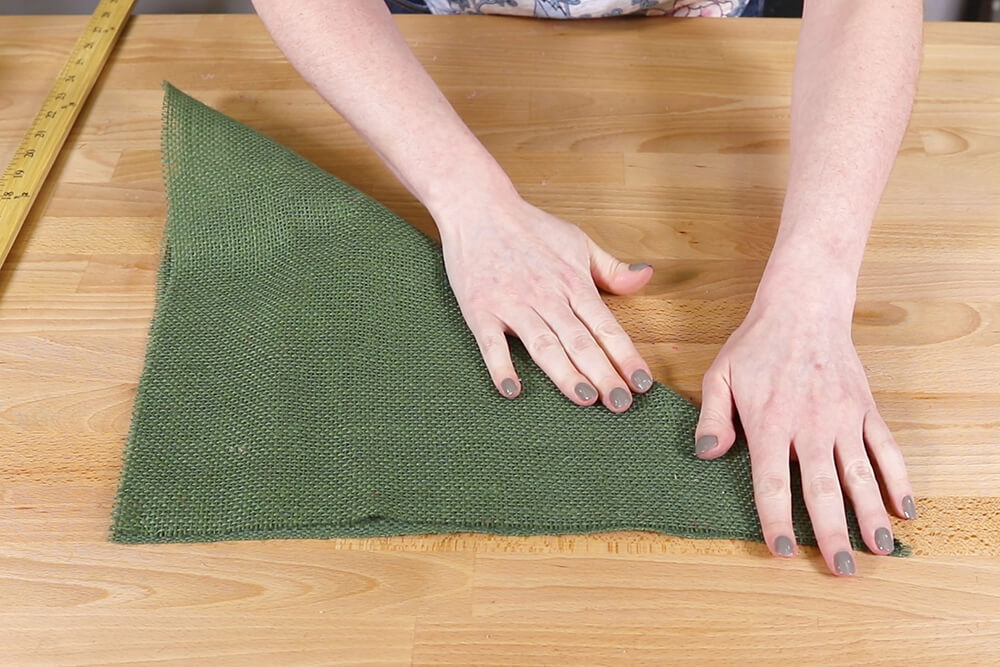
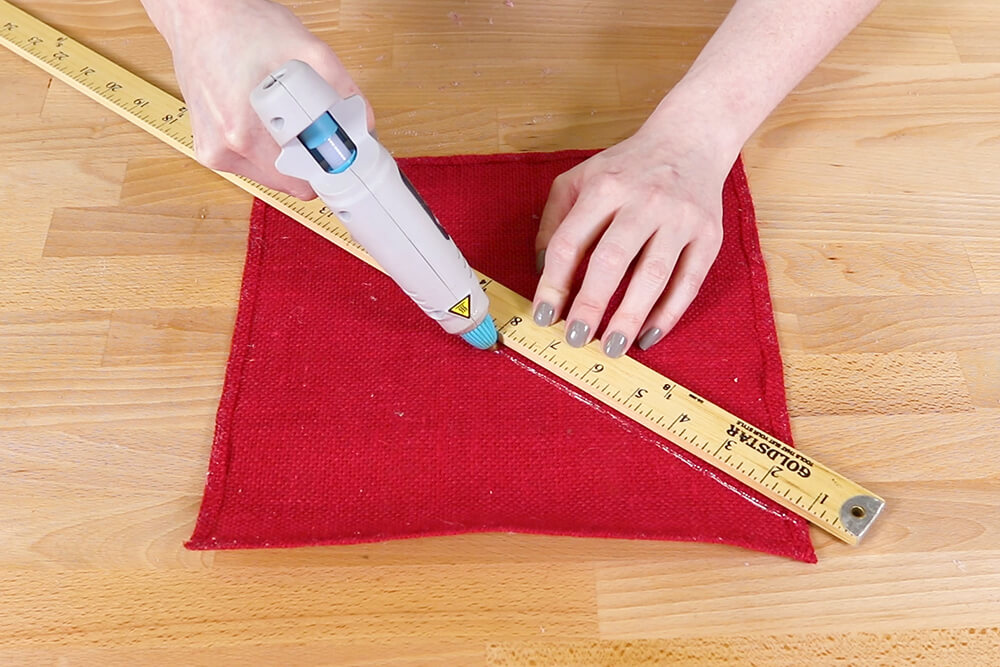
The exact size of the squares doesn’t matter so use a measurement that you can get as many pieces out of the width as you can.
There are a number of ways to form the leaves and petals. I’ll start with the most common method and also show other ways to make the petals for different flowers.
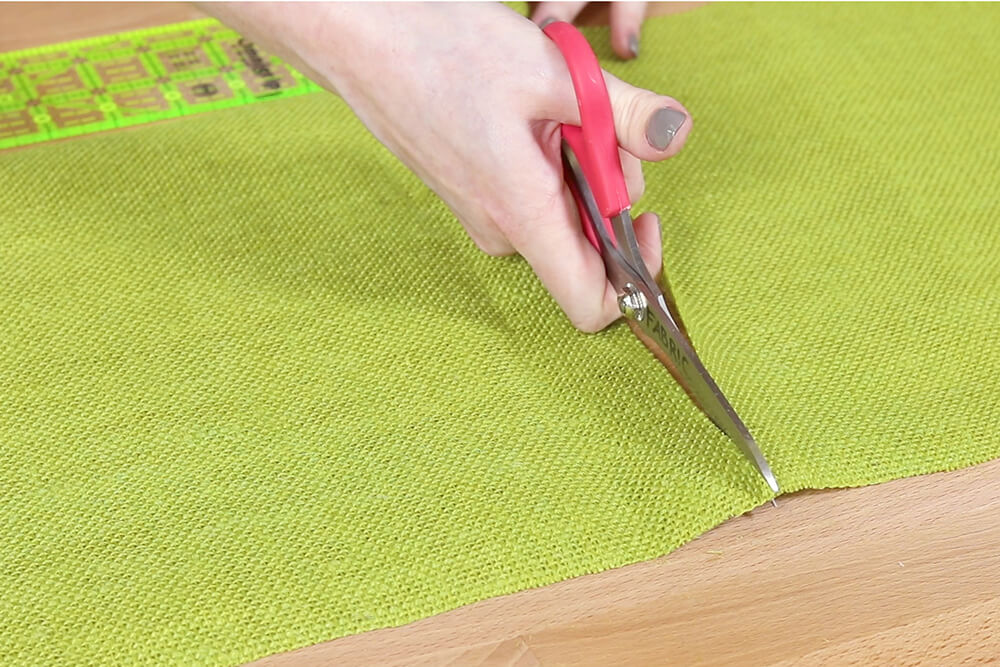
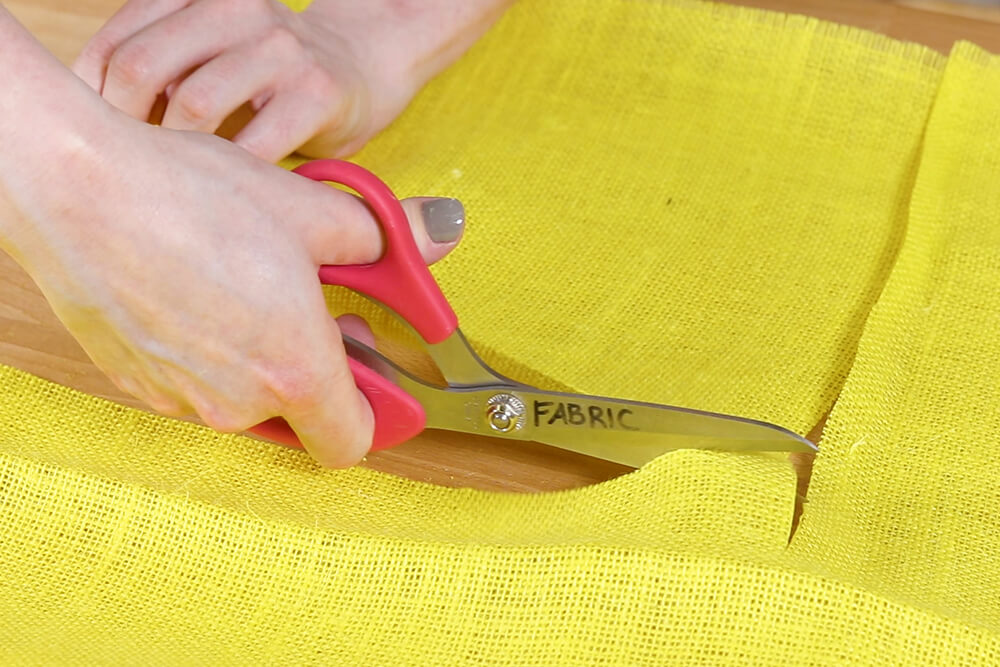
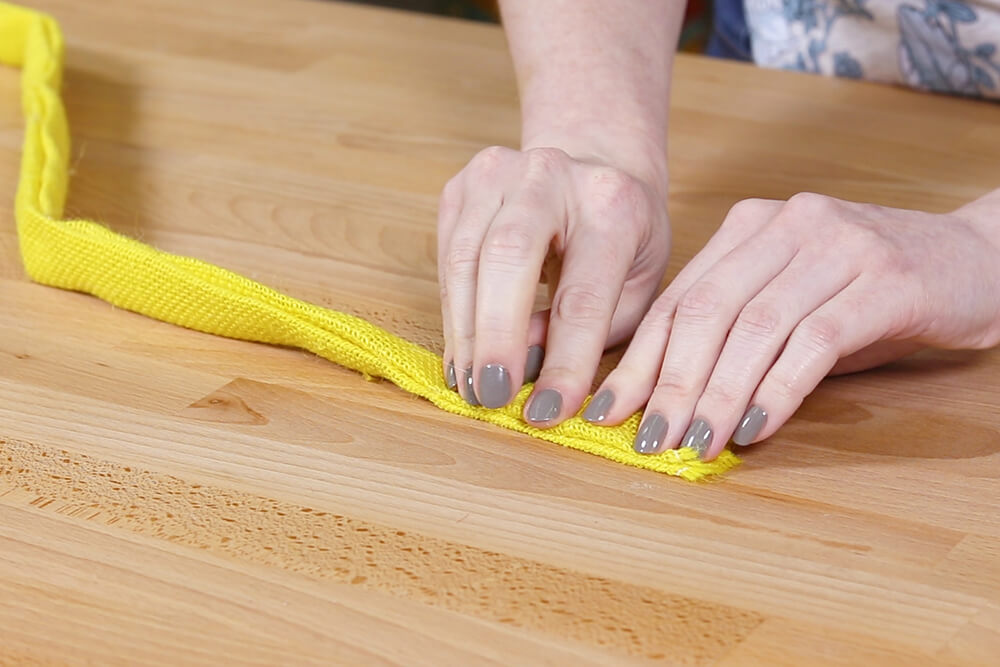
Cut along the grain of the burlap to minimize fraying. I think the frayed edges adds to the charm of burlap, but if you don’t want strands of burlap coming off, you can sew around the outside of each of the pieces of burlap.
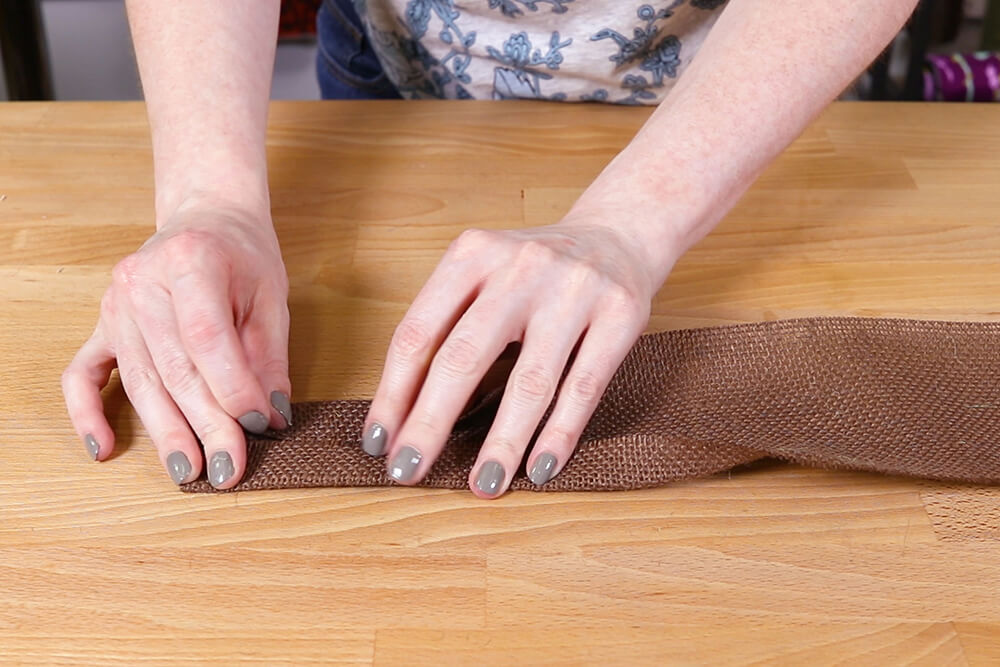
You can also use burlap ribbon for the squares, but burlap fabric is the more economical choice.
Step 3: Create the leaves and petals
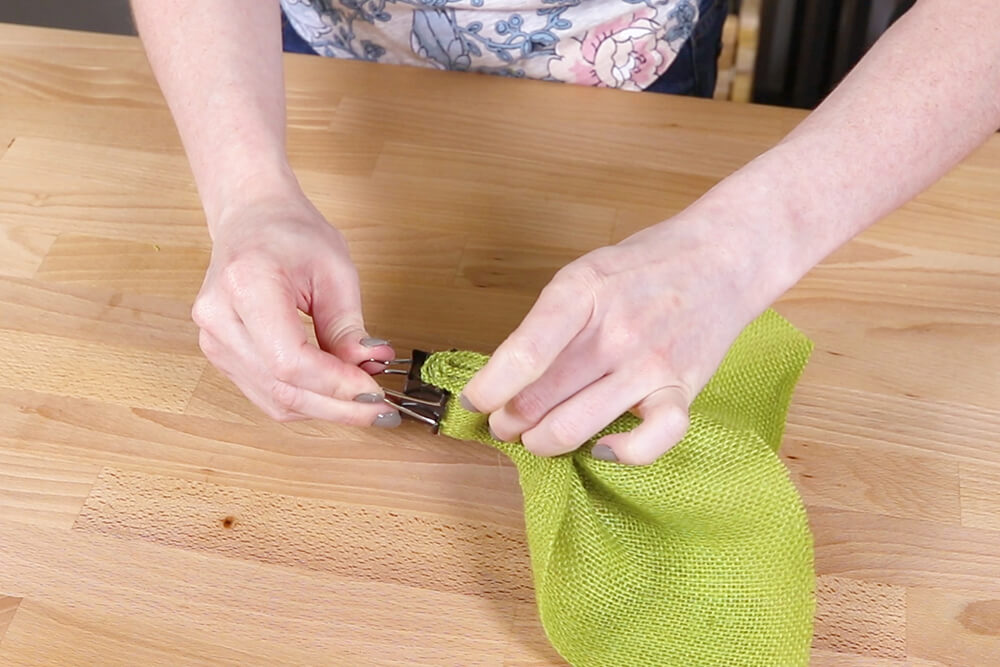
It may help to use clips to hold the burlap together, especially the first couple times you do it.
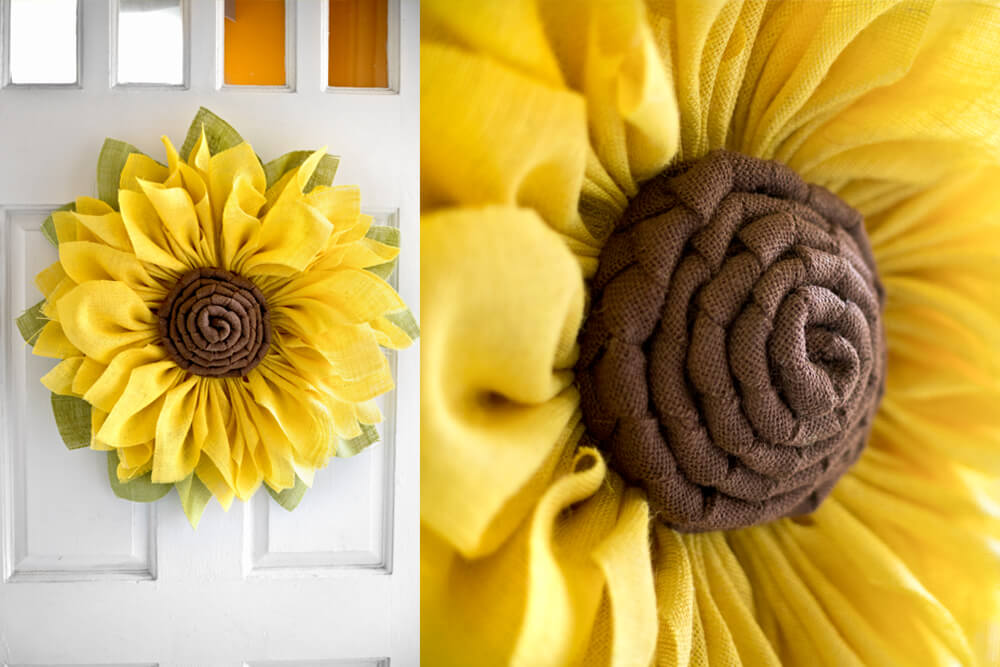
Sunflower
Cut squares of the leaf color and the petal color that are 11 ½ to 12 inches. You’ll need 6 of the leaf color and 24 of the petal color.
The leaves and petals are created in the same way for the sunflower.
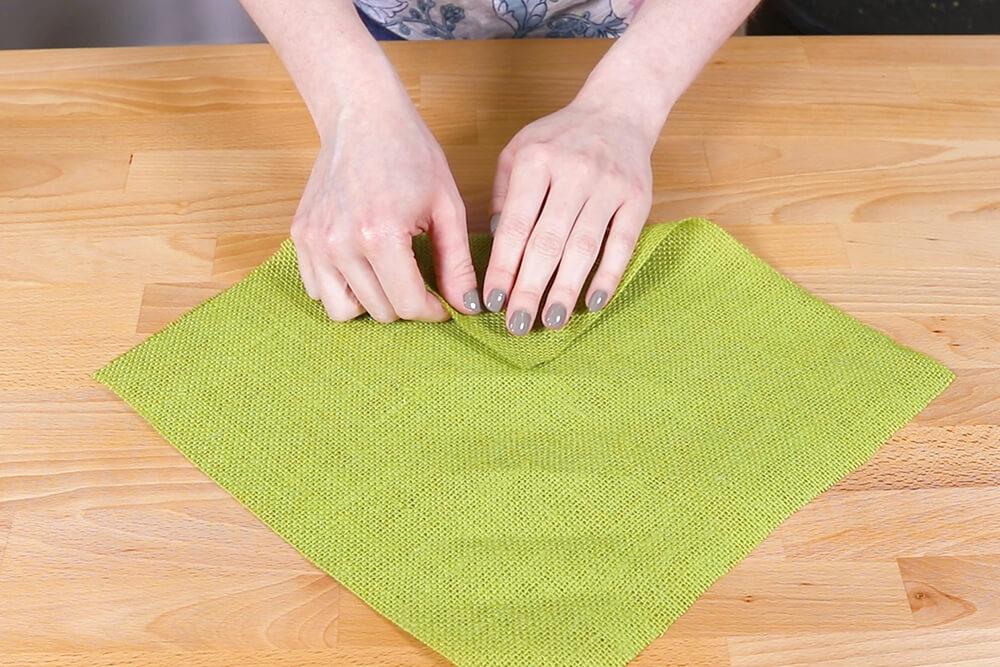
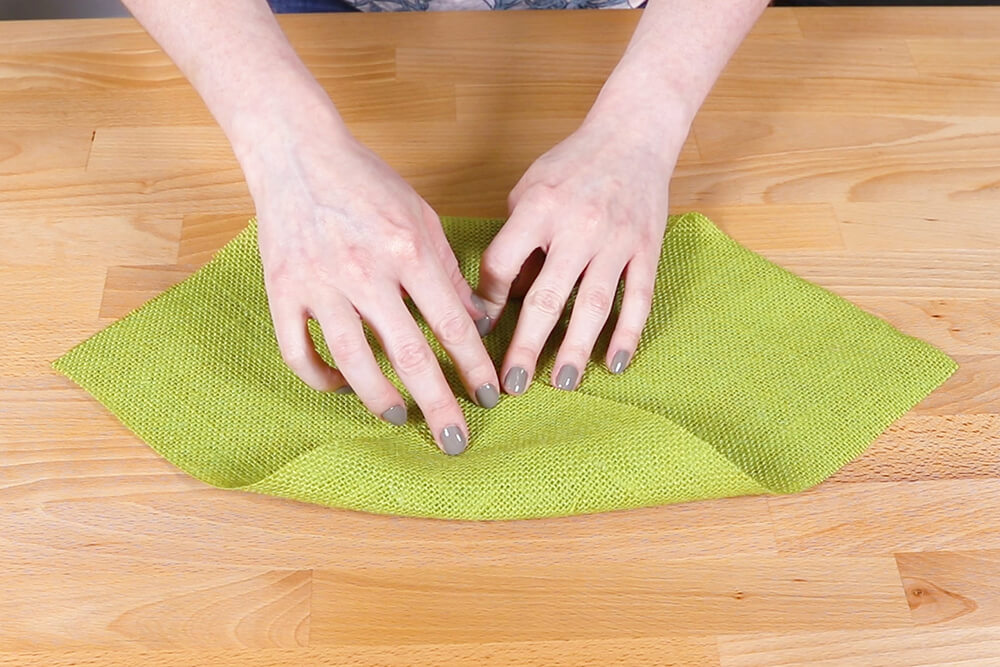
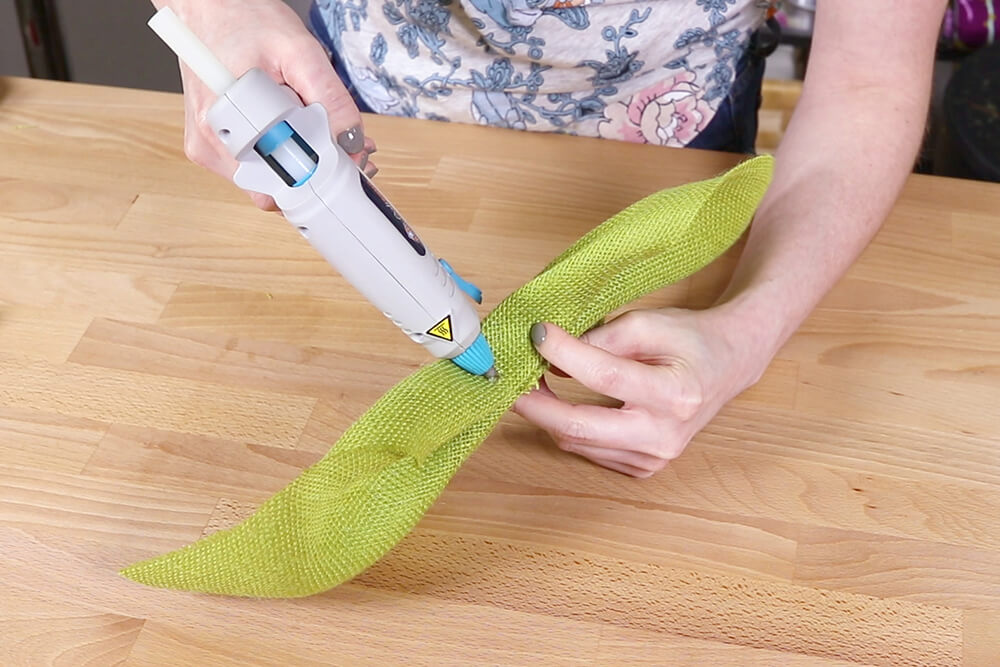
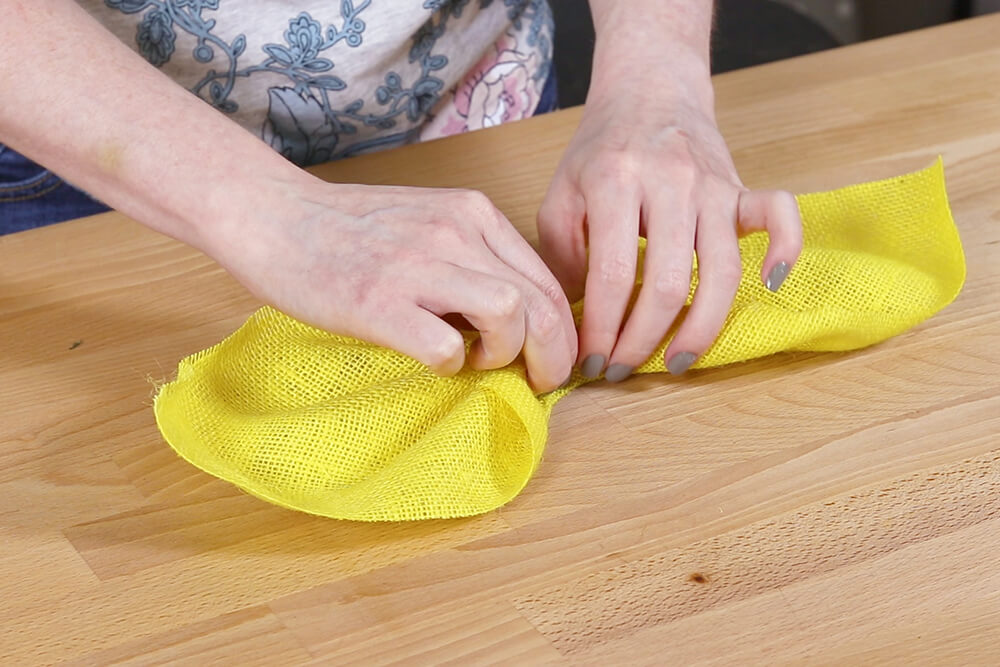
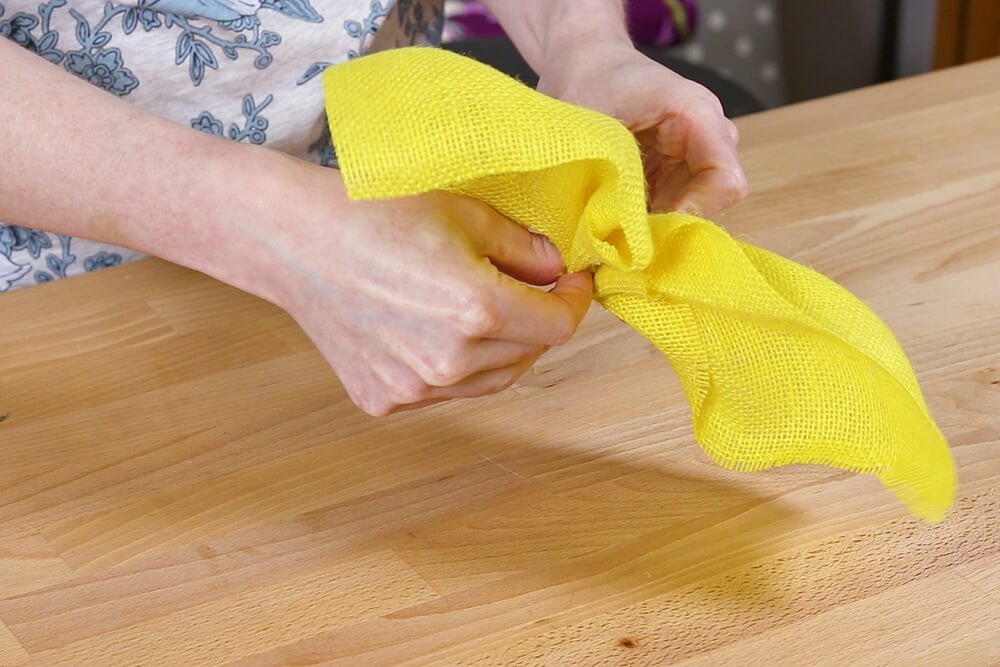
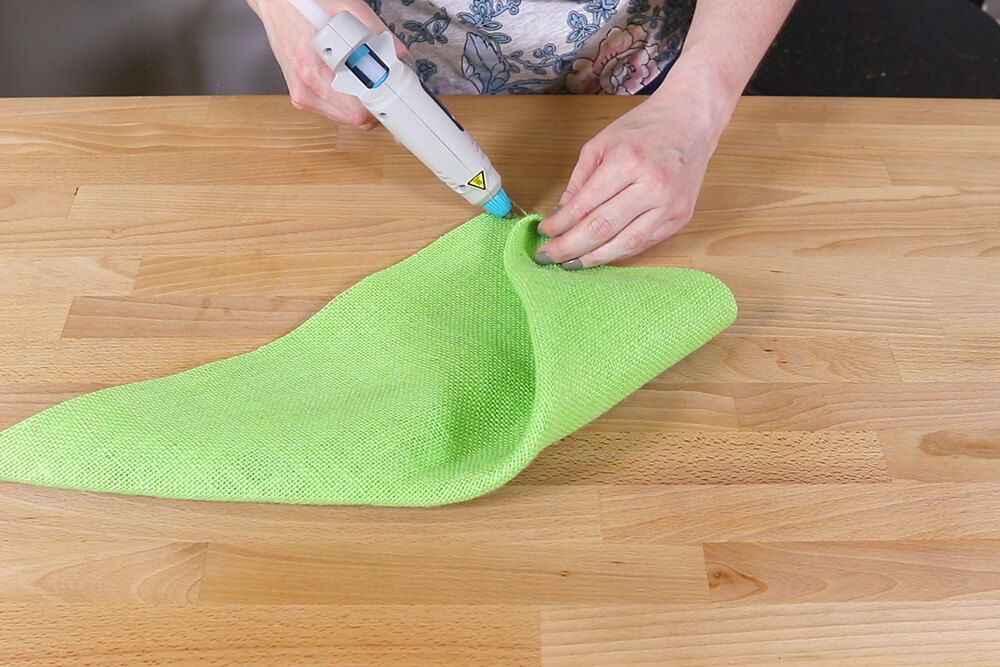
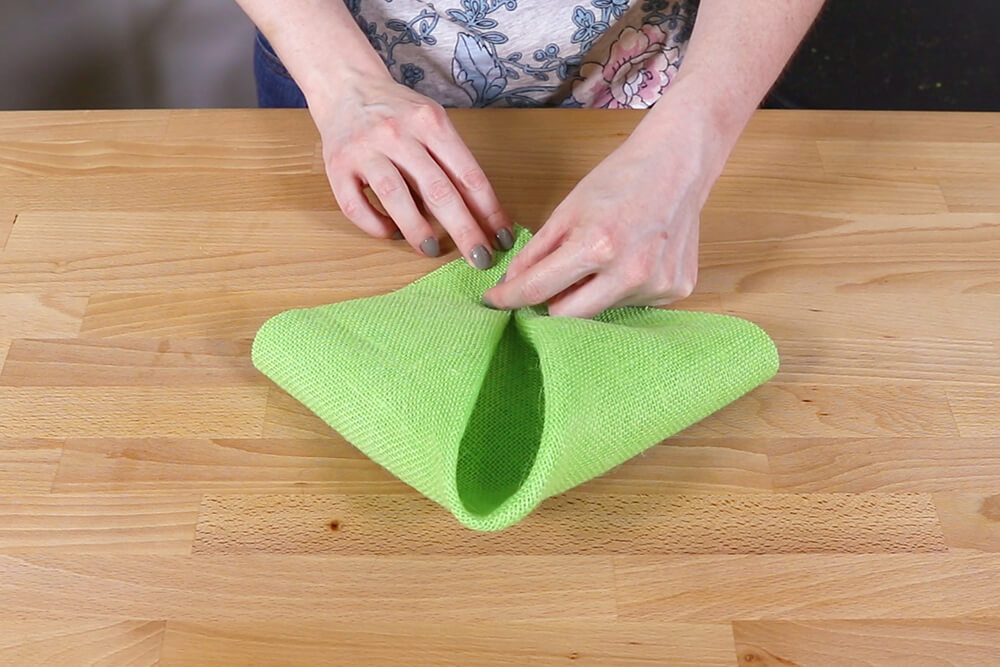
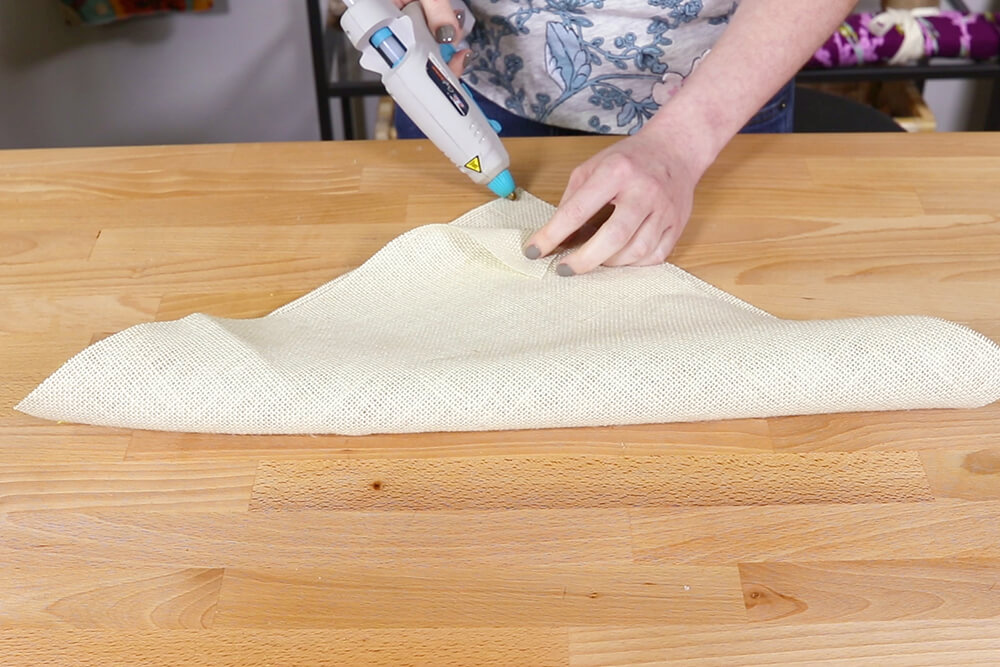
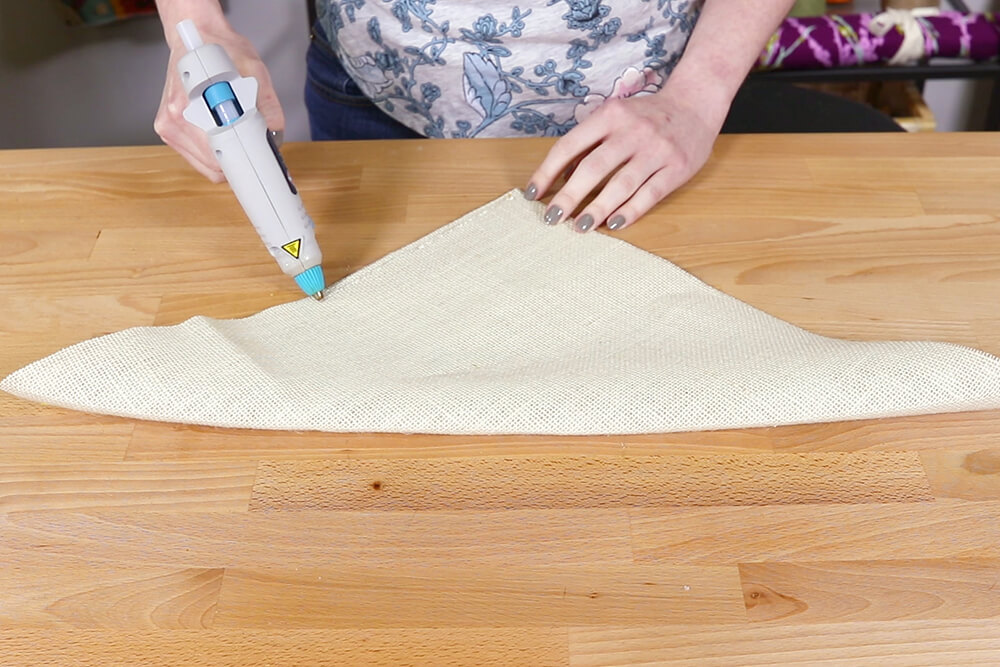
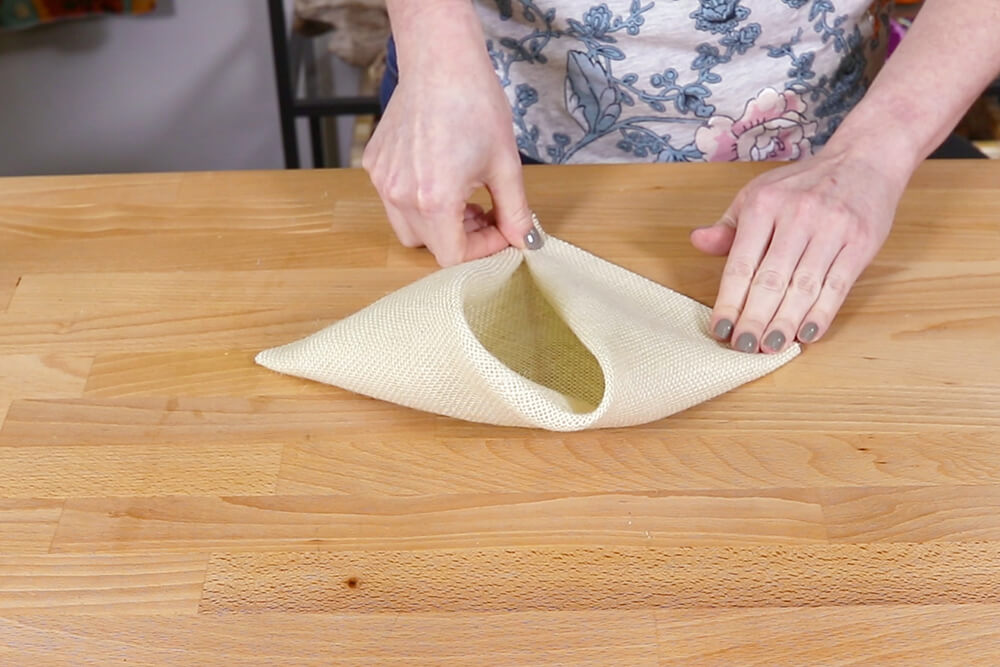
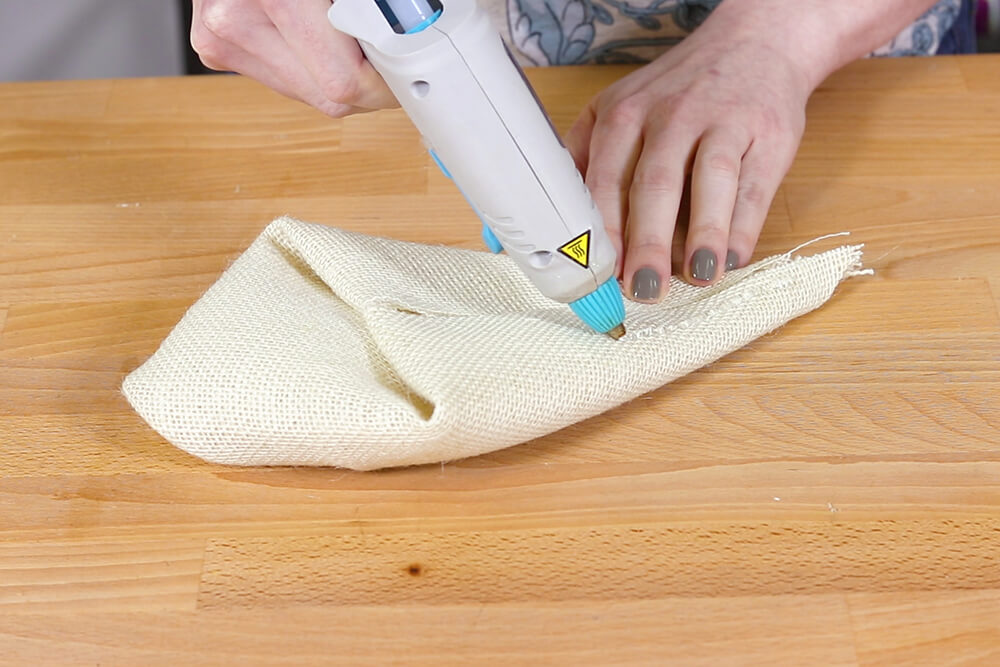
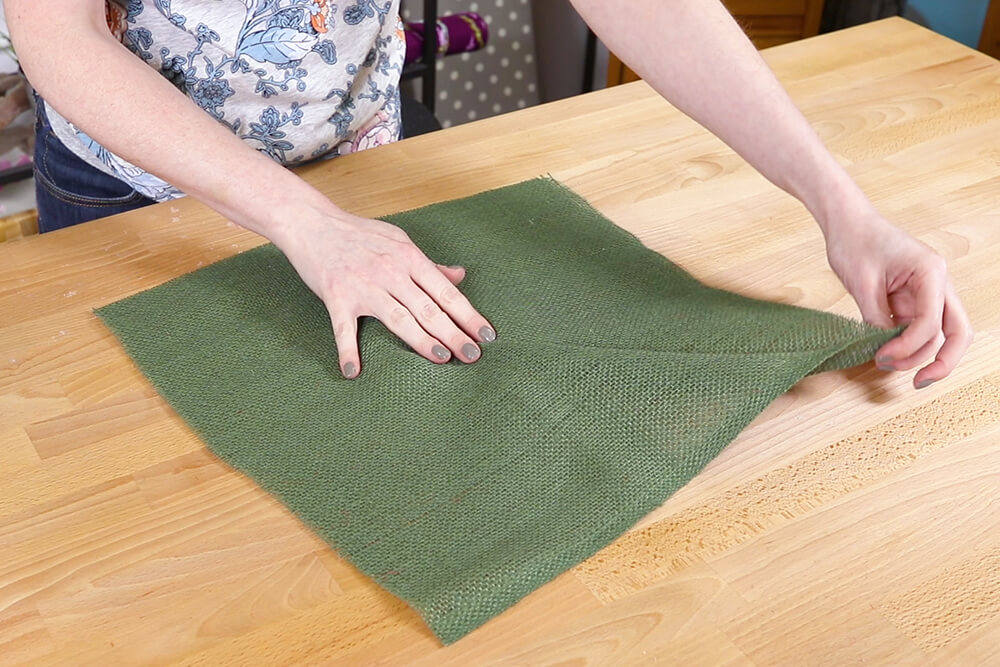
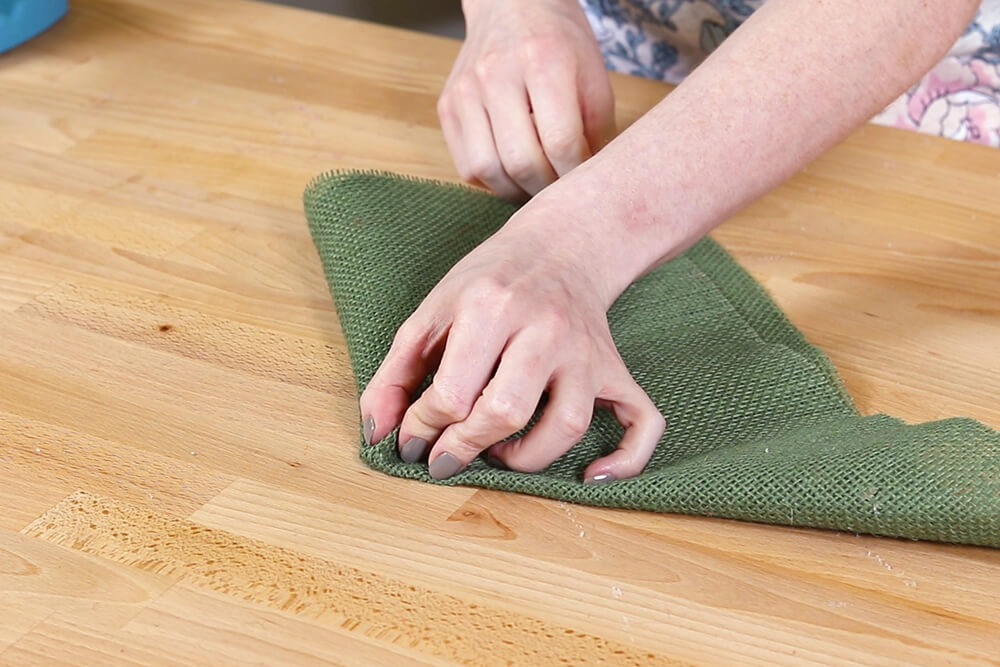
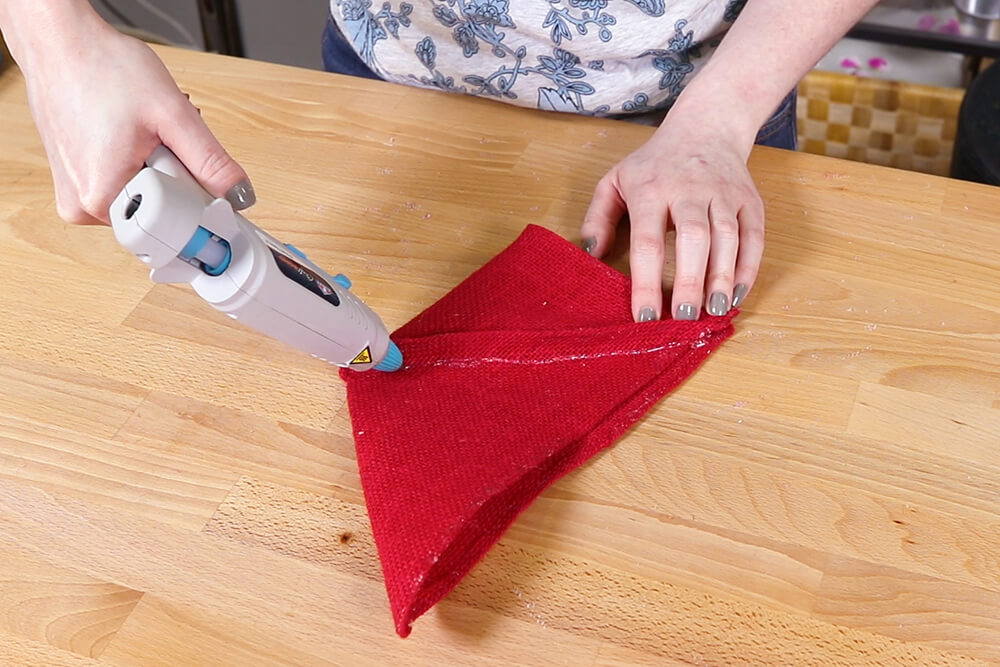
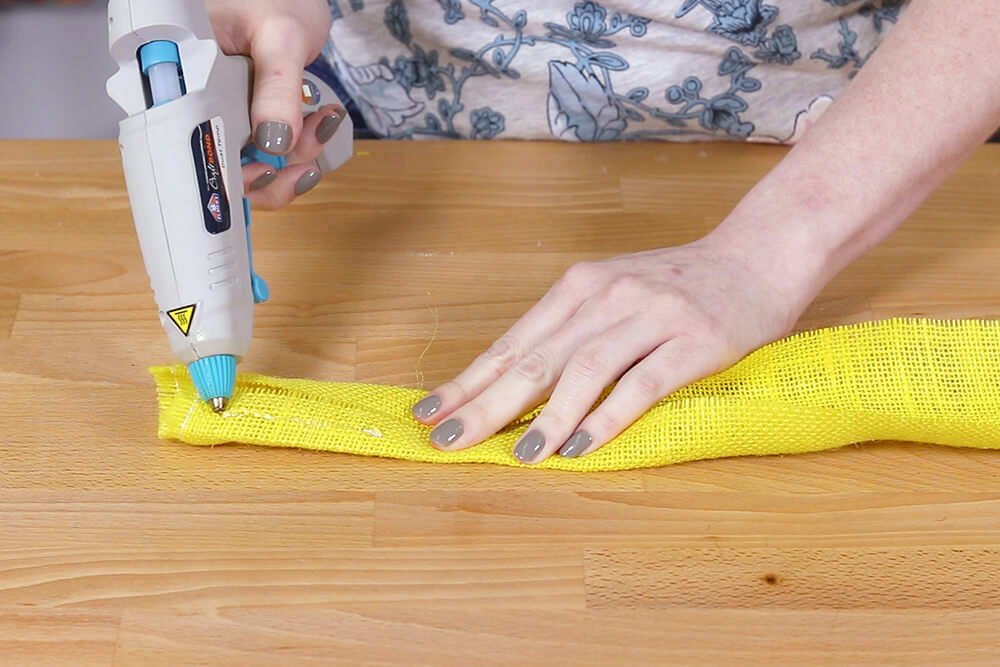
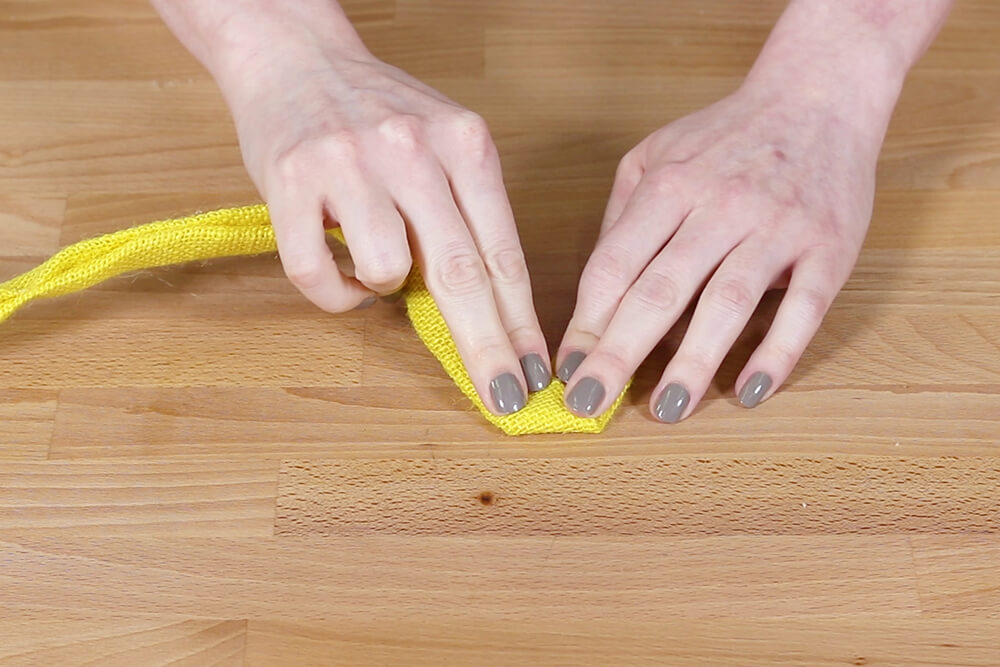
Fold the corners into the center. Pinch the center to create one pleat. Pinch the burlap on both sides of the first pleat and hold the folds together.
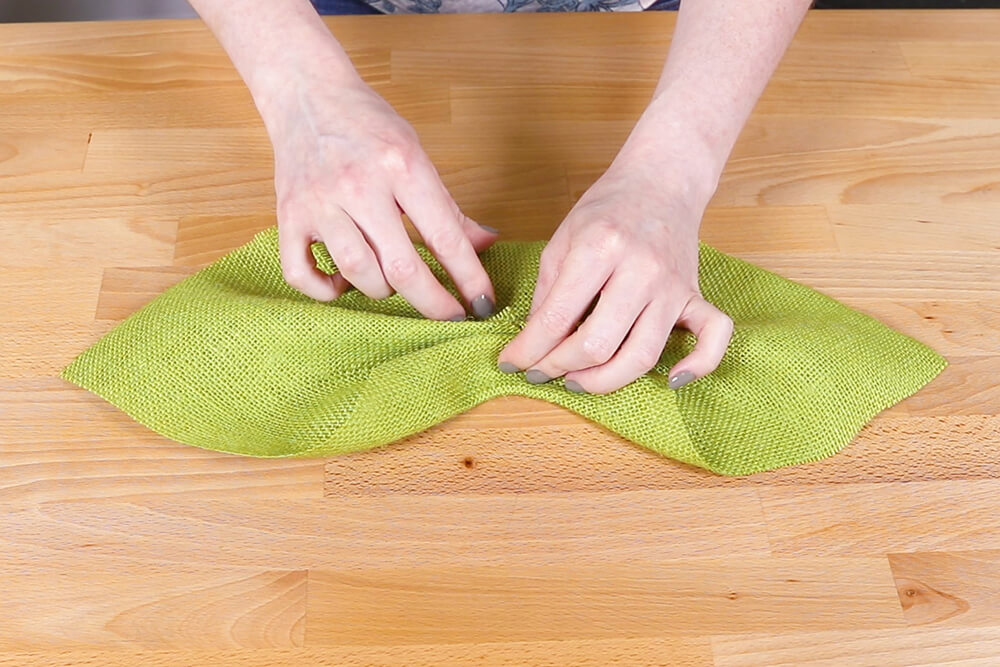
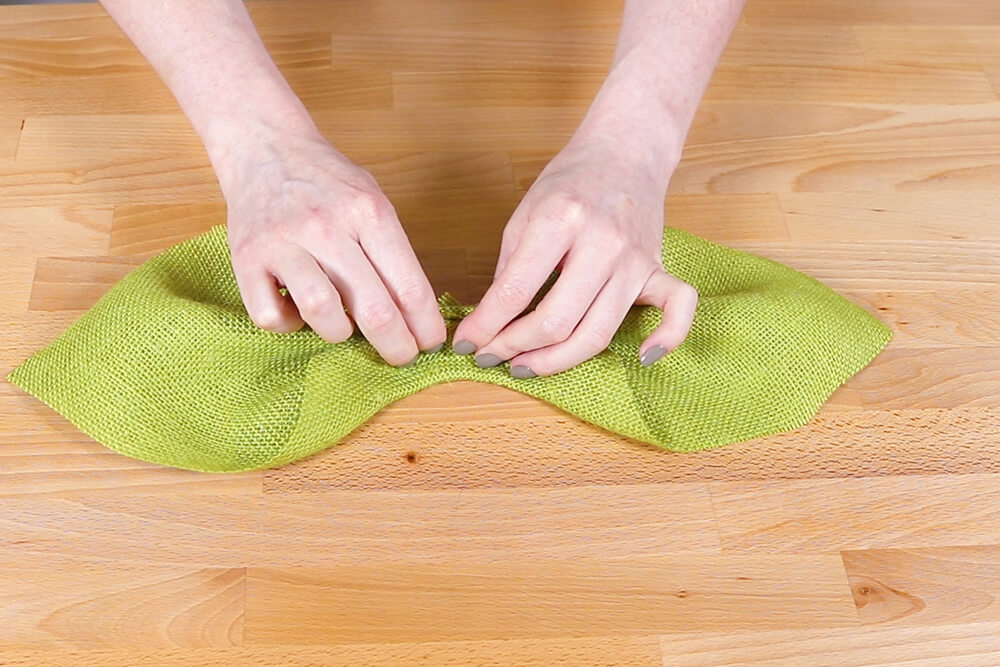
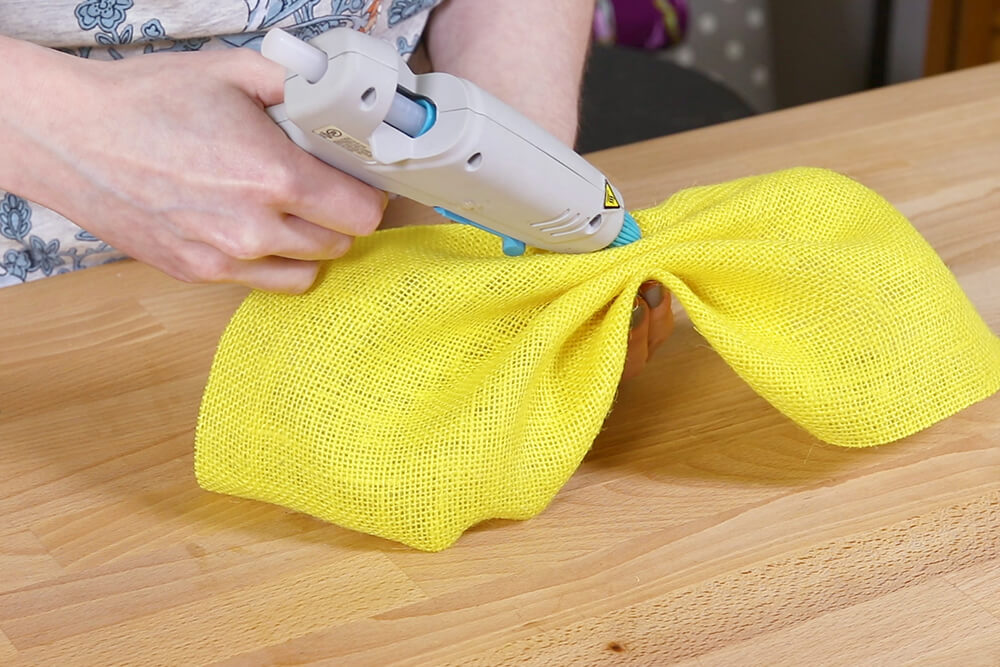
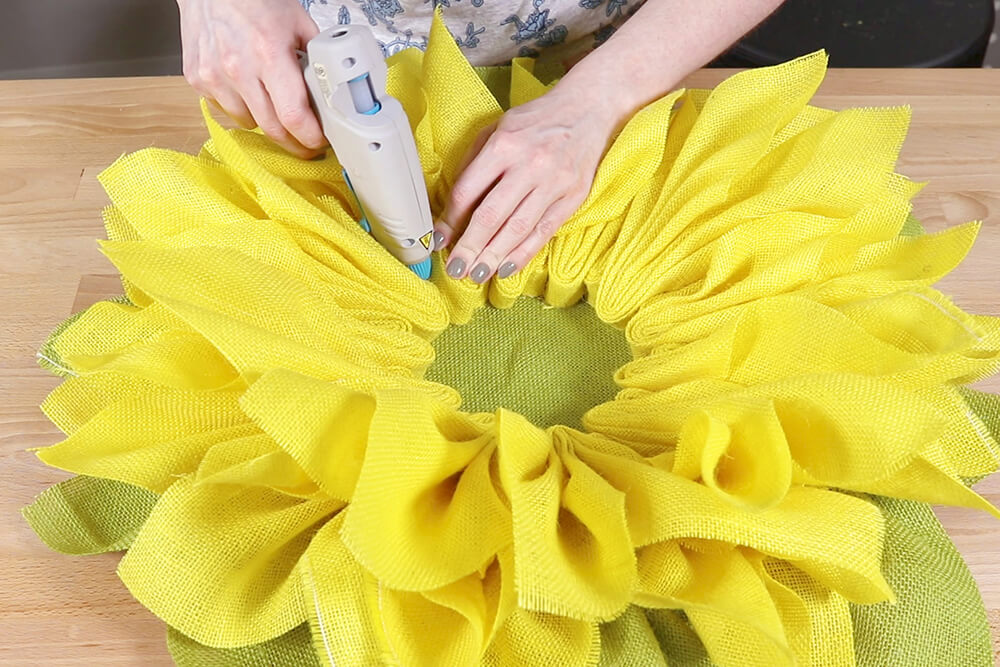
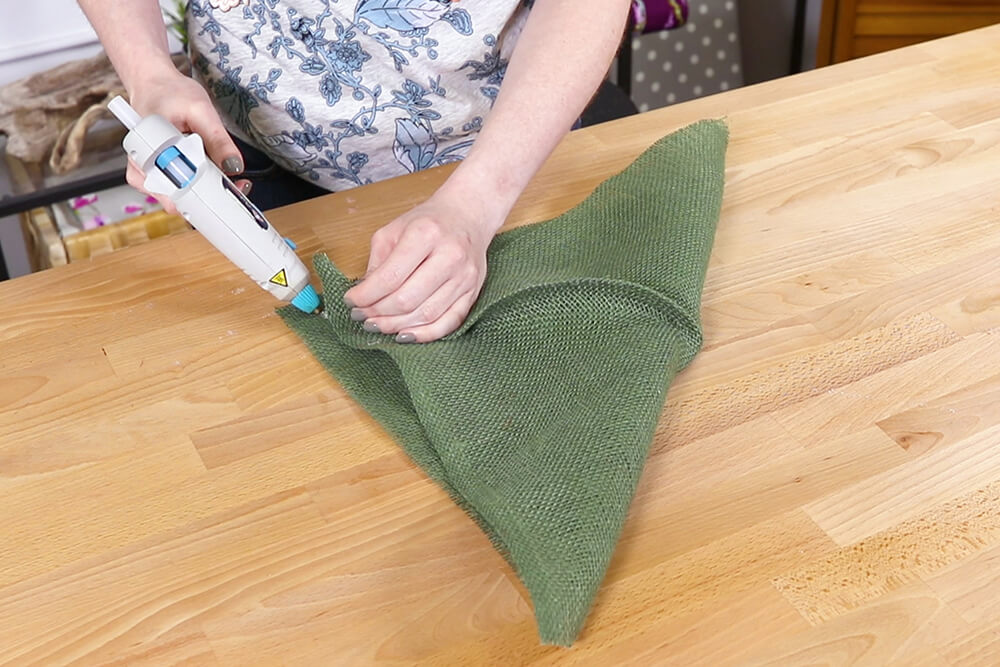
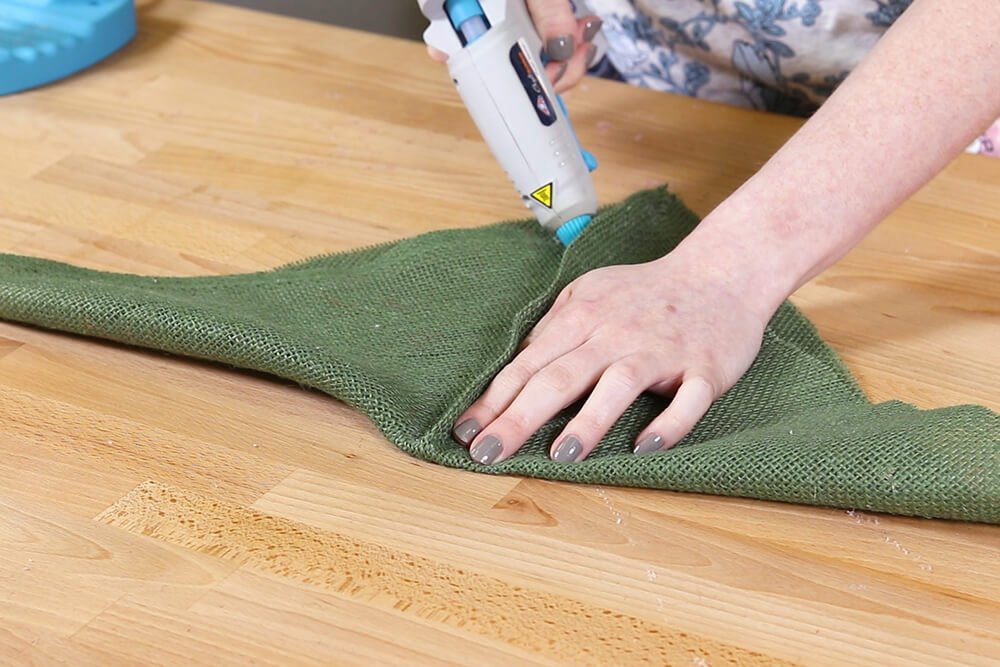
On the front, hot glue between all the folds. Do the same between the back folds.

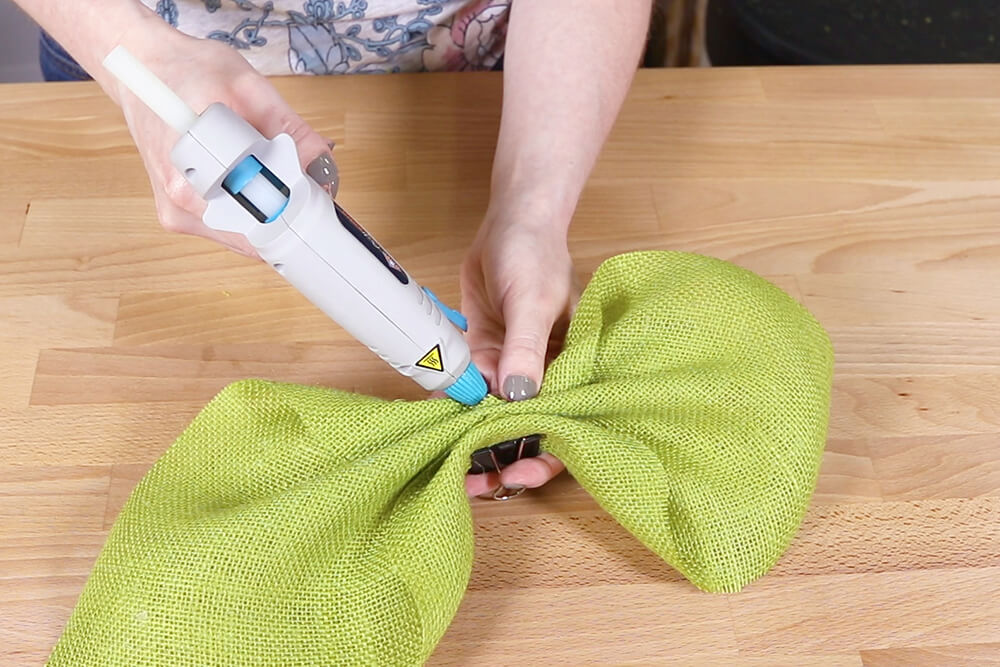
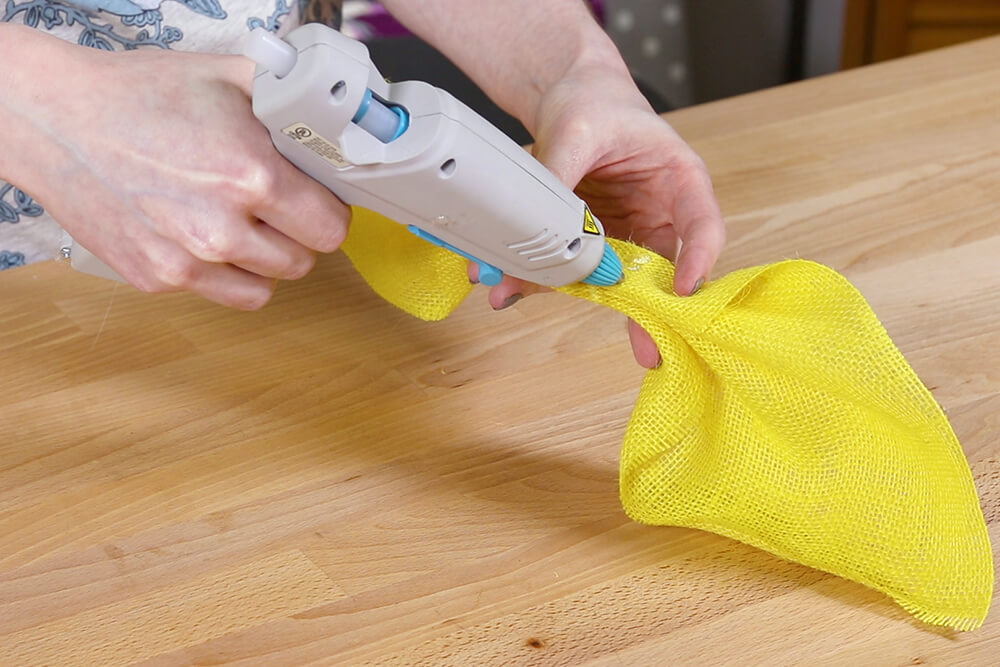
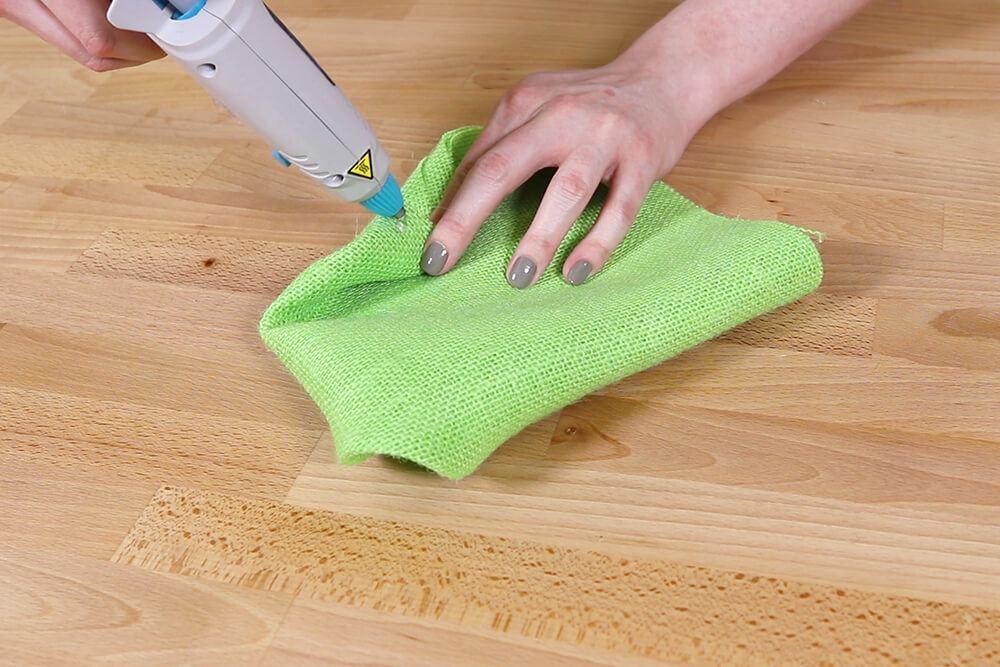
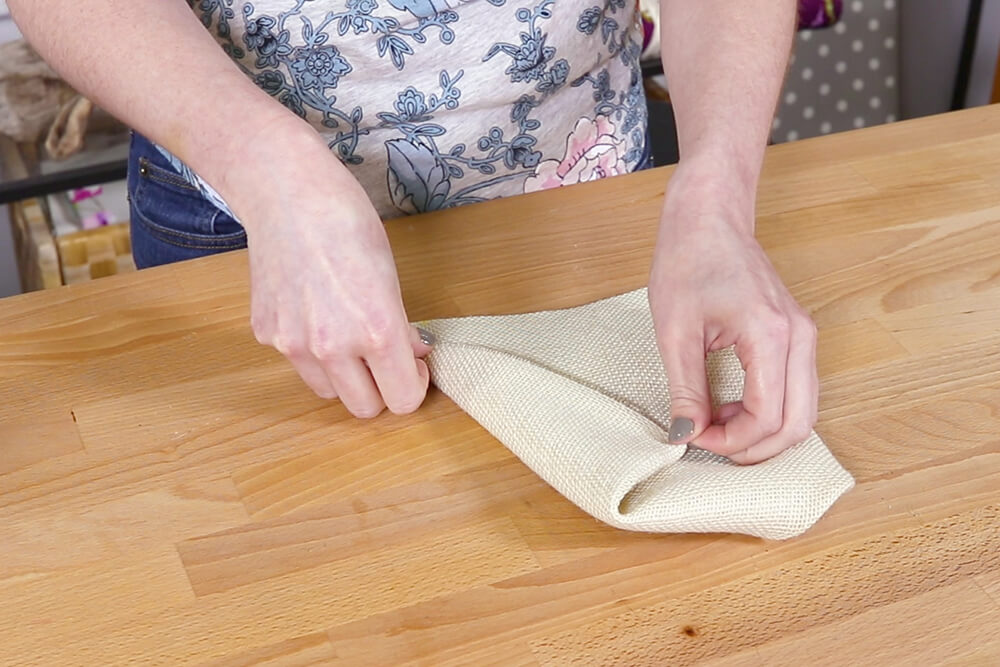
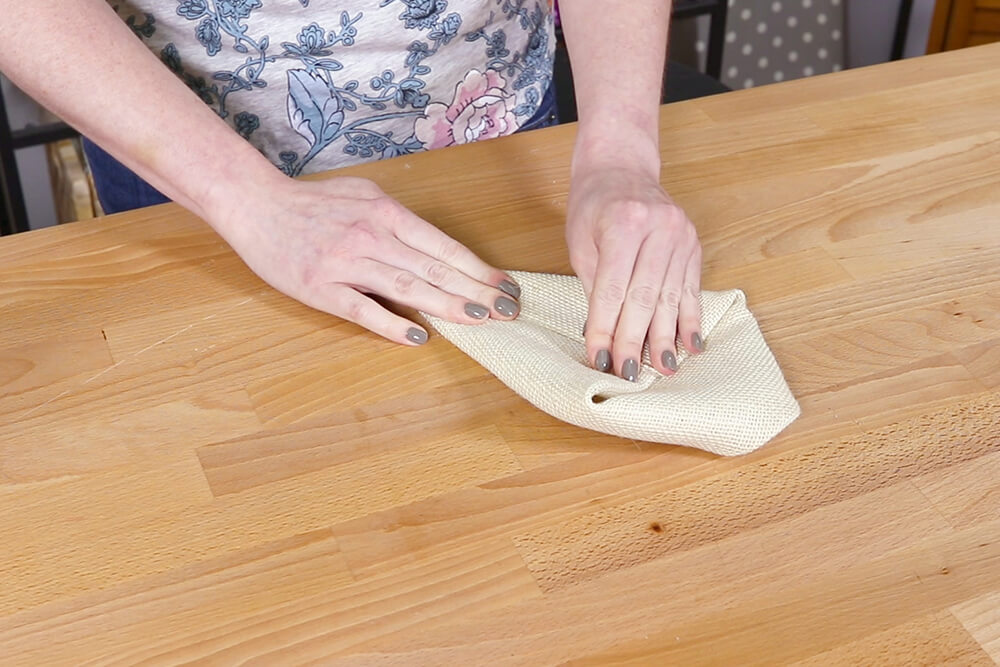
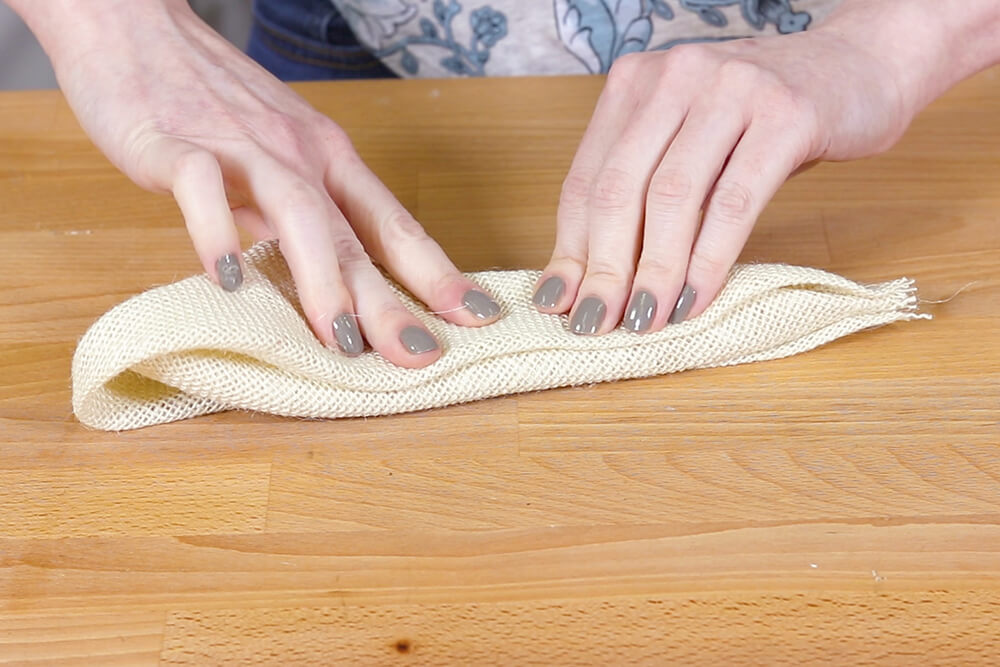
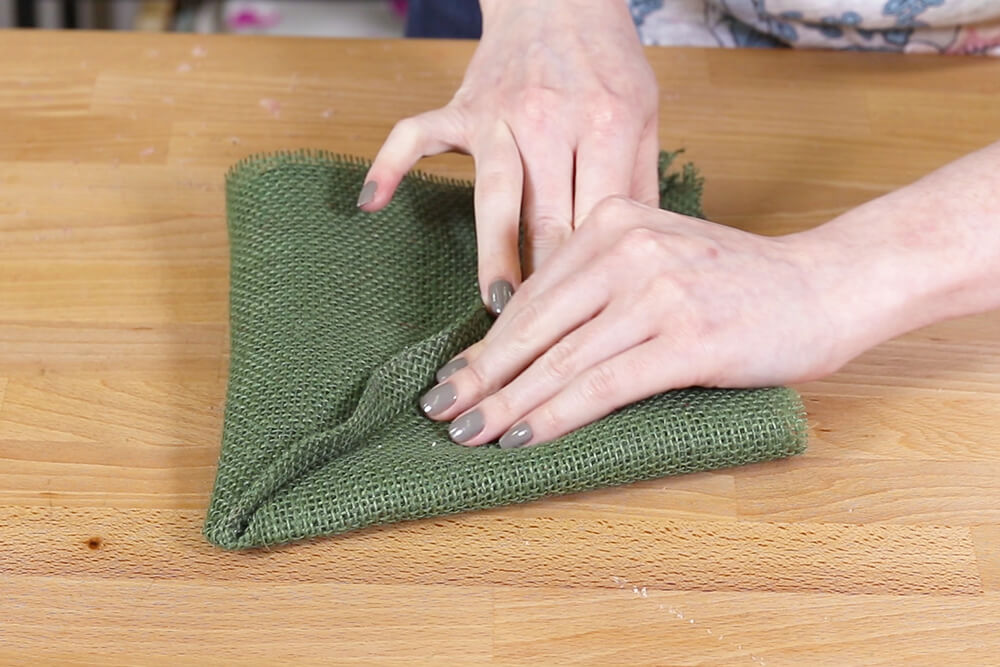
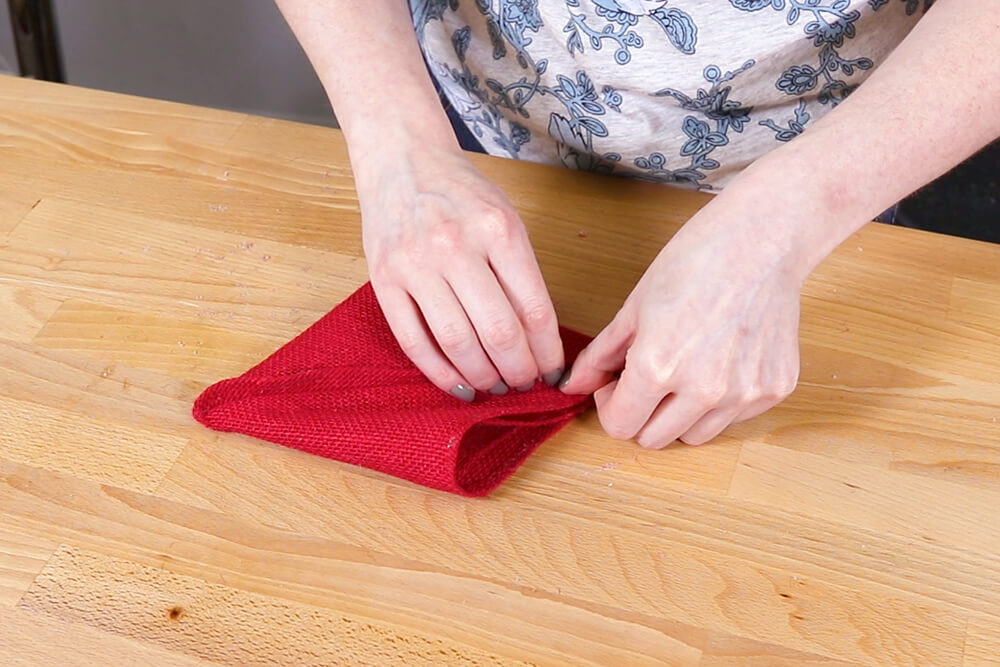
Put hot glue on the middle of one of the sides and fold it in half. Clip the folded end while the glue dries.
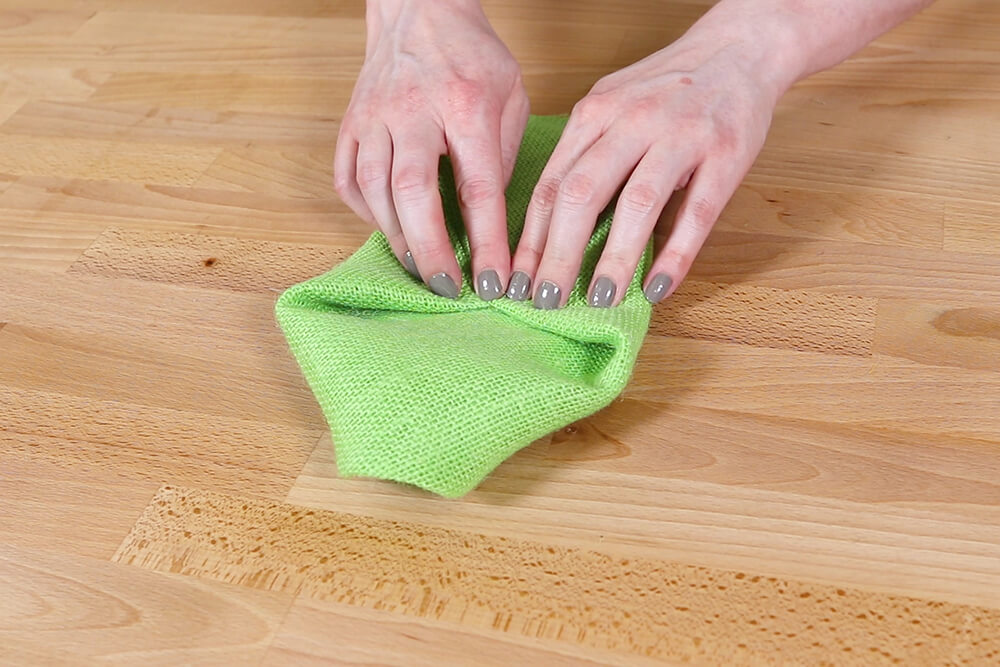
Repeat for a total of 6 leaves.
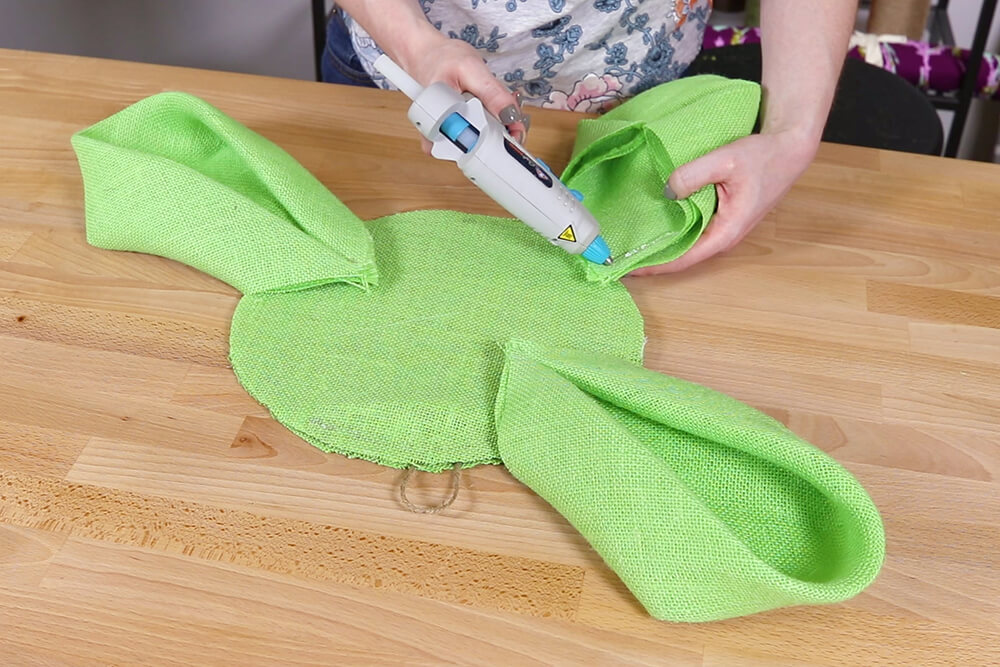
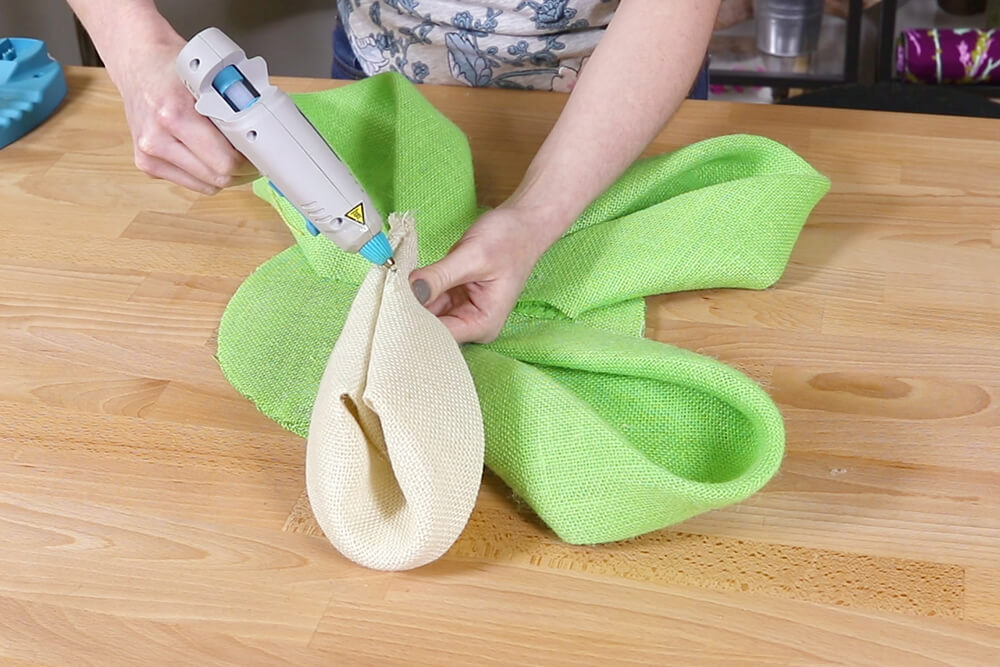
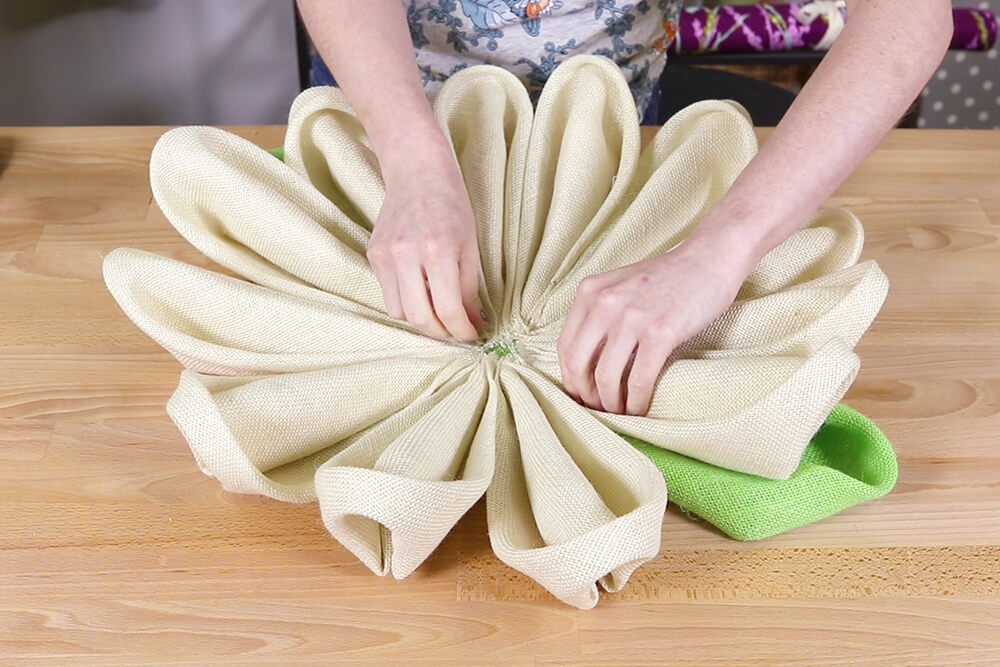
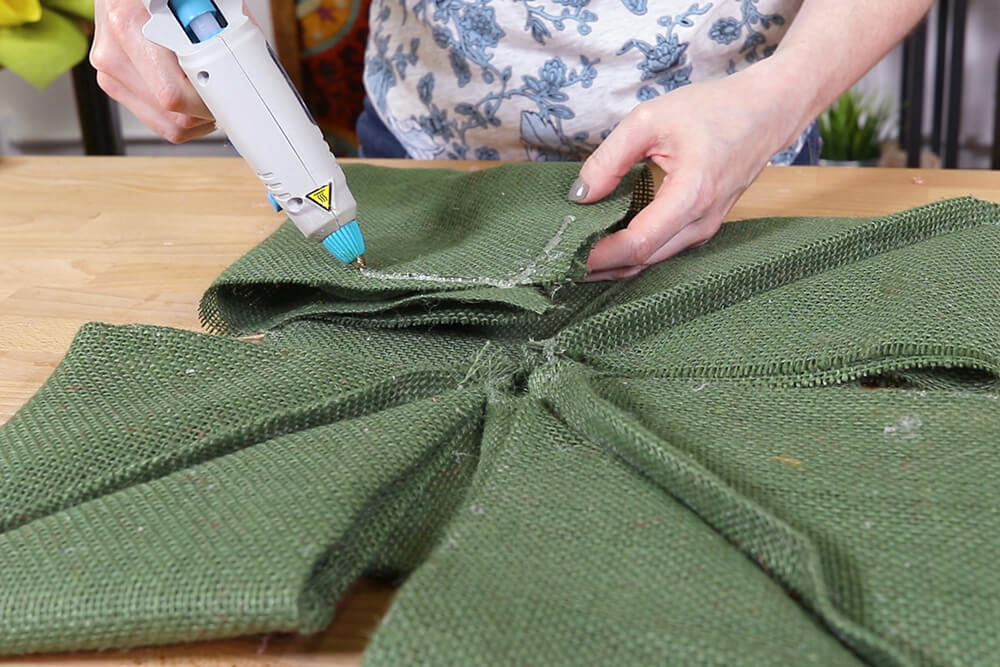
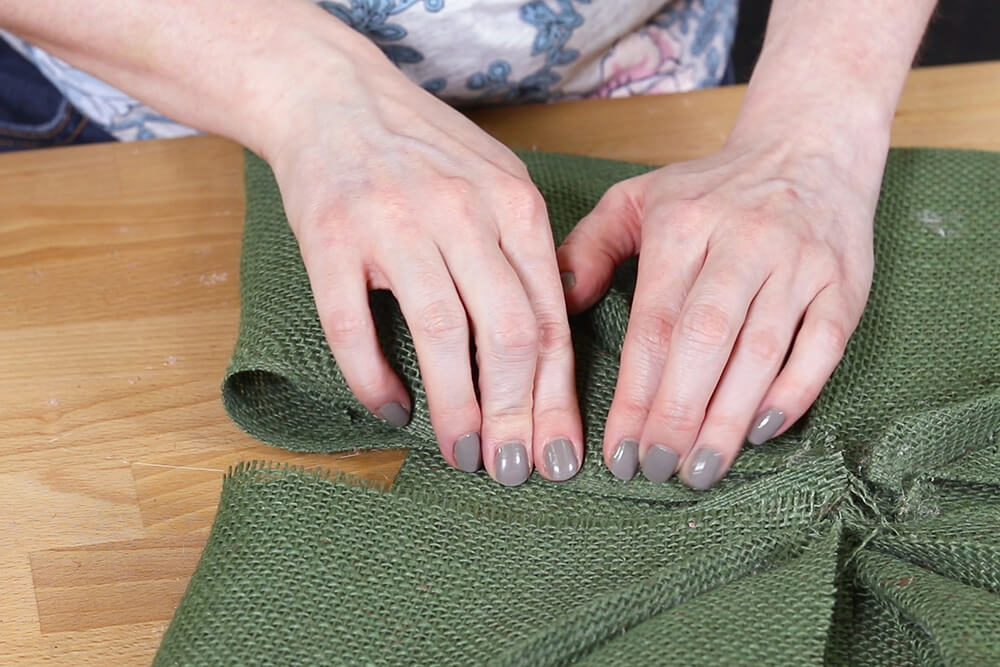
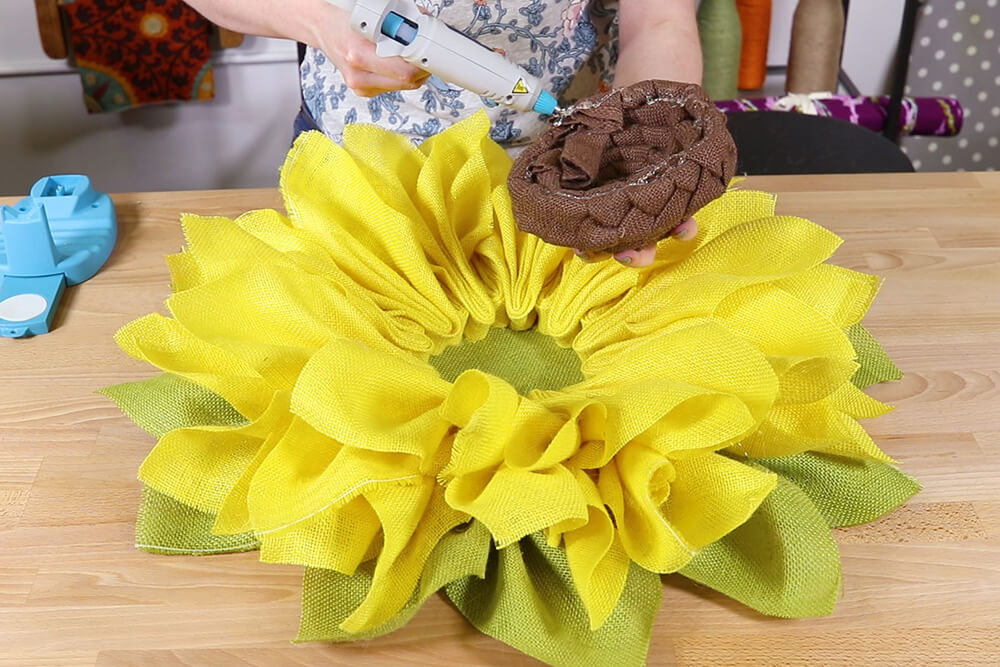
Glue the leaf pieces evenly around the edge of the backing.
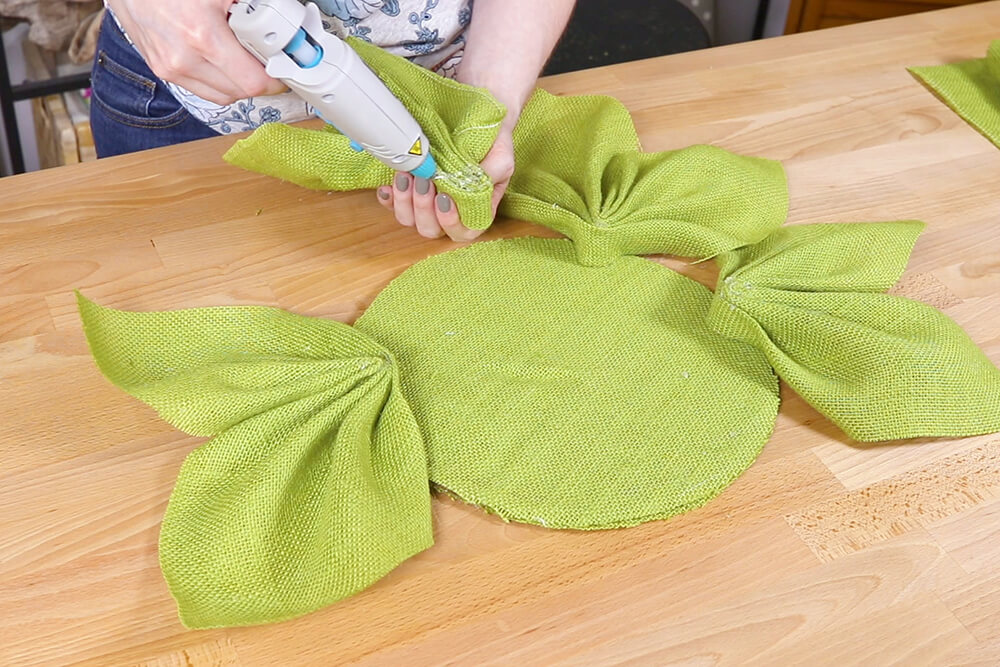
Create a total of 24 petals in the same way as the leaves.
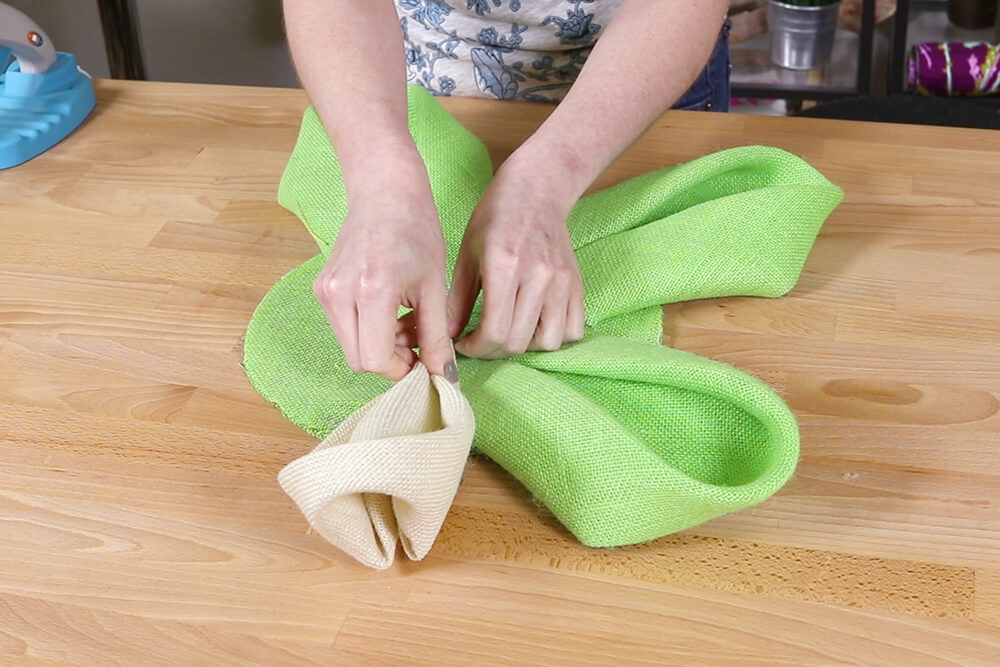
Glue 2 petals between the leaves further in from the edge.

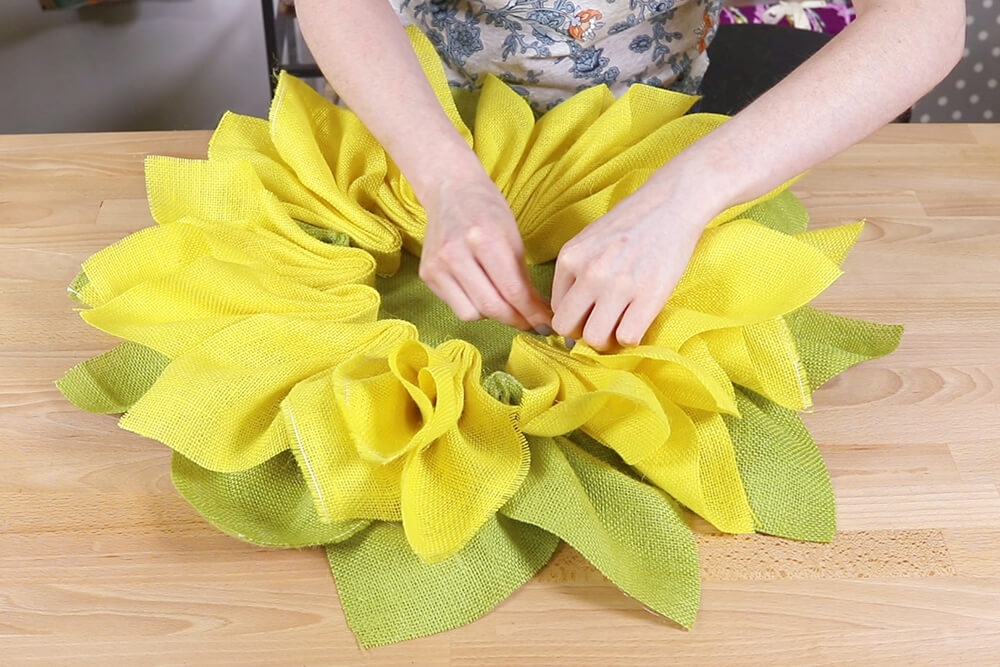
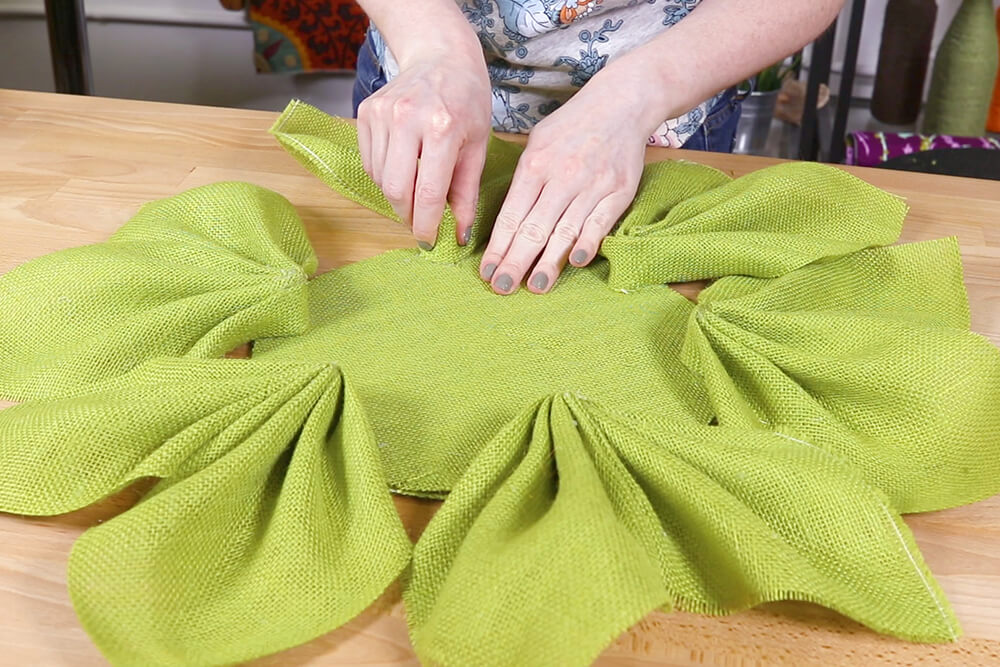
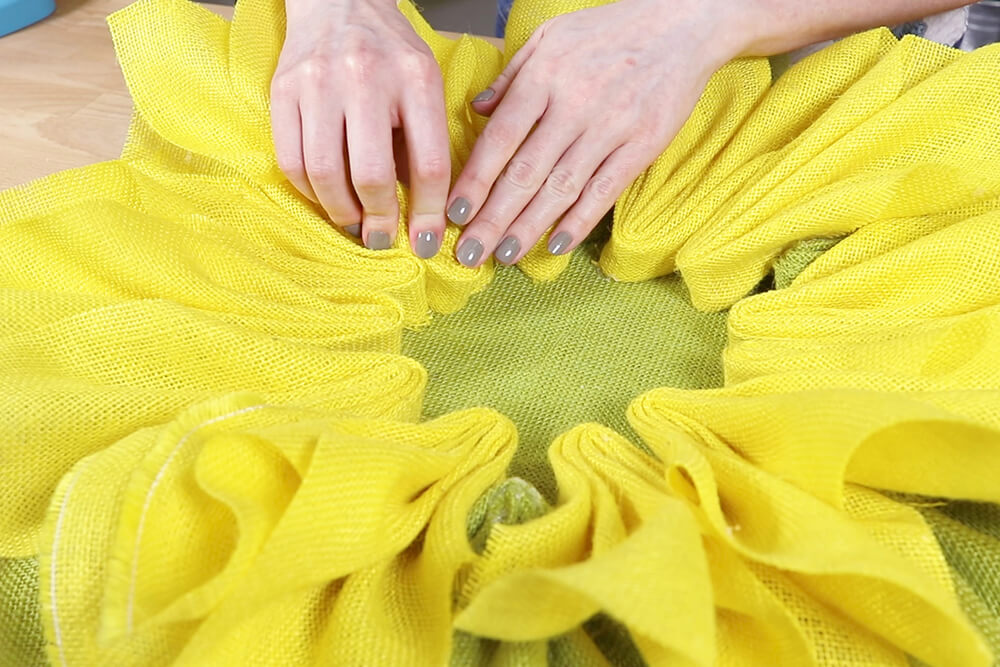
Create a second layer of petals by gluing the remaining 12 petals between the first layer of petals. Place this layer a little further in.
Also glue between the bottom of the petals.
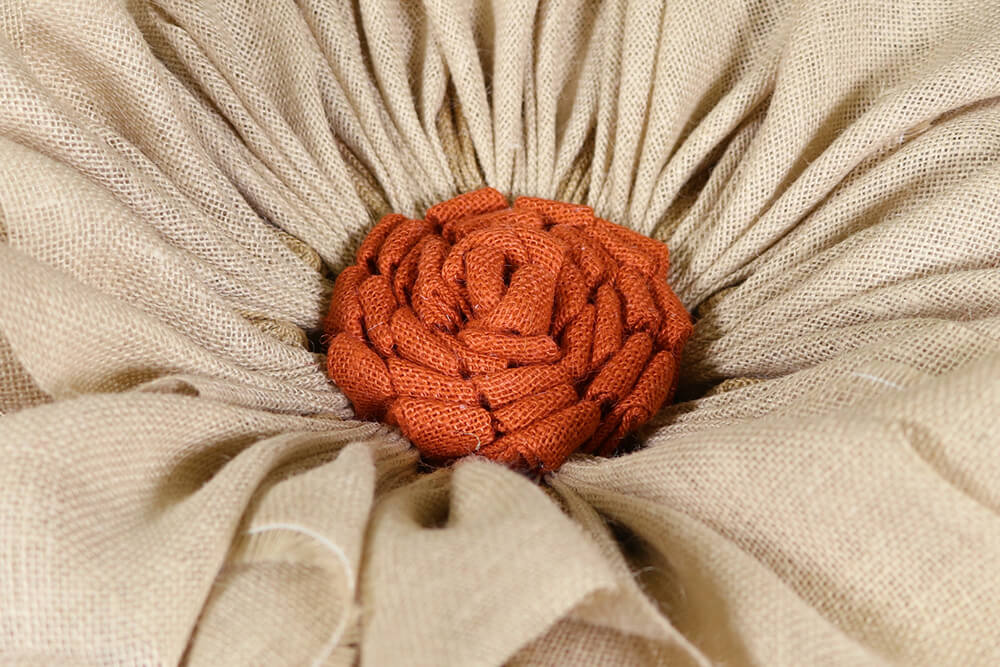
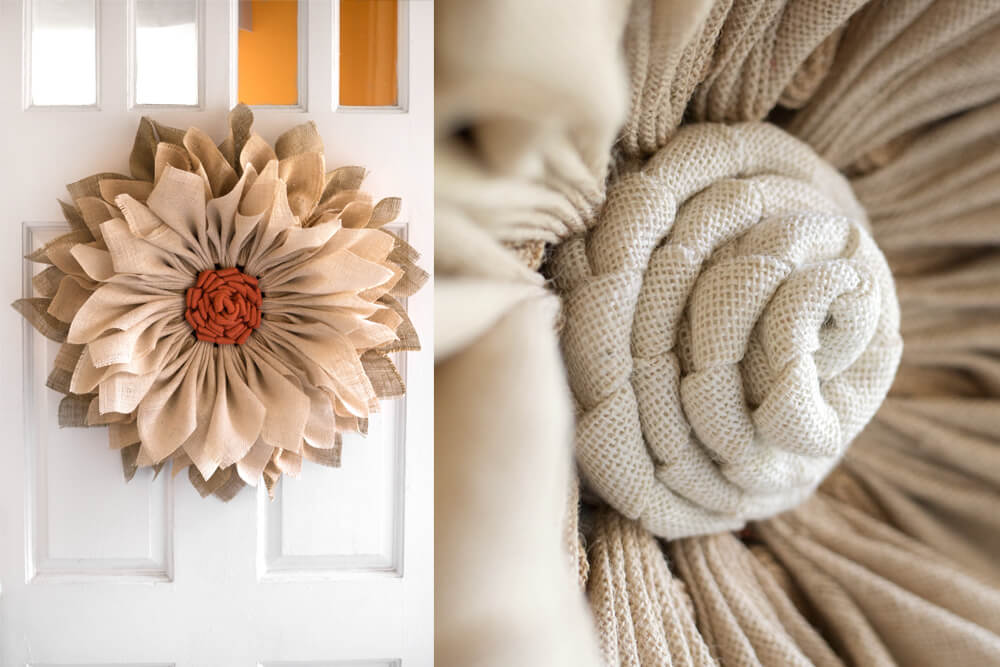
Fall Flower
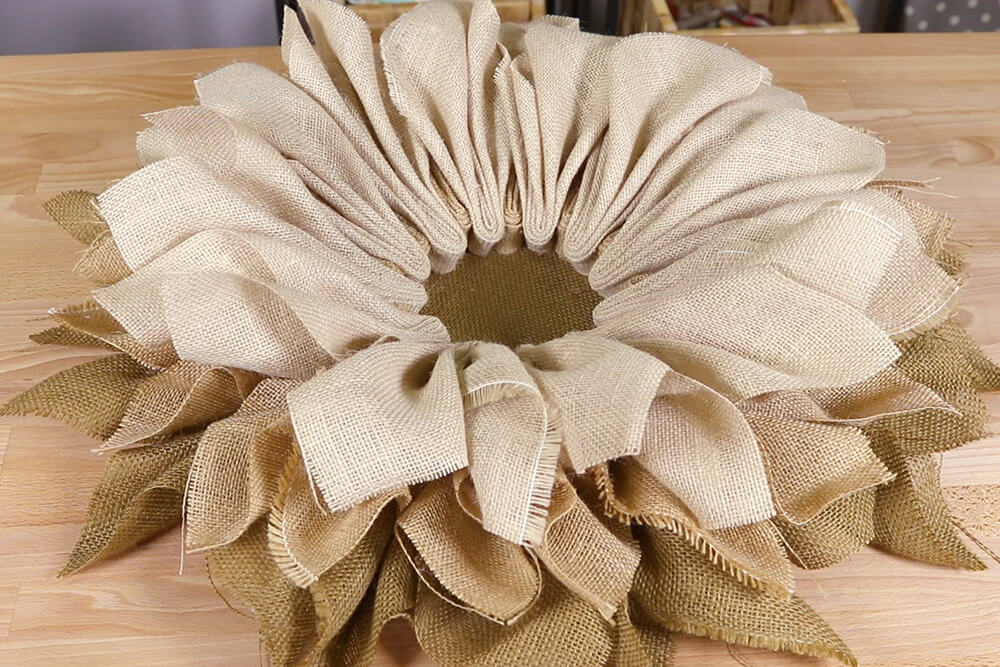
This method of creating petals works well for sunflowers, and I also used it for my fall flower. I used dark, medium, and light natural shades of burlap.
For this one I used 12 pieces on the bottom layer instead of 6.
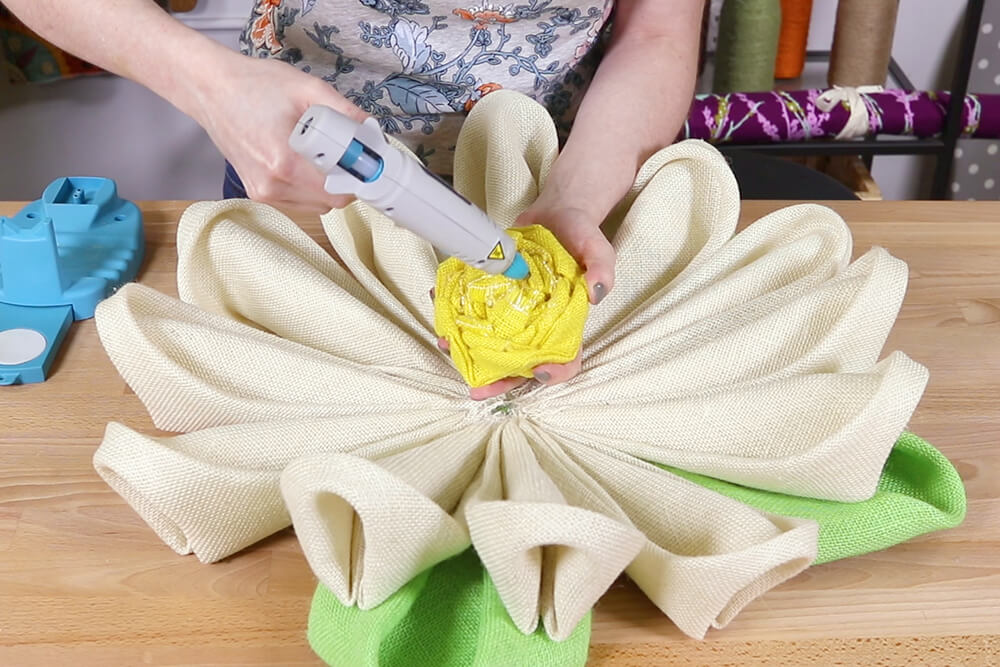
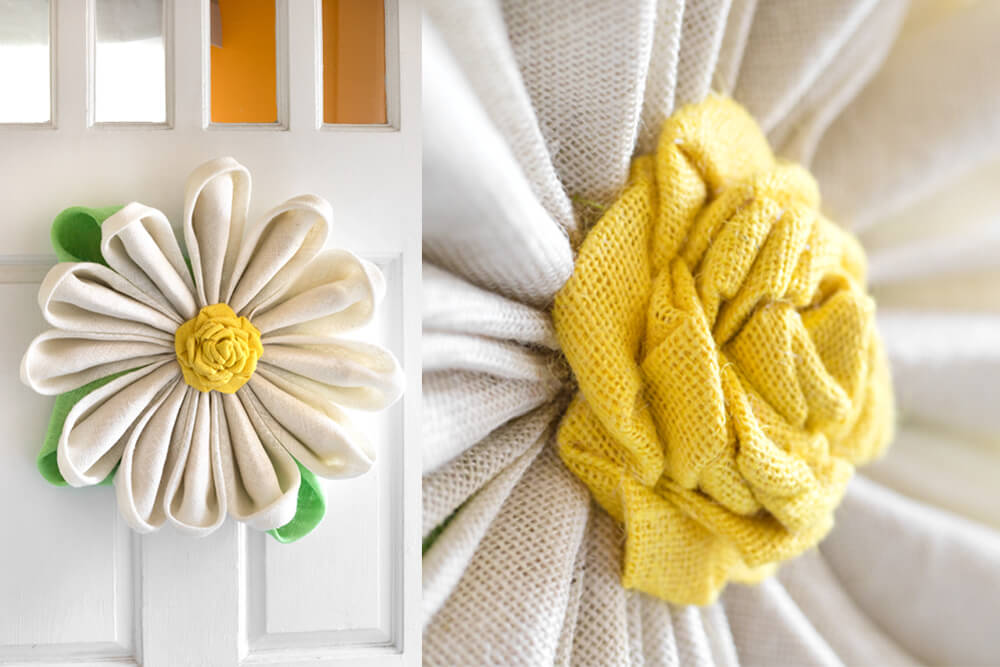
Daisy
There are other ways to create leaves and petals for different flowers. To make the spring daisy, cut squares that are 15 ½ to 16 inches. Make 3 or 4 for the leaves and 12 for the petals.
For the leaves, fold the square in half diagonally. Fold the side corners down to the middle corner and glue.
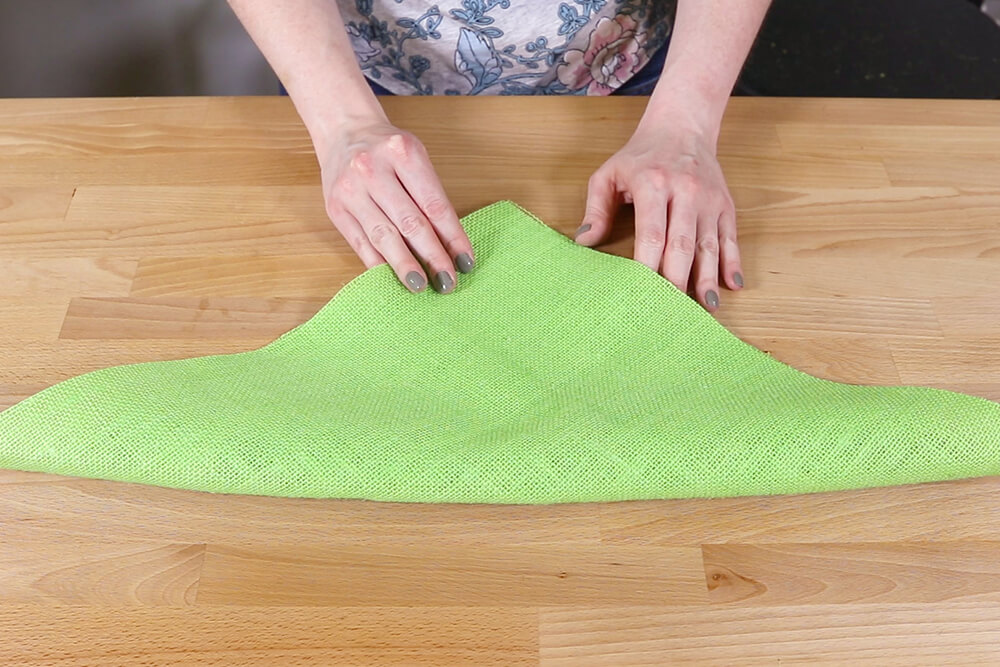
Turn the piece over and bring the side corners in to the center and glue.
Arrange the leaves on the back. I’m making them asymmetrical but you can space them evenly or add more leaves if you prefer.
Hold the piece vertically before gluing to make sure the leaves near the top don’t flop down. Move them further to the center of the backing if they do. (I didn’t check this before gluing, but the glue hadn’t dried all the way, so I could remove and reposition the leaves easily.)
Glue the leaves down and also glue between loose layers.
The daisy petals are very similar to the leaves. Fold the square diagonally and glue the corner. Place a line of glue half way down the side to the corner. Fold the side corner down to the glued corner.
Repeat for the other corner.
If the layers aren’t holding together, add more glue so the edges don’t gap.

Turn the piece over. Put a line of glue down the side and fold it so the entire edge is at the center.
Repeat for the other edge.

Fold the petal in half and glue the back edges together.
Arrange the petals evenly with the ends at the center of the backing and glue them down.
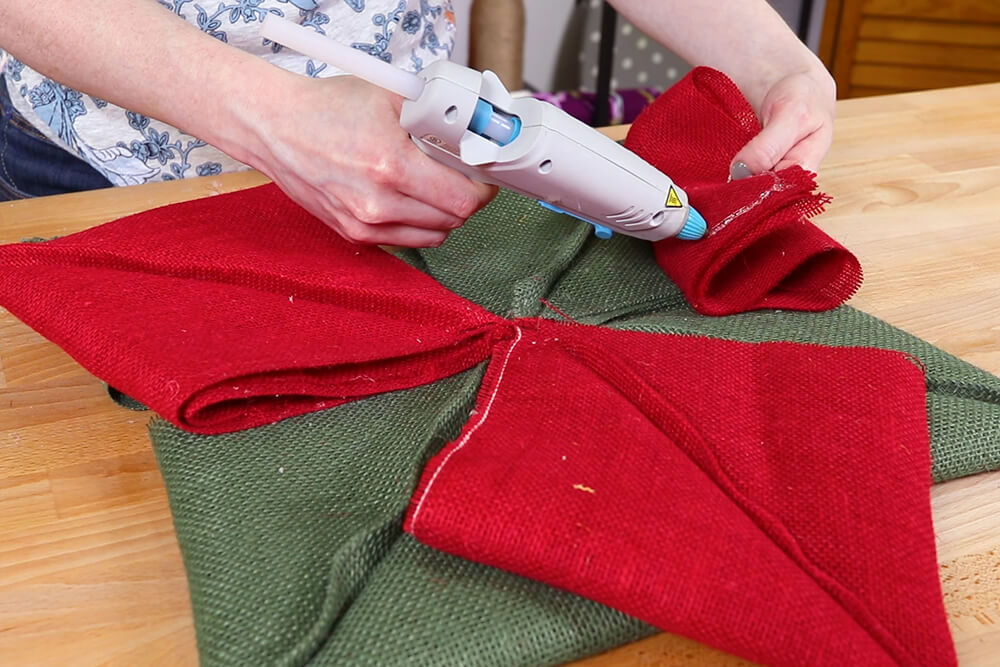
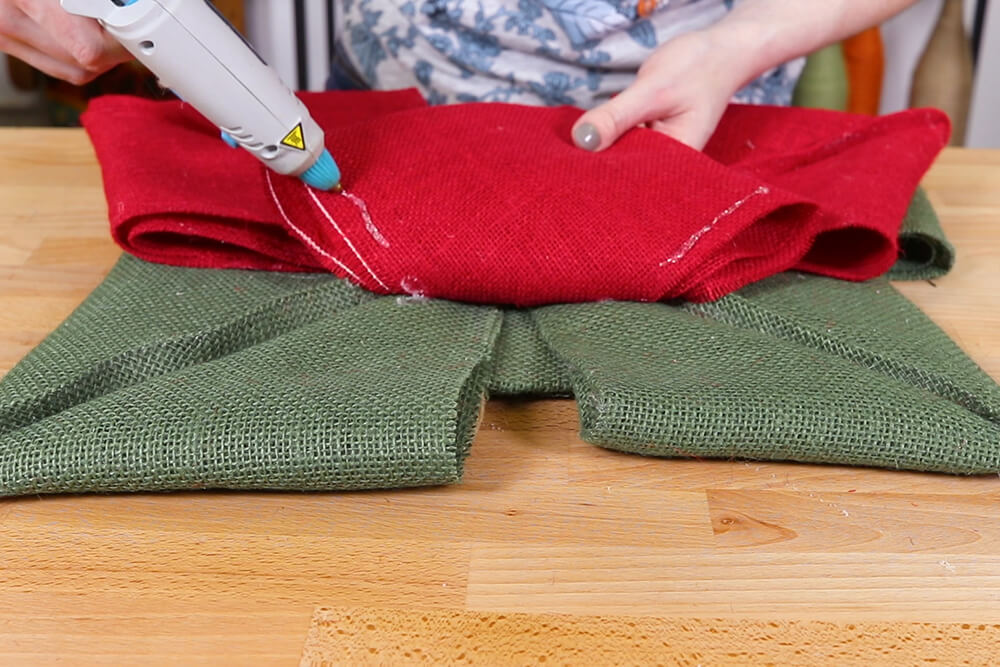
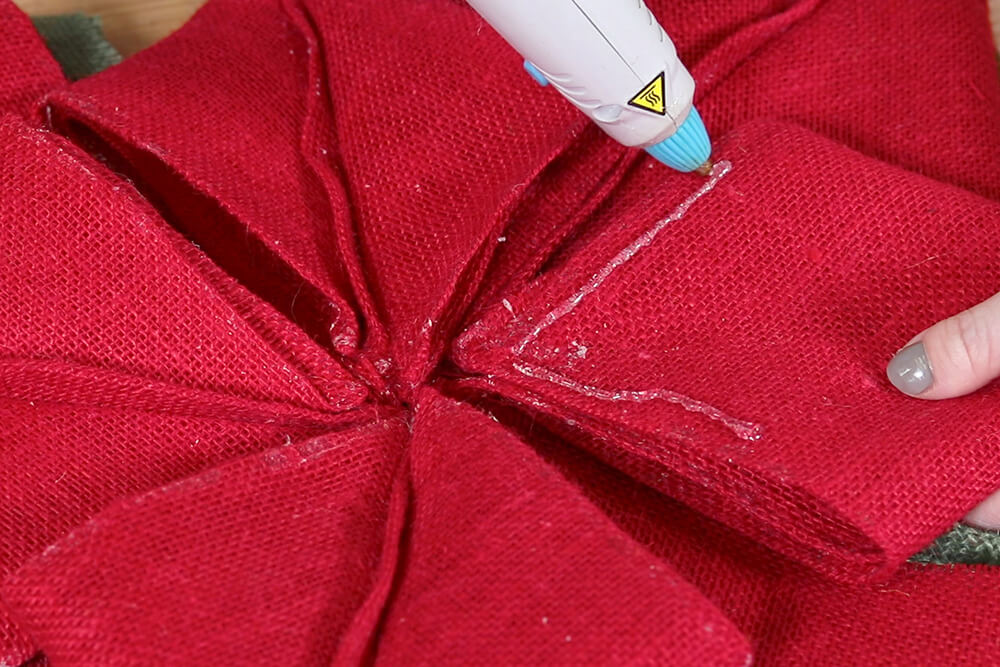
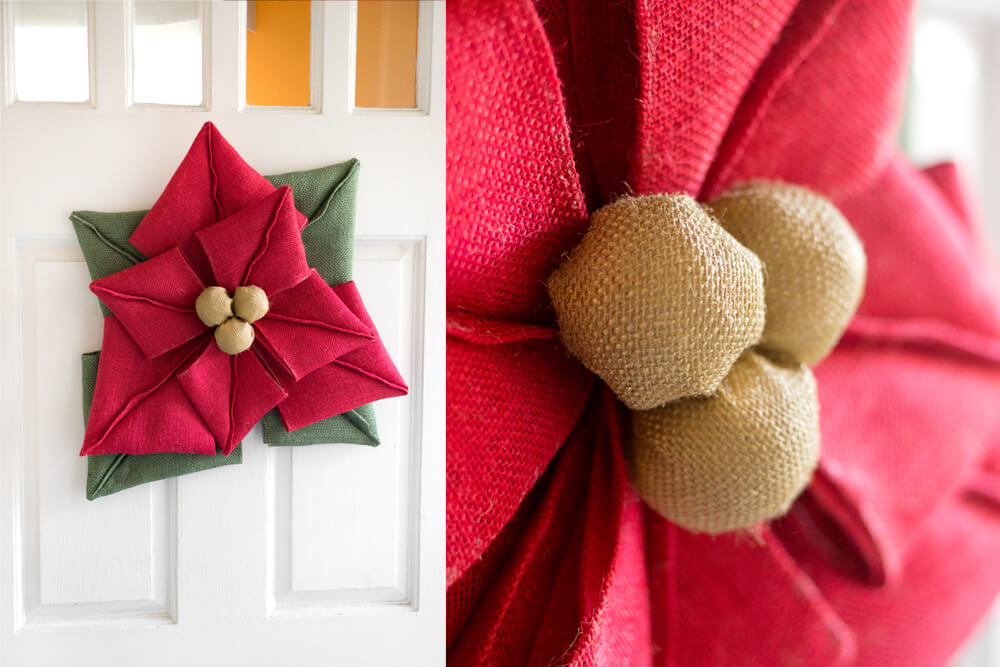
Poinsettia
For the winter flower, I’m creating a poinsettia which has distinctive leaves.
For the leaves, use two 18 inch and two 16 inch squares.
Measure diagonally and find the midpoint. Without moving the center, rotate the ruler so that it is about ½ an inch from one of the corners. Place a line of glue along the ruler, stopping in the center.
Fold the square in half diagonally. This creates a center vein for the poinsettia leaves that’s tapered so it gets bigger near the corner.
Once the glue dries, unfold and glue it down diagonally in the opposite direction so the vein is in the center facing up.
Run a line of glue next to the vein. Fold the edge on so that a point is created.
Do the same on the other side of the vein to complete the diamond shaped leaf.
The petals are made in the same way. I used three 16 inch and four 12 inch squares.
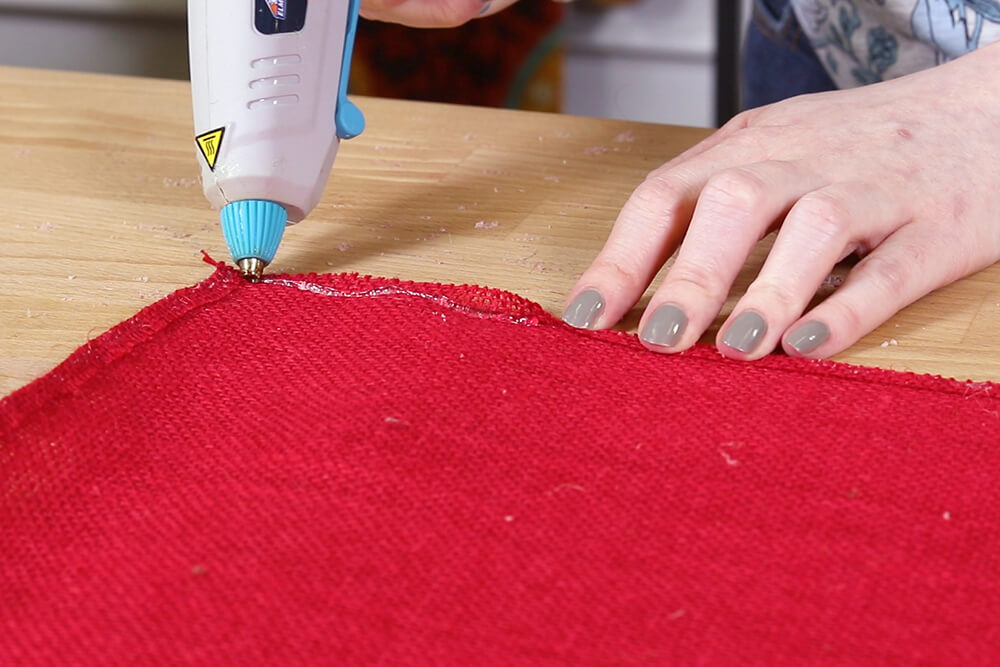
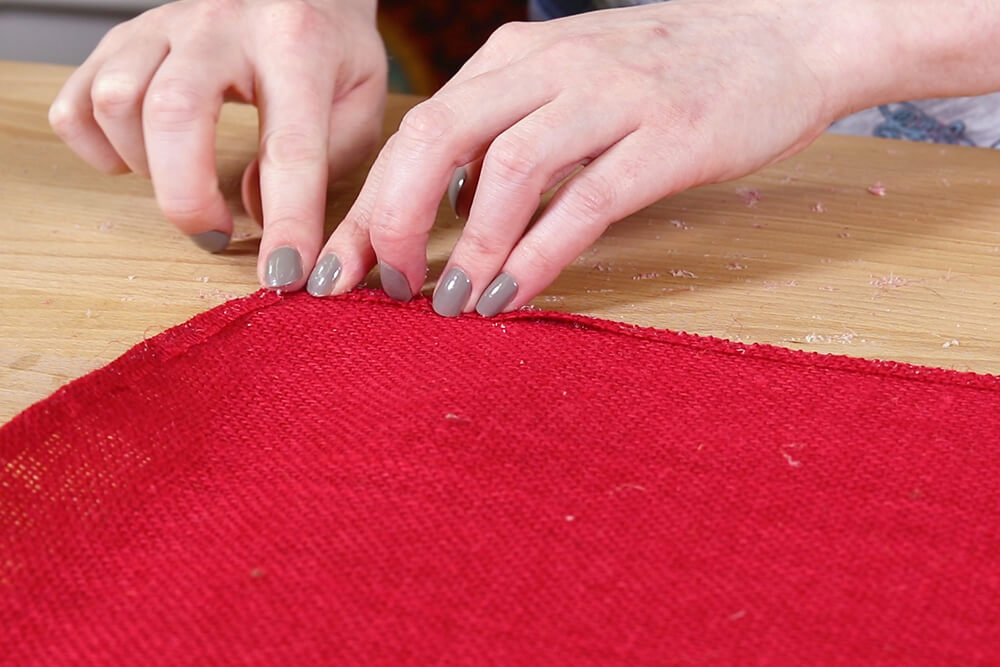
If you don’t want to see the raw edges of the burlap, fold and glue the edges in about ¼ inch on all sides. You can do this for the leaves too if you prefer.
The bits of glue that you see through the burlap might look white. In this case, hold the metal tip of the hot glue gun on the glue to re-melt it and it will dry clear.
Make all the sizes of leaves and petals the same way.

Position the leaves on the backing and make sure they don’t flop down when held vertically. Put glue on the back of the leaves and attach to the backing.
Also glue down any loose edges where the petals will be attached.


Glue the larger petals, then the smaller petals in the same way.

Step 4: Make the flower centers
I’m going to show 3 ways of making the centers of the flowers.
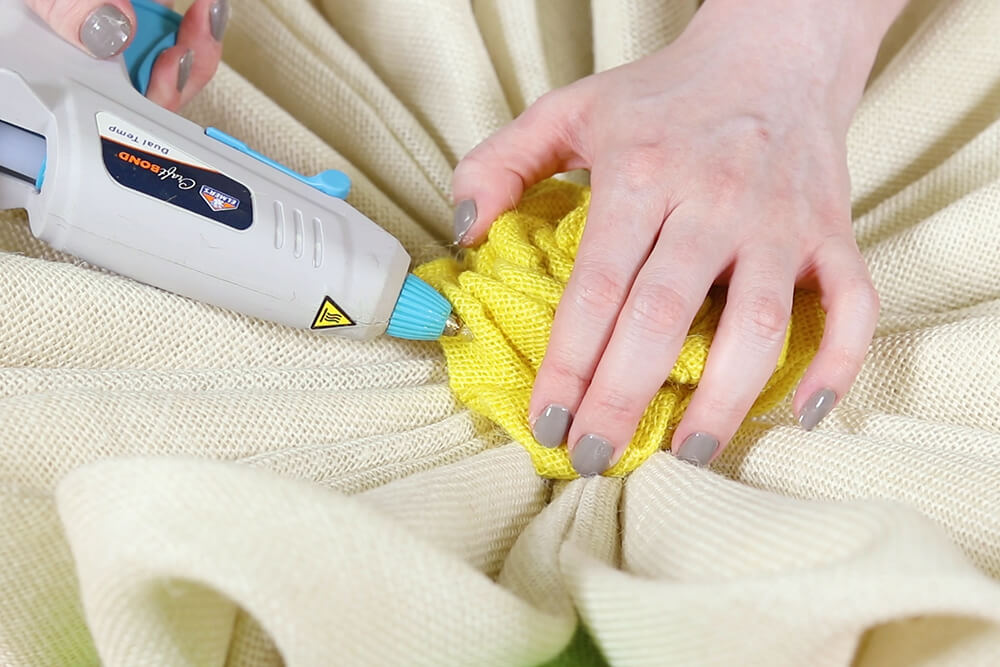
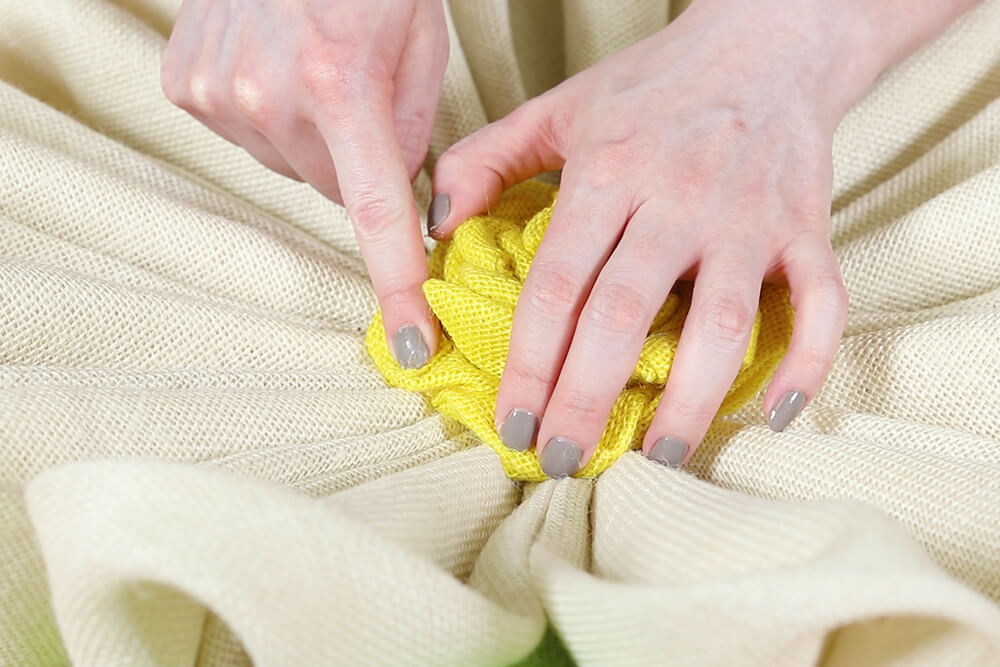
Sunflower
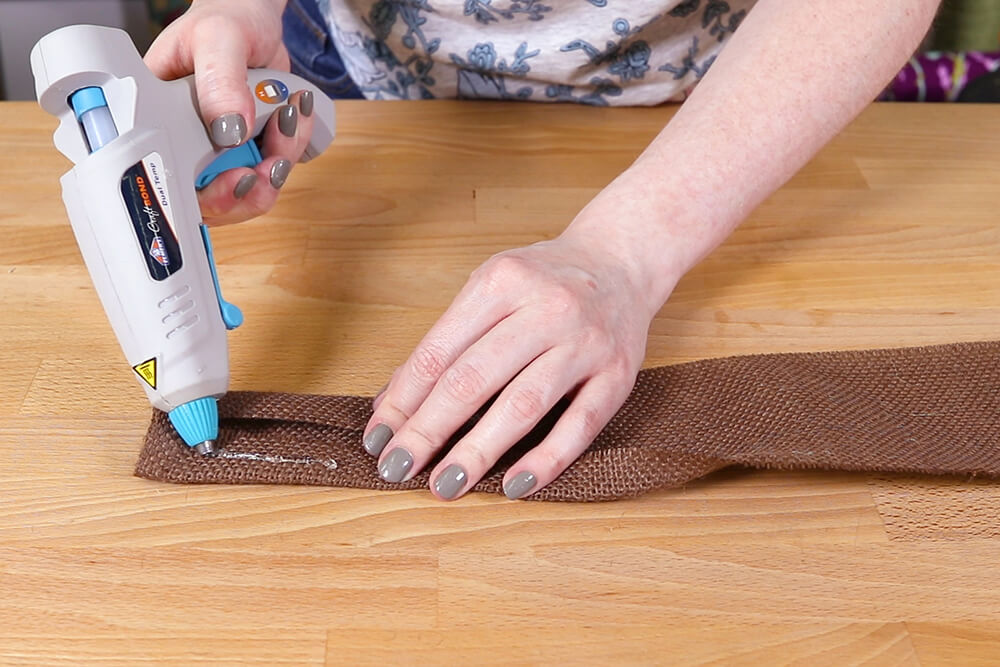
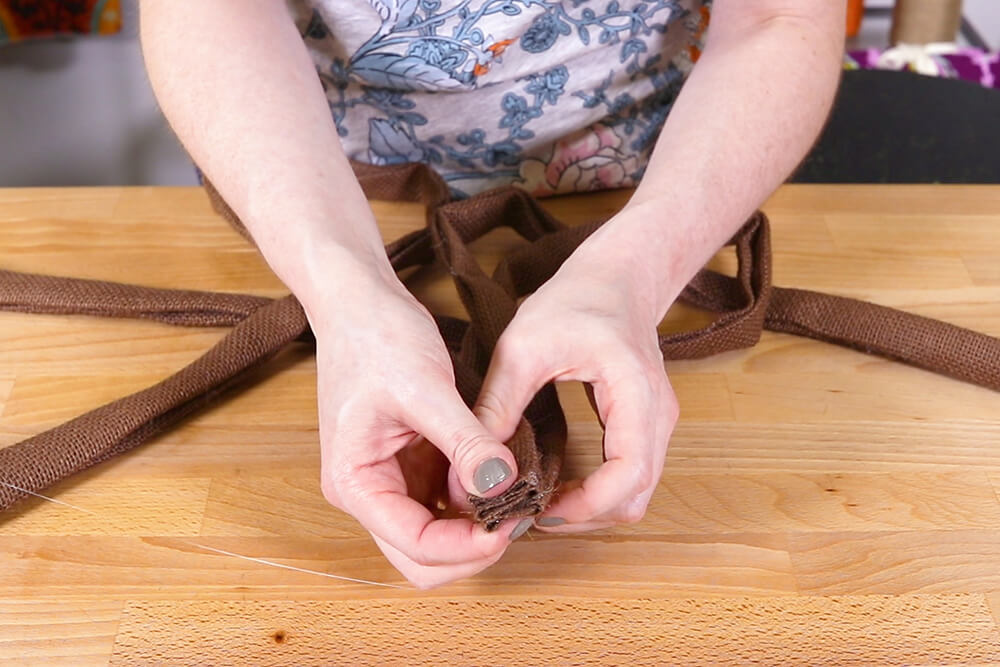
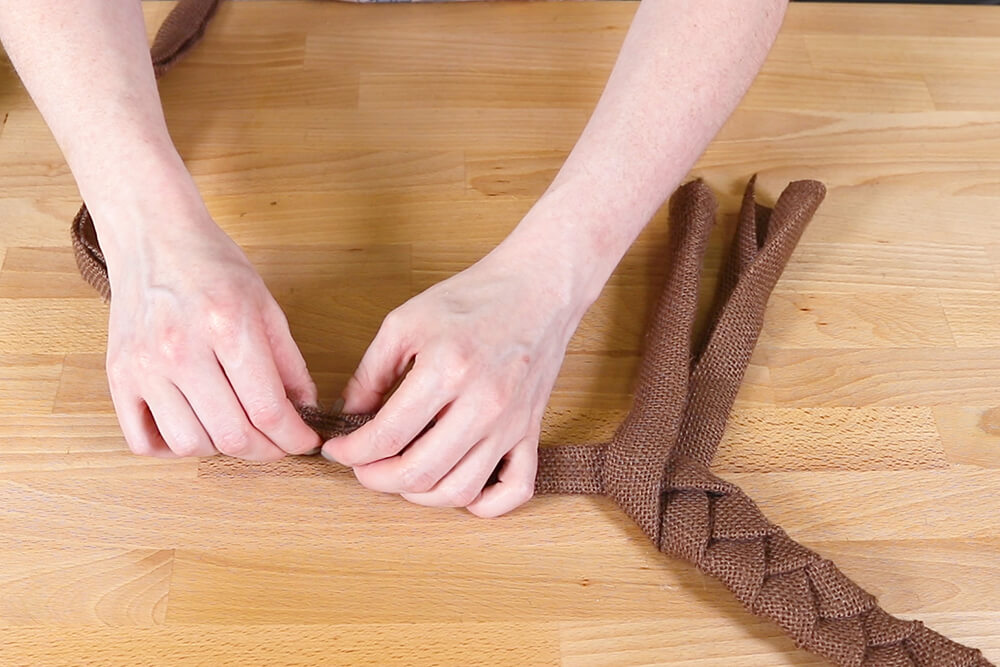
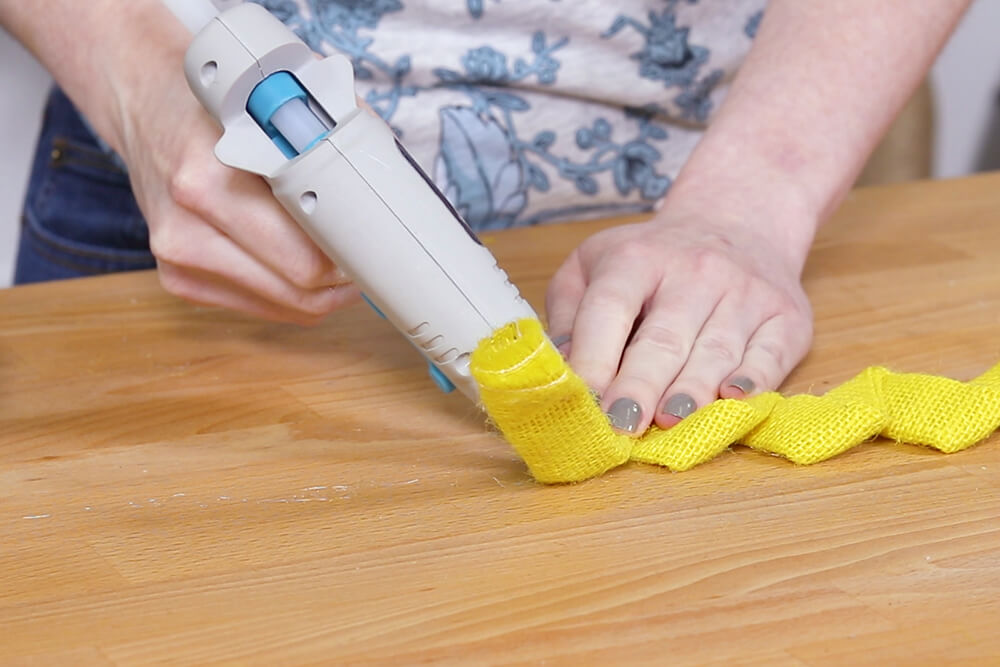
For the braided center of the sunflower, cut 6 strips that are 4 inches wide.
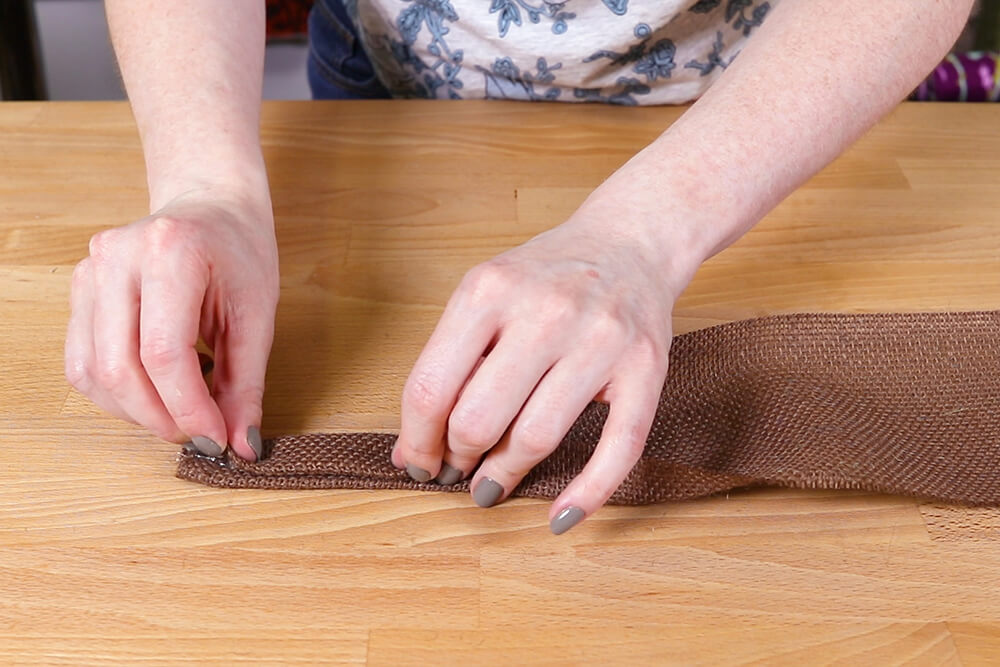
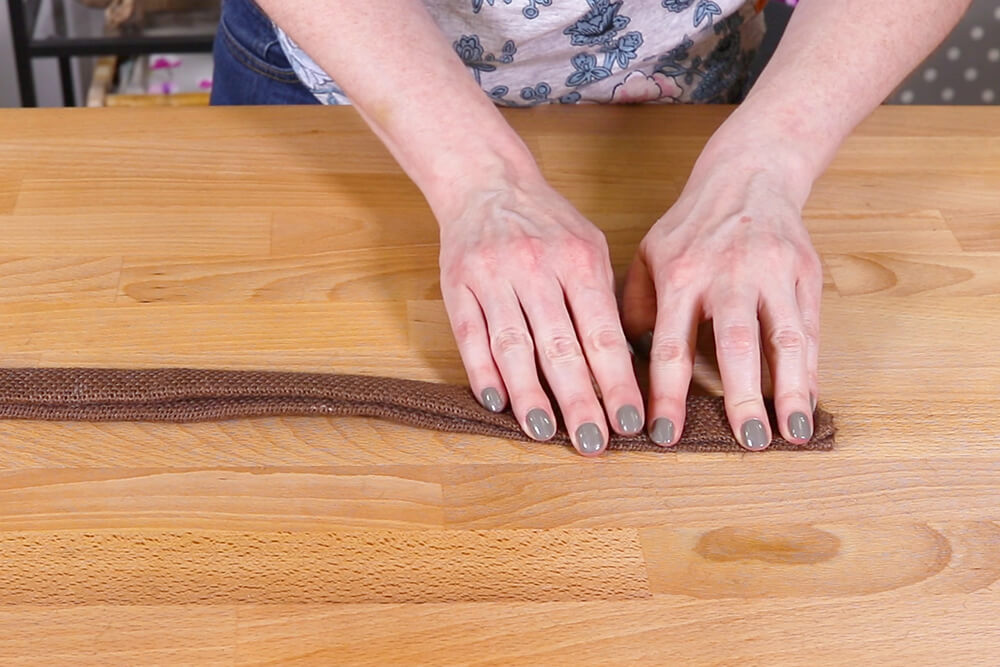
Fold the edges in about an inch, fold in half, and glue. Continue down the length of the strip.
Repeat for the rest of the pieces.
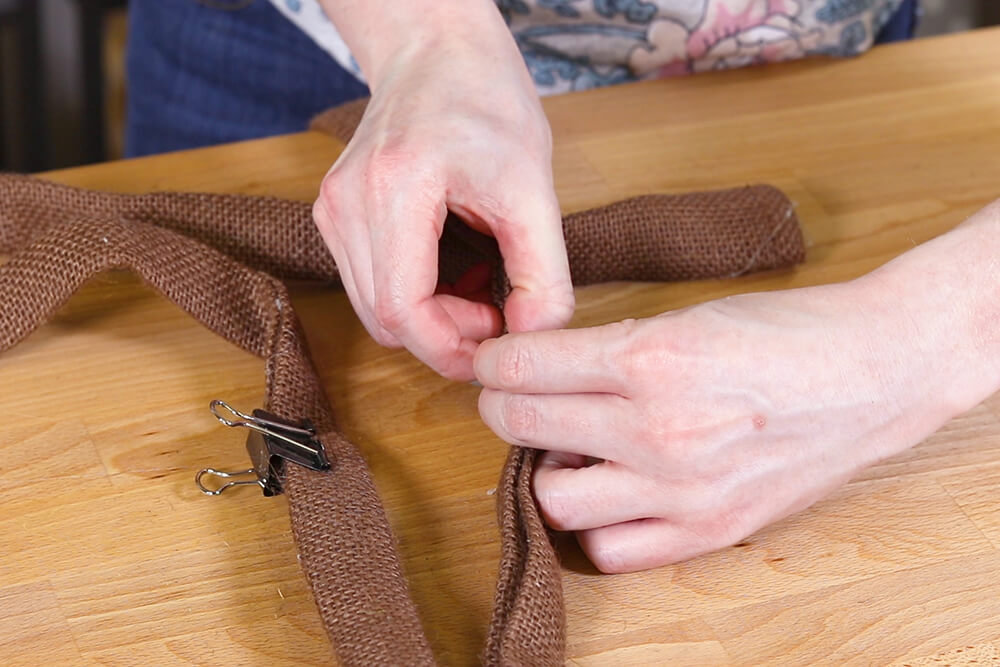
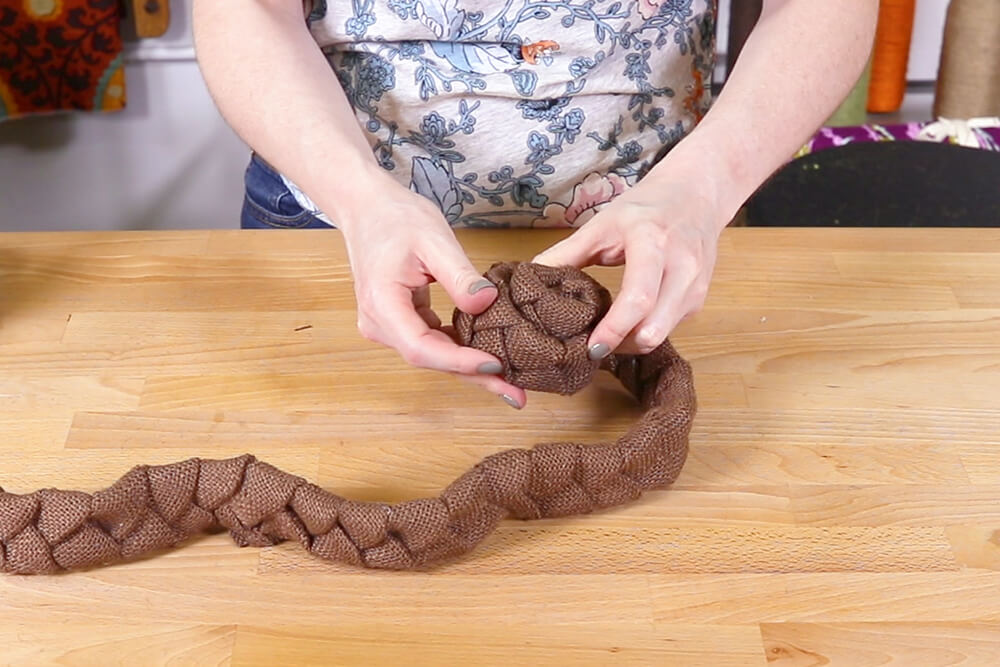
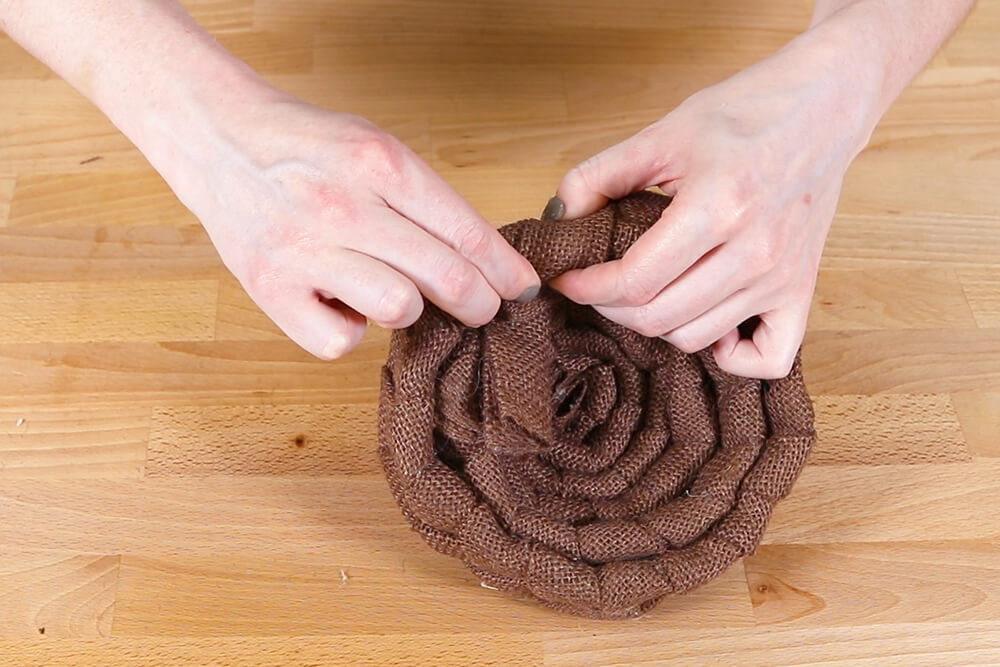
Glue the ends of 3 of them and clip together. Braid the strands until you get near the ends.
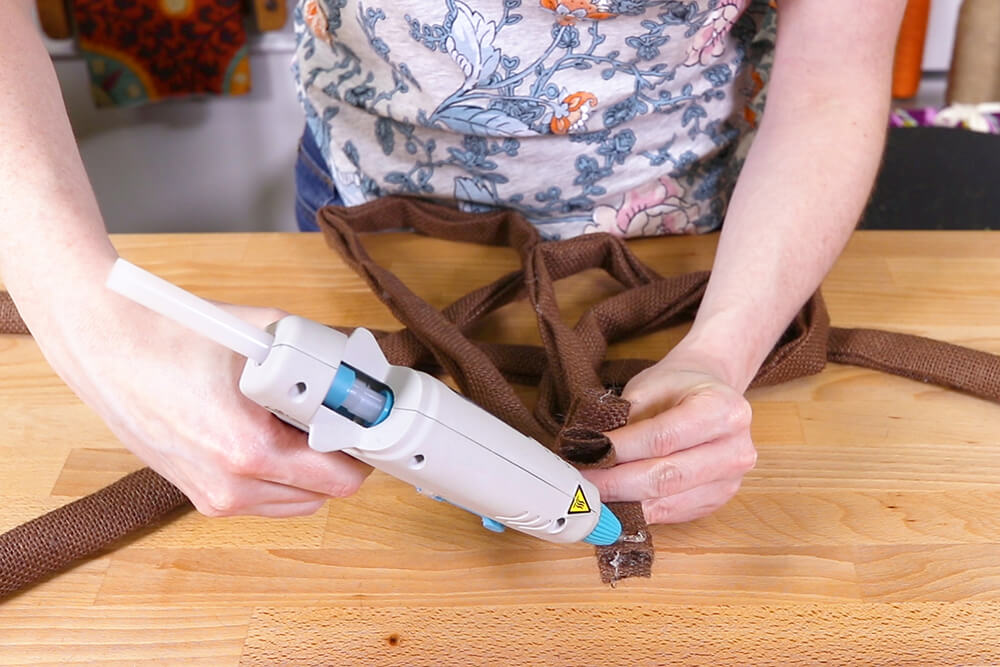
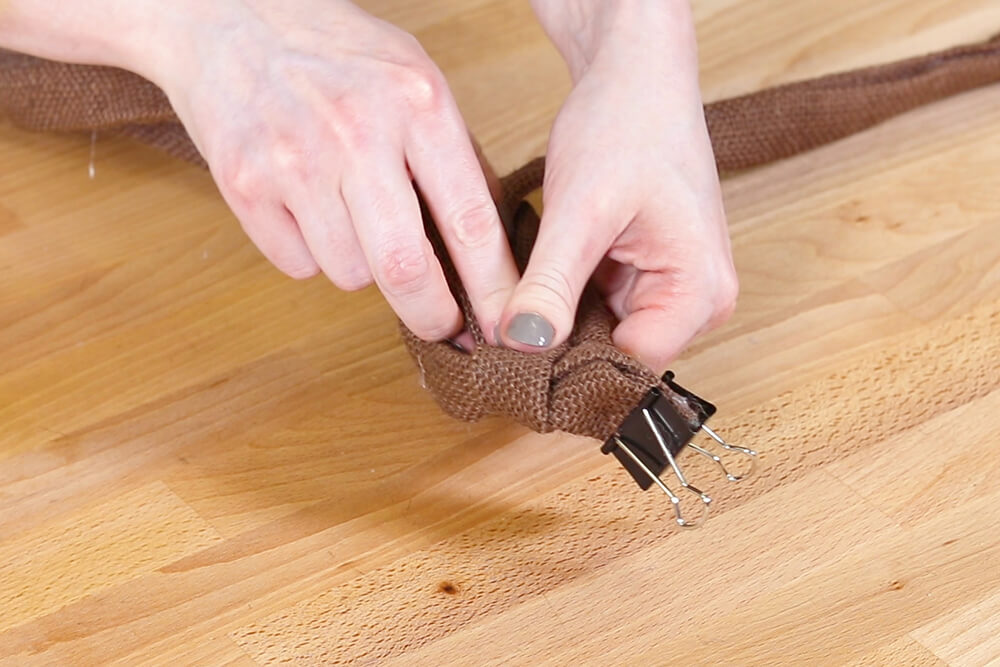
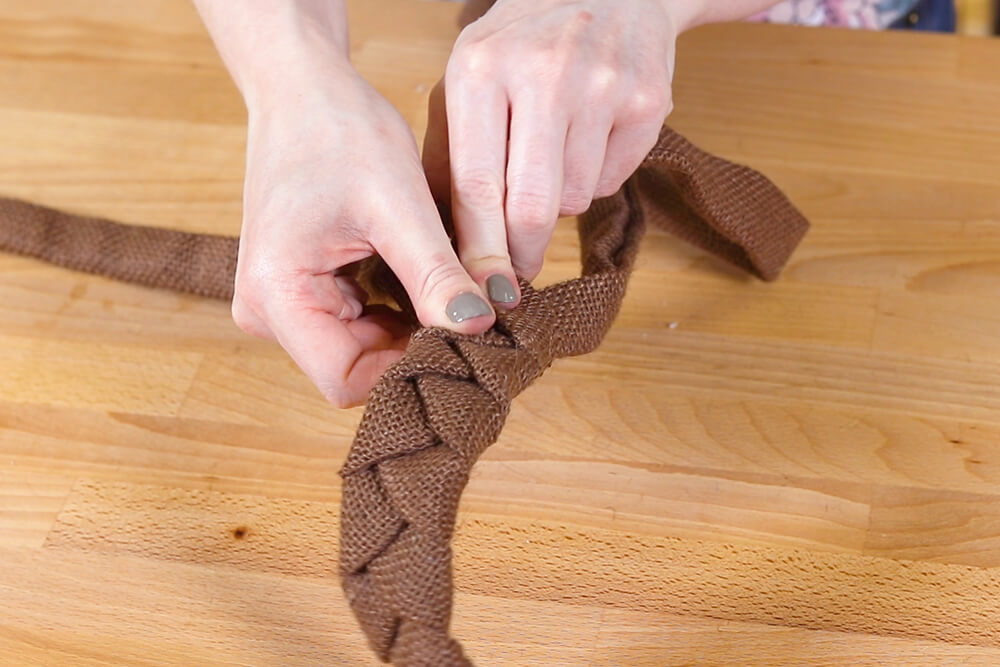
Attach the remaining strips with glue and continue braiding. Clip the ends together.
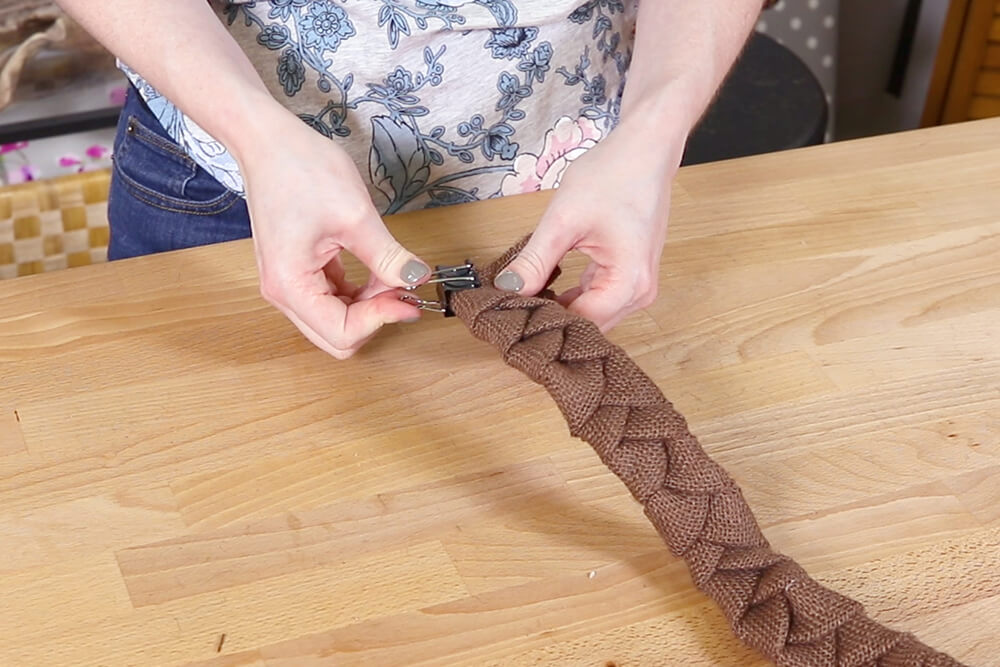
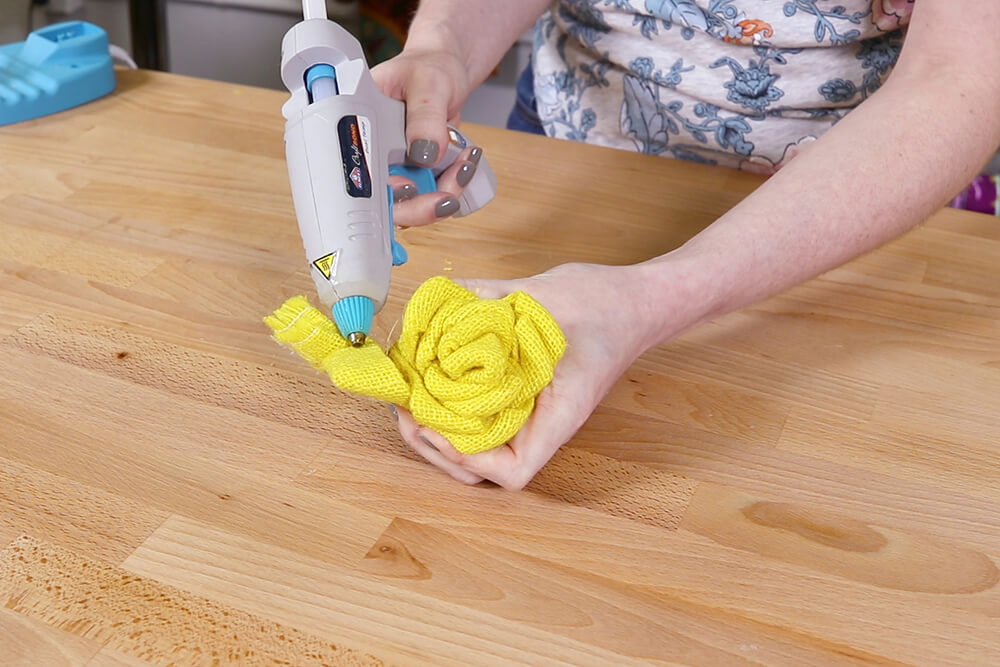
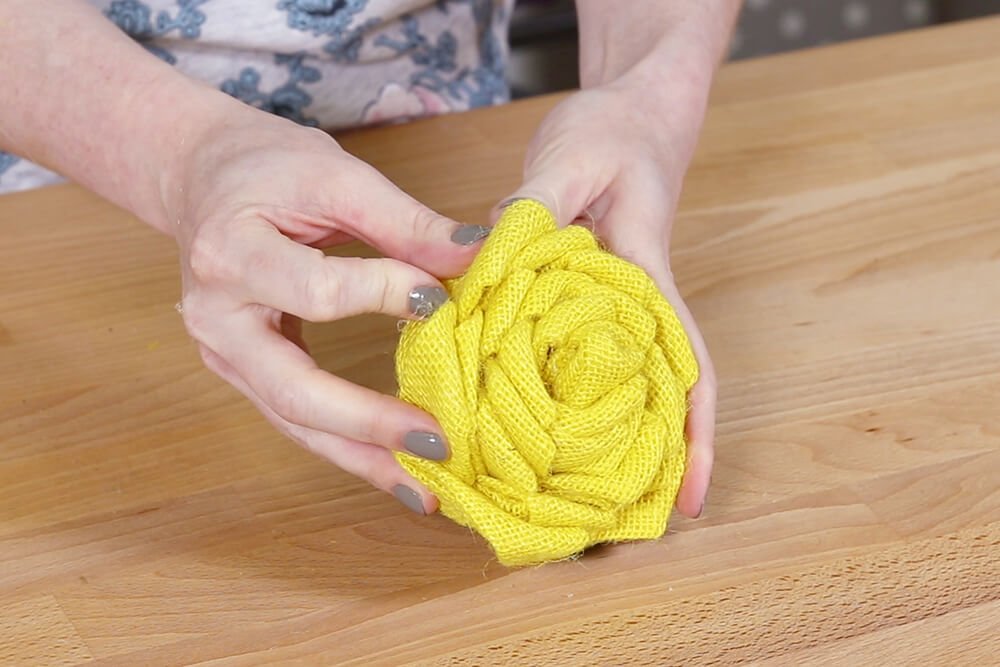
Unclip the beginning of the braid and fold the end in. Wrap the braid in a spiral and glue in places as you go.
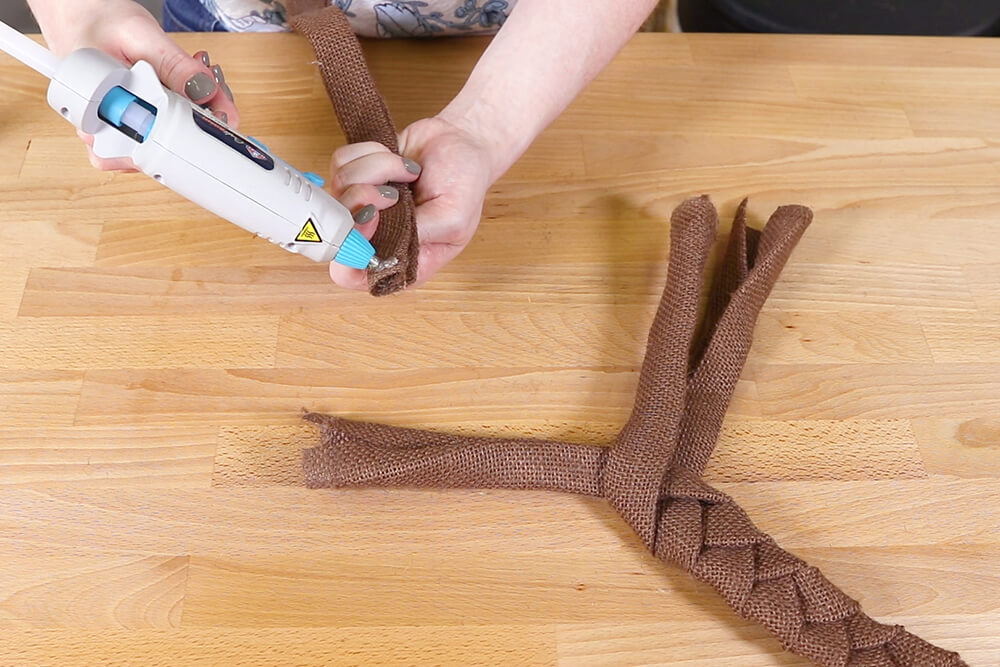
Position the braid slightly lower every time you go around to create a domed shape.
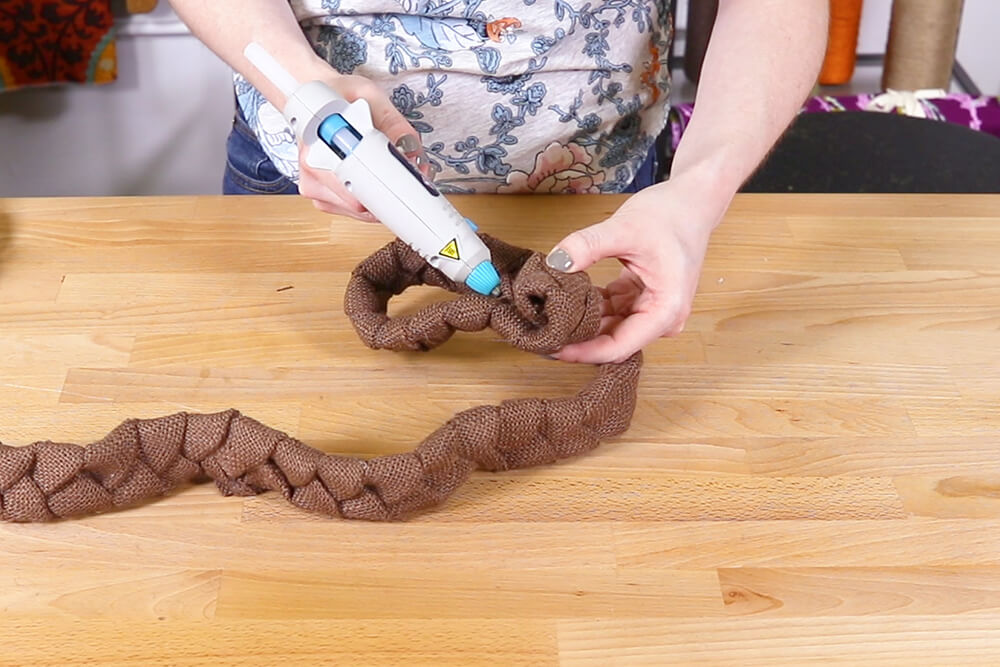
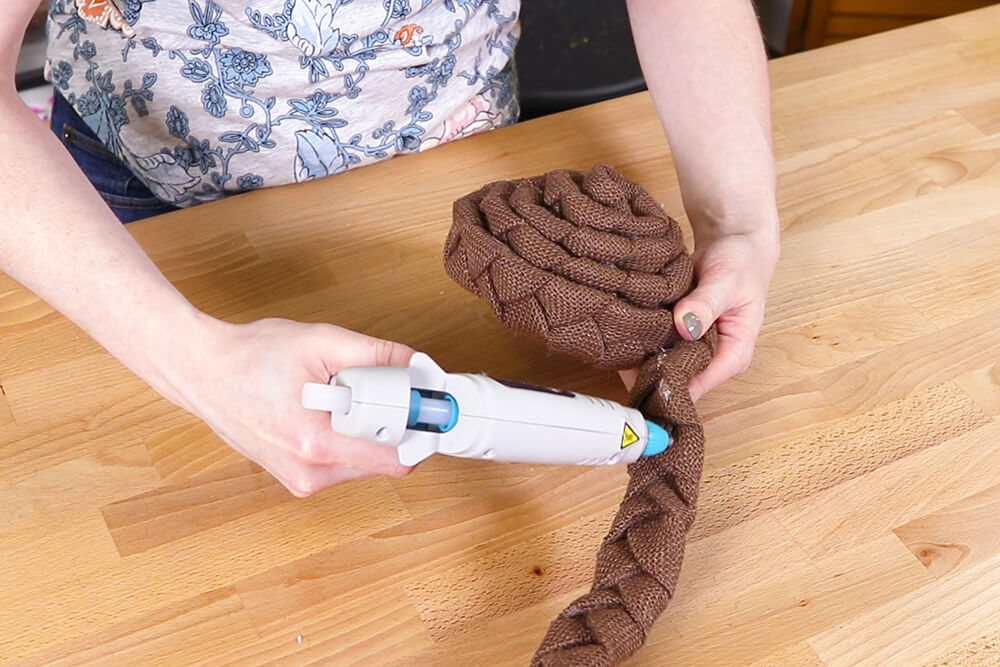
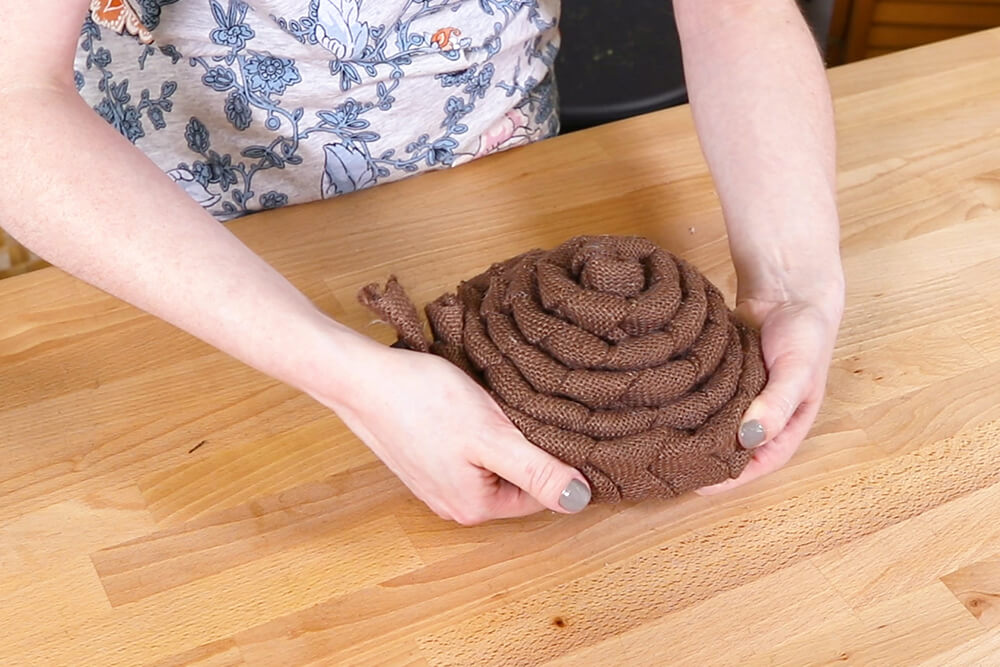
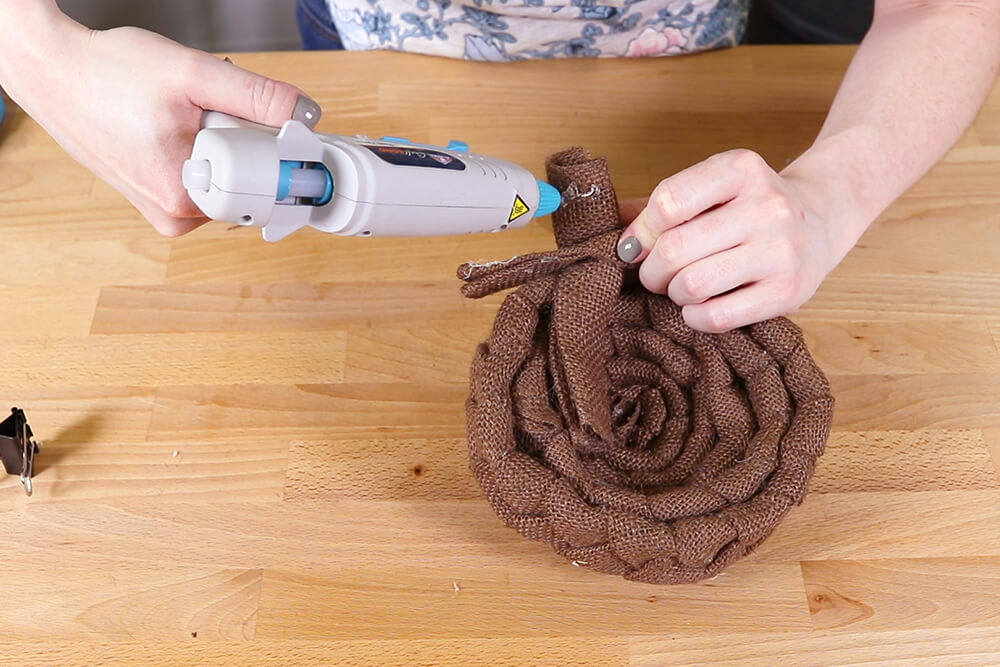
Tuck the ends under and glue.
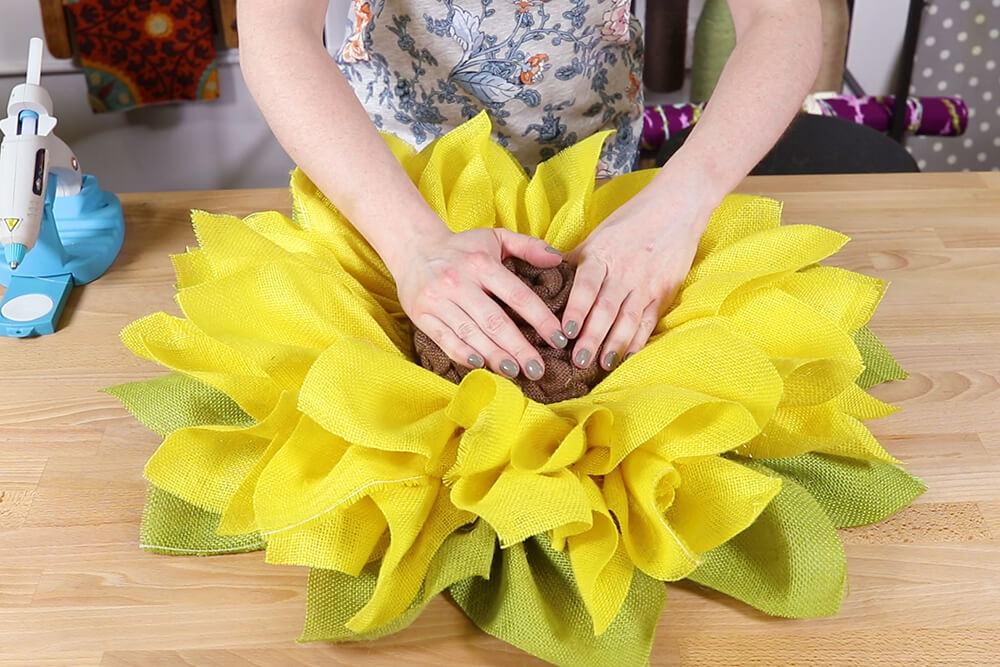
Glue around the edges on the back and place on the ends of the petals.
Daisy
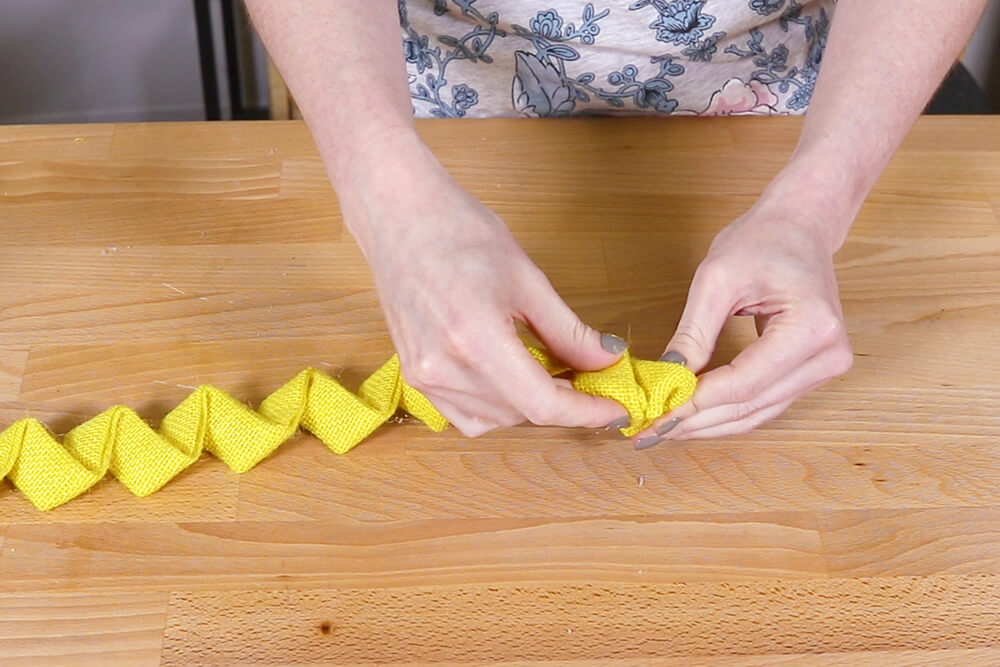
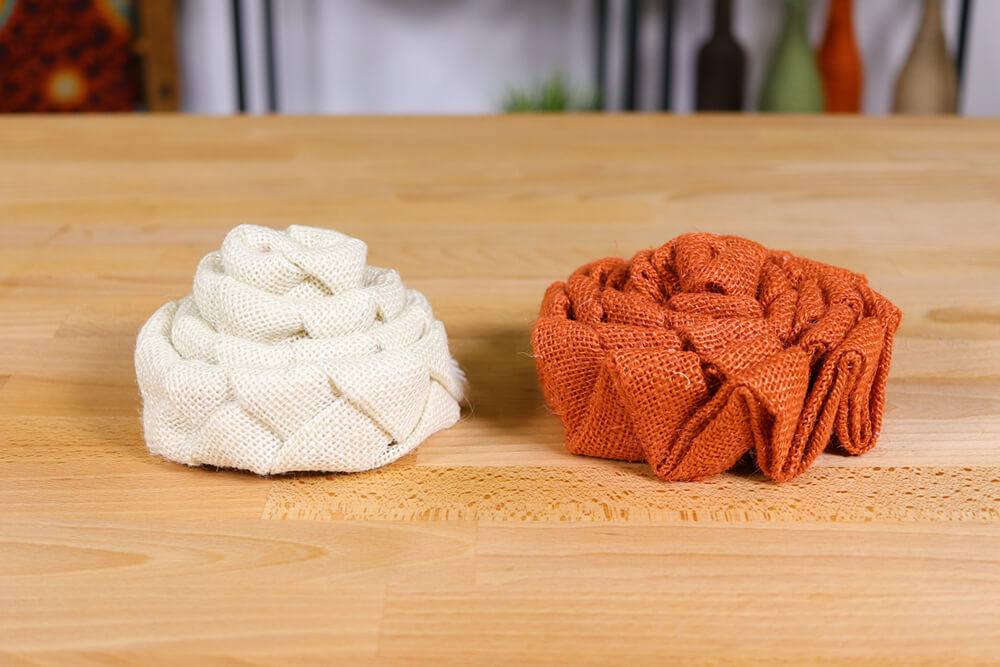
For the daisy I’m making a zigzag spiral.
Fold and glue 4 inch strips the same way as the sunflower center. You’ll need at least 2 strips depending on how large you want the center to be.
Fold the strips in a zigzag pattern that’s about 1 ½ to 2 inches tall. Glue in each fold.

Wrap the strip in a spiral, gluing as you go. The tops of the zig zags create petal-like shapes.
Attach more strips as needed.
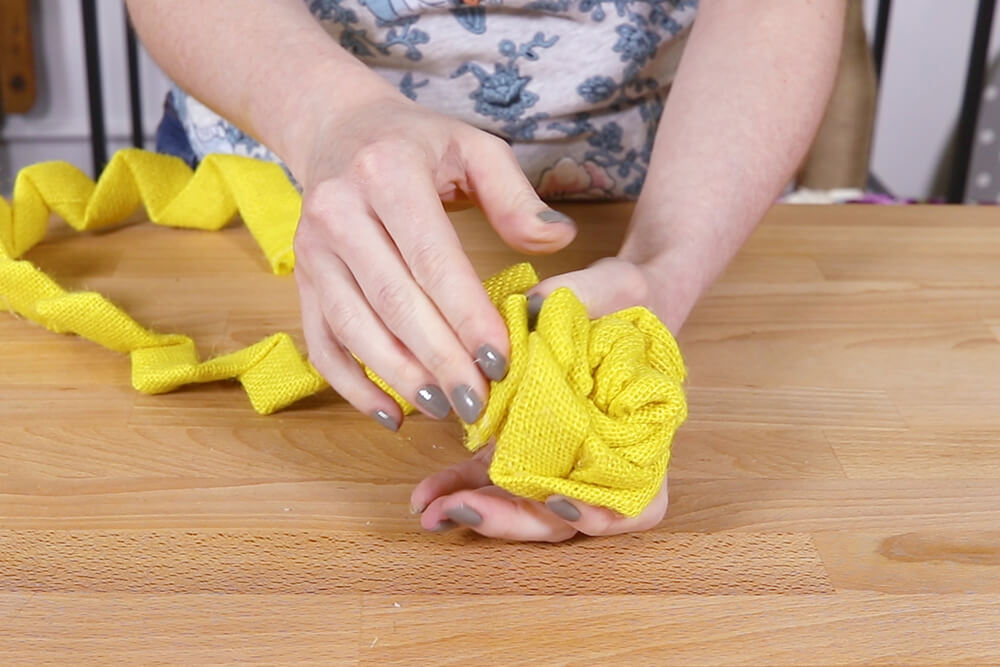
Attach the end to the back and glue the piece to the center of the daisy petals.
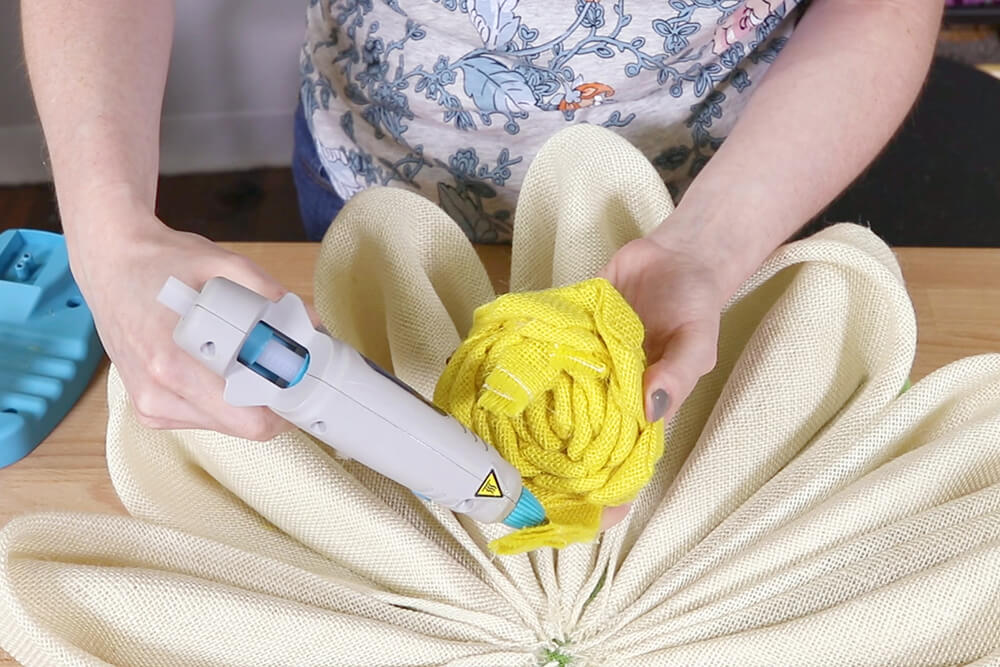
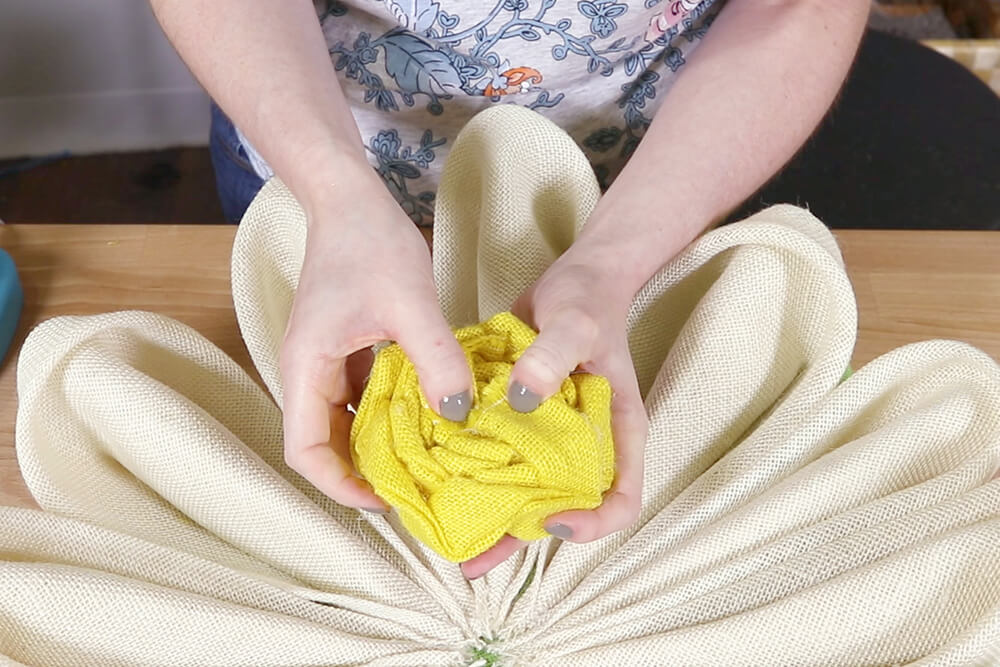
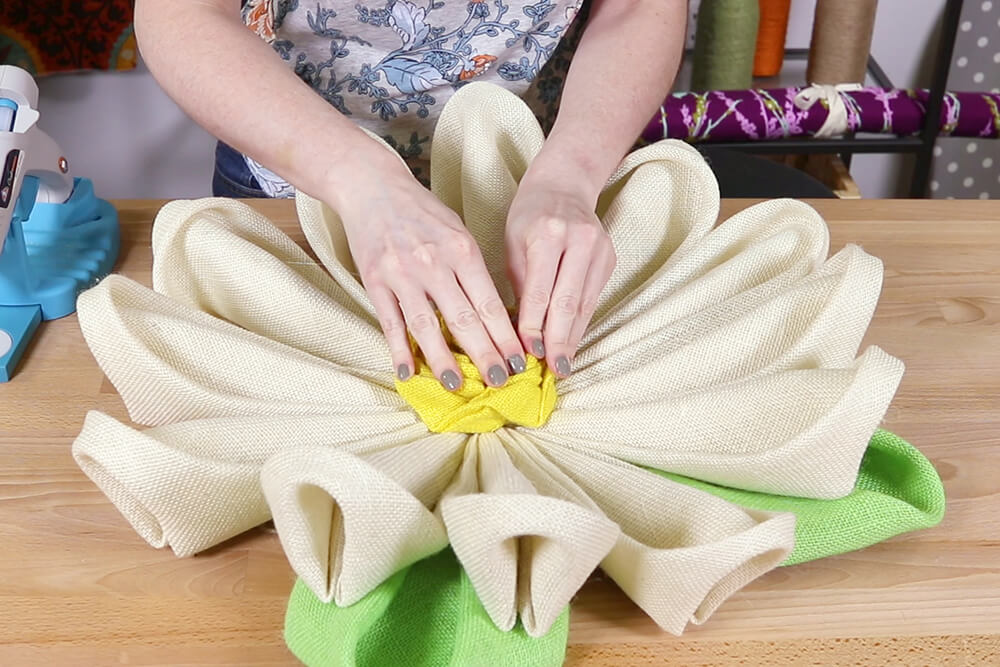
On this one, I’m also folding the outer edges down and gluing.
Fall Flower
I used this zigzag method for the fall flower as well, but I also made a white center using the braiding method. This could be used any time of year.
Since they fit very snugly, I’m not going to glue them so they can be changed out.
Poinsettia
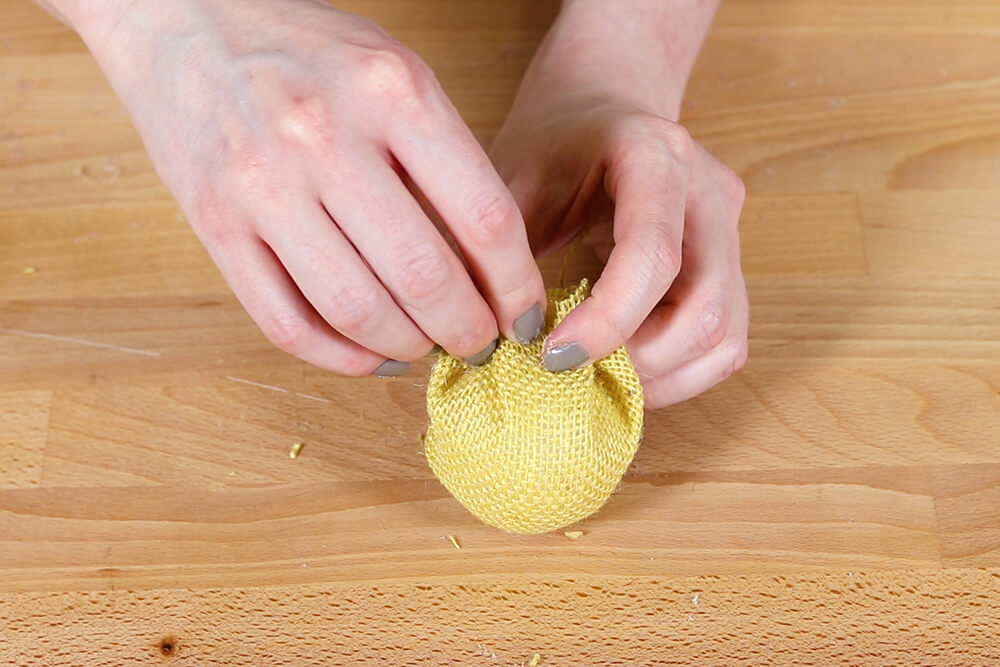
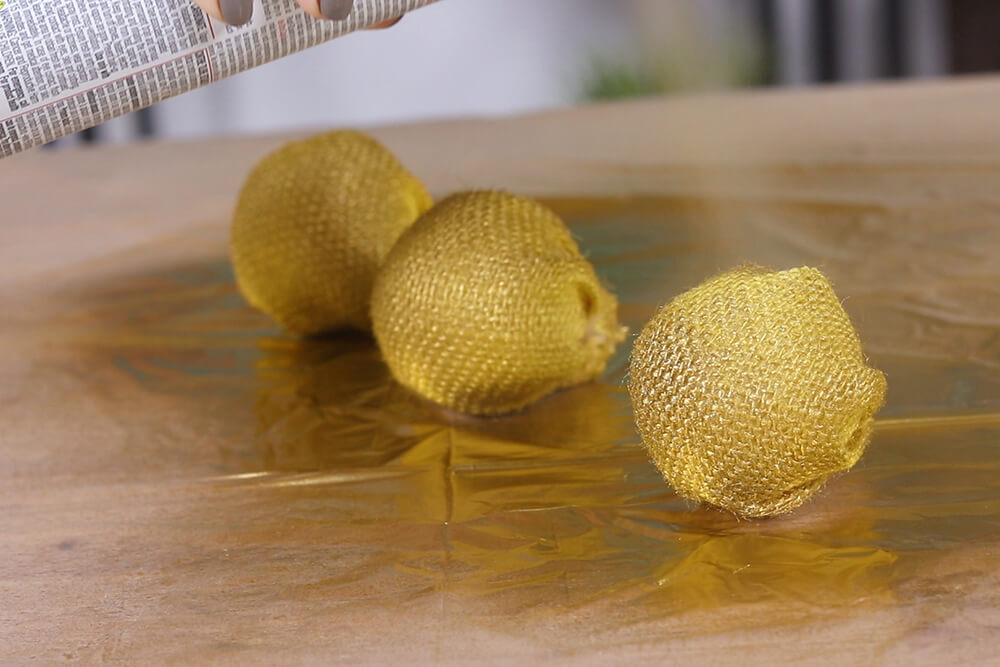
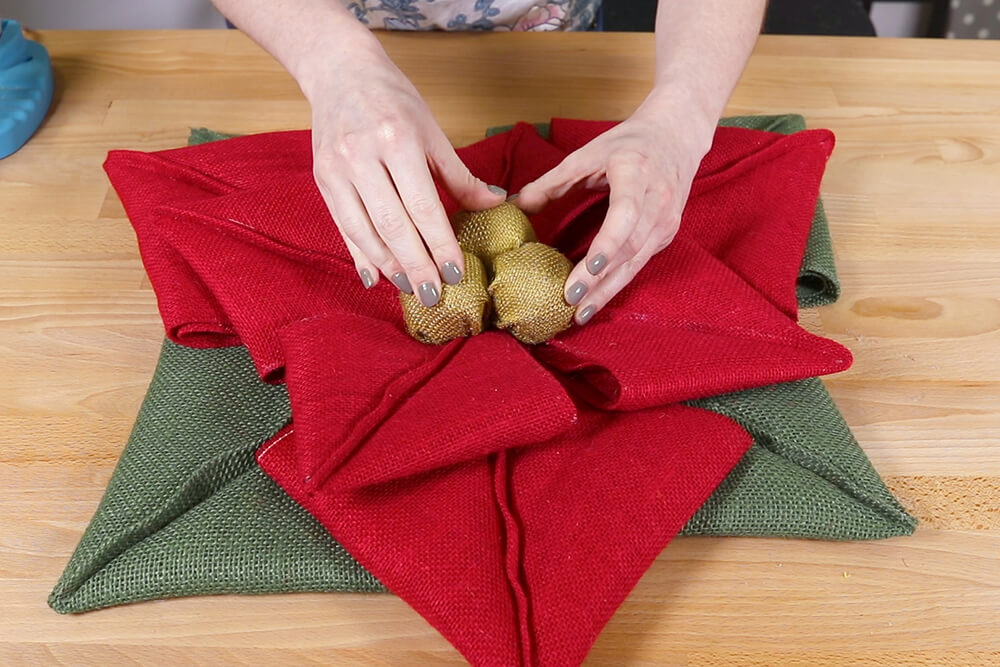
I’m making 2 inch gold balls for the center of the poinsettia. This requires 3 foam balls and gold spray paint.
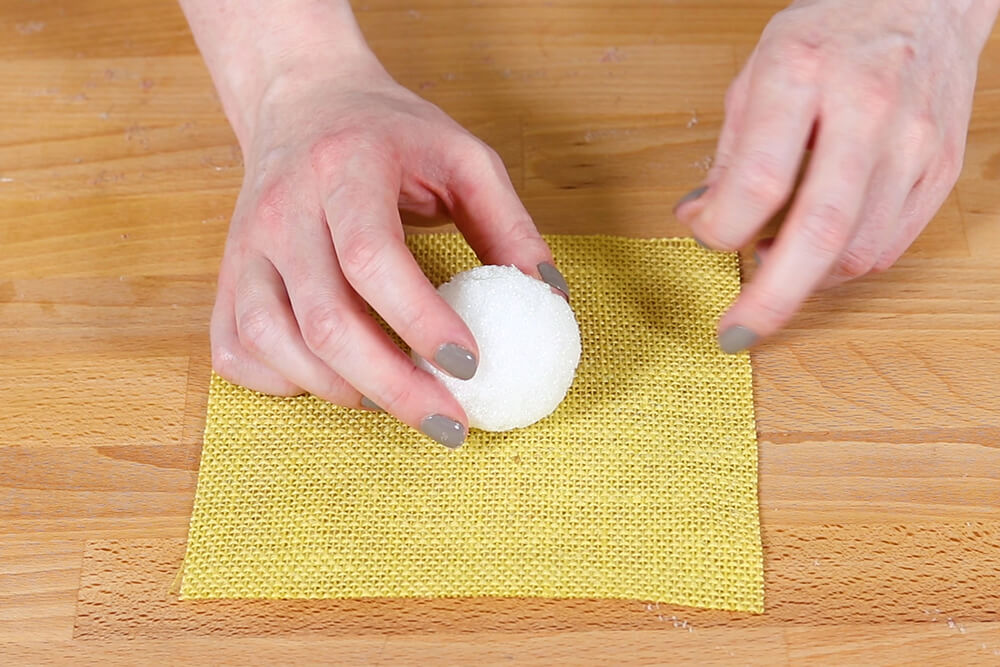
Cut three 6 inch squares of a yellow or natural burlap. Pinch the corners together and glue.
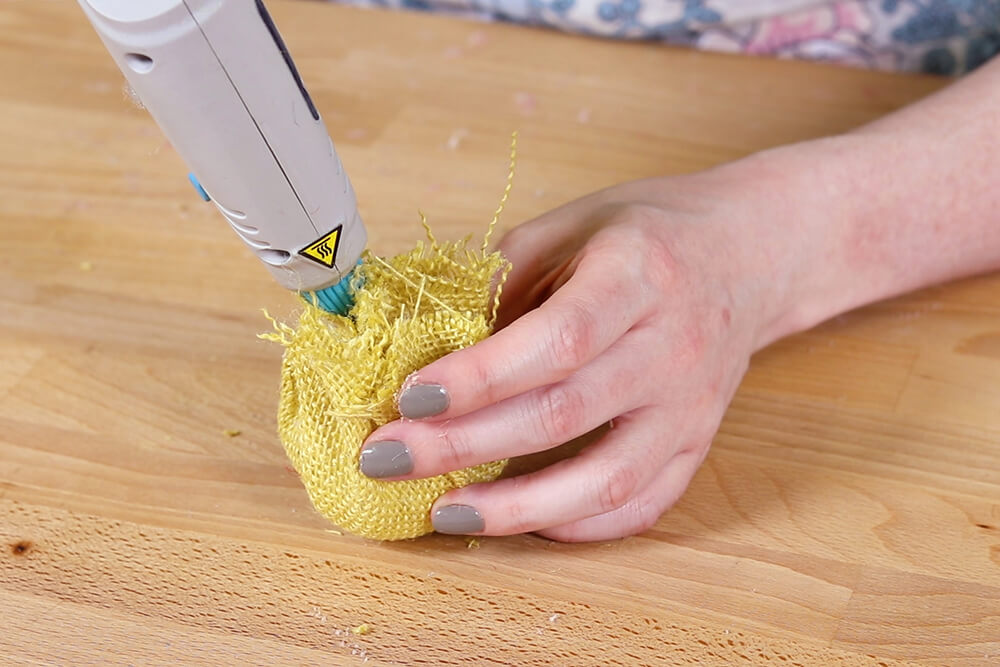
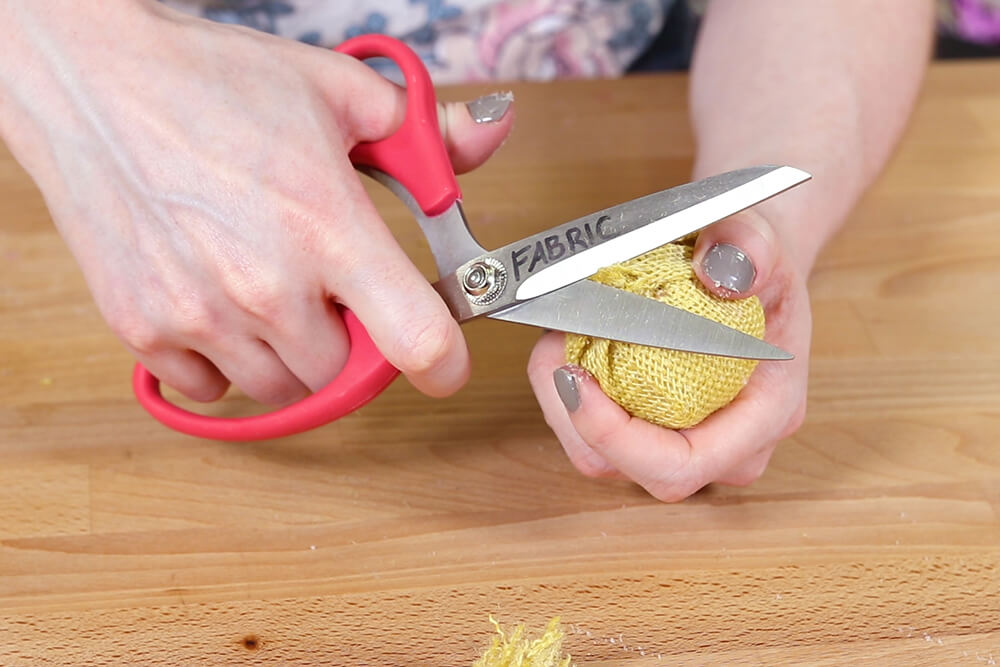
Trim some of the extra fabric to reduce bulk.

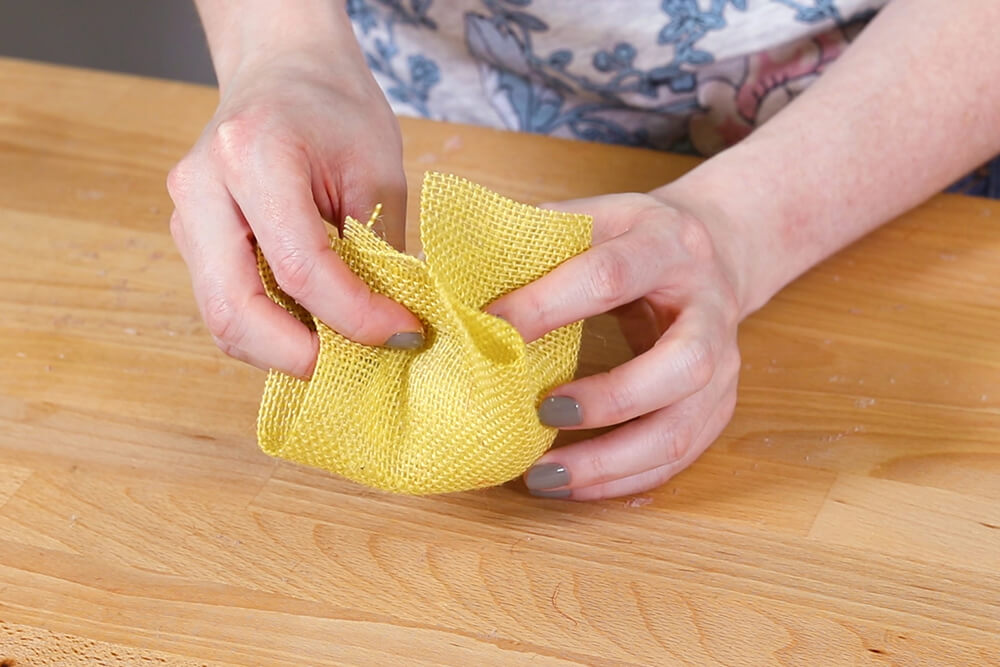
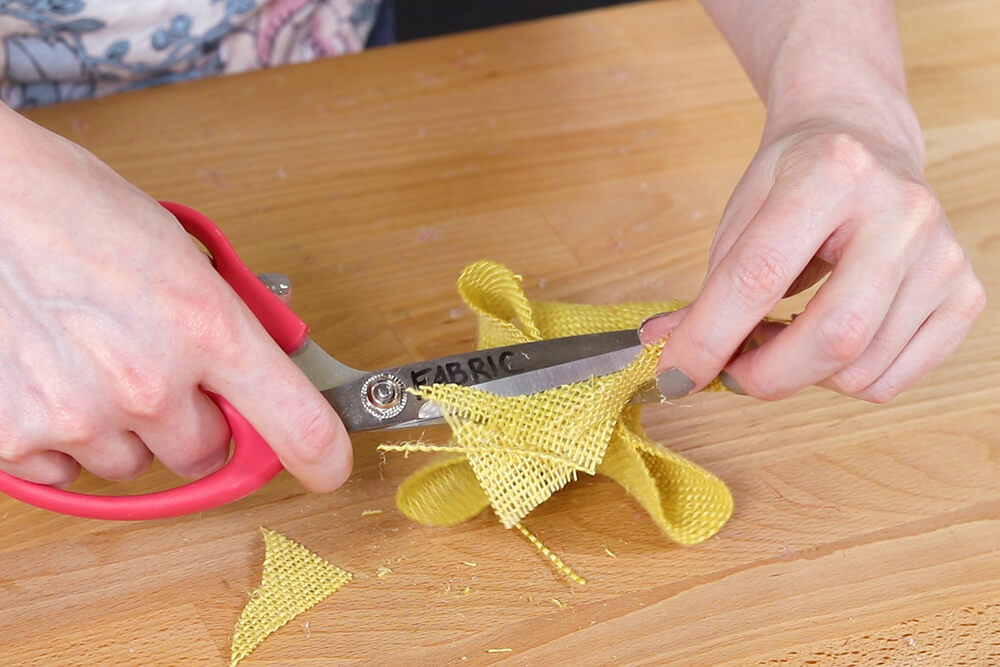
Continue to wrap the edges up and glue until it’s relatively smooth. Cut off the extra burlap.
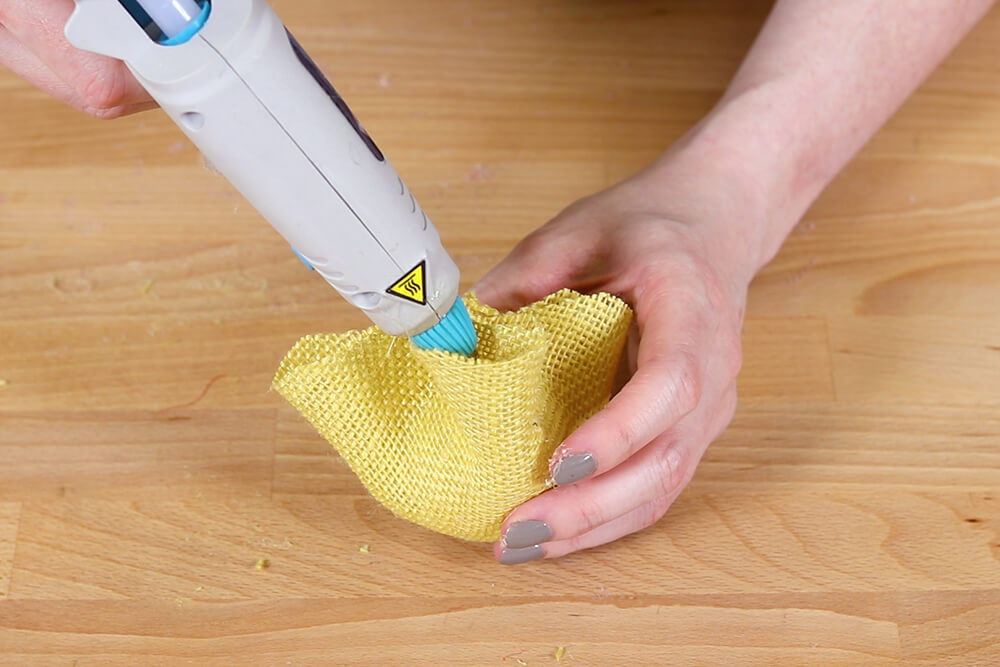
Spray paint the balls gold and let dry.
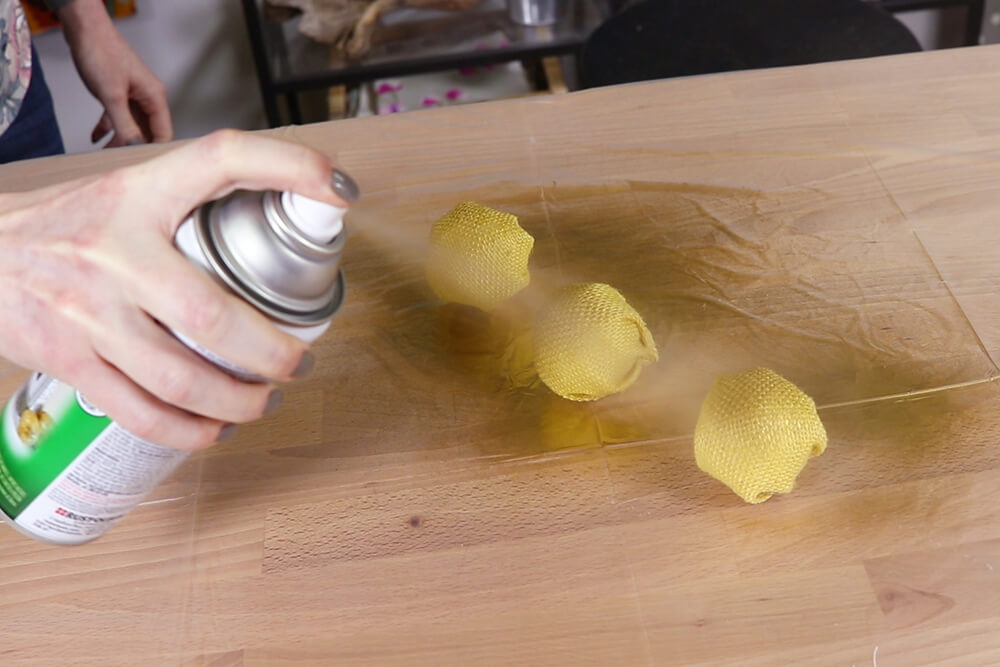
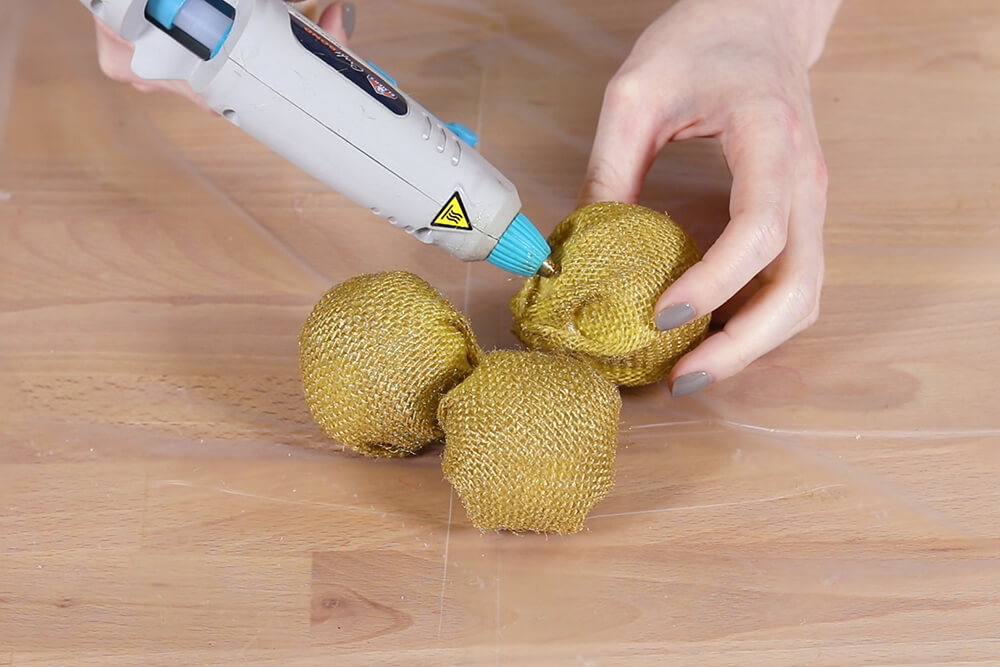
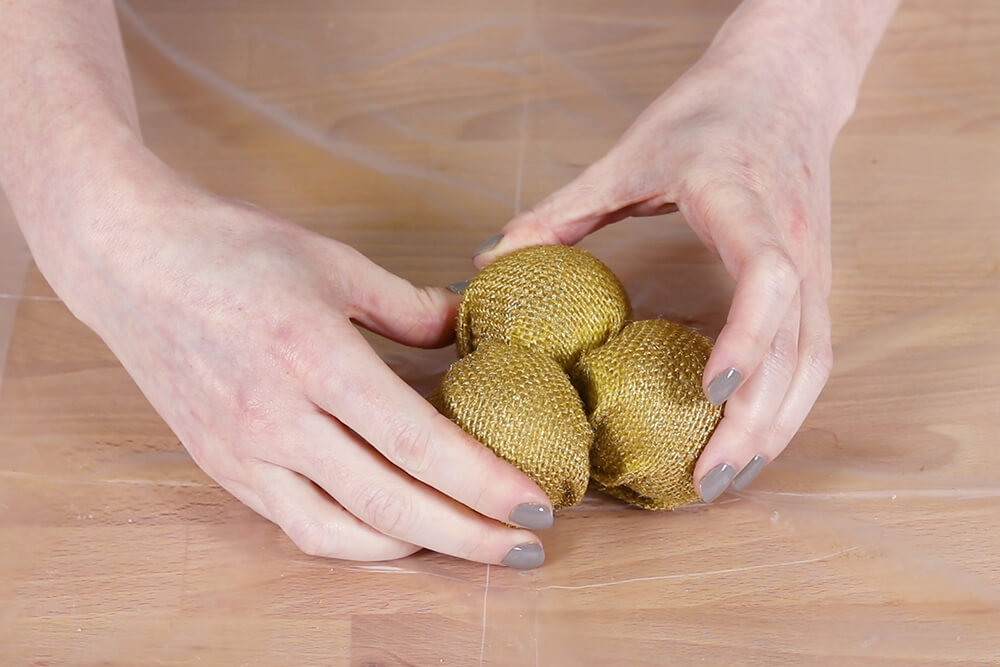
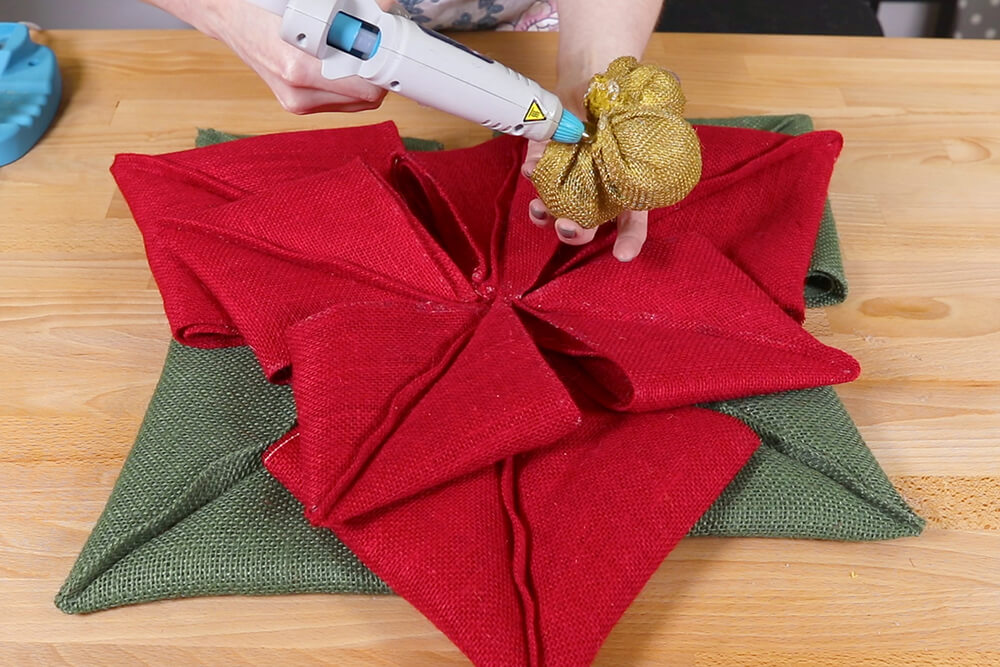
Glue the balls together before attaching them to the center of the petals.
Yardage
Here’s the colors and yardage of the 46/48″ wide burlap I used for the flowers (rounded up to the nearest yard), but you can choose different colors if you want to make them your own!
Sunflower
- 2 yds yellow burlap
- 1 yd avocado green burlap (not currently available but you can use lime green 60″ burlap instead)
- 1 yd dark brown burlap
Daisy
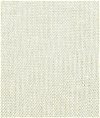
- 2 yds white burlap
- 1 yd lime green burlap (not currently available but you can use lime green 60″ burlap instead)
- 1 yd yellow burlap
Poinsettia
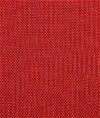
- 1 yd barn red burlap
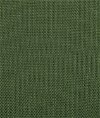
- 1 yd hunter green burlap
- 1 yd butter or natural color burlap
- 2″ foam balls
- Rust-Oleum metallic gold spray paint
Fall Flower
- 1 yd Idaho potato brown burlap
- 1 yd natural color burlap
- 1 yd light natural burlap
- 1 yd burnt sienna or white burlap
Make your own burlap flower wreath with our high quality burlap fabric!